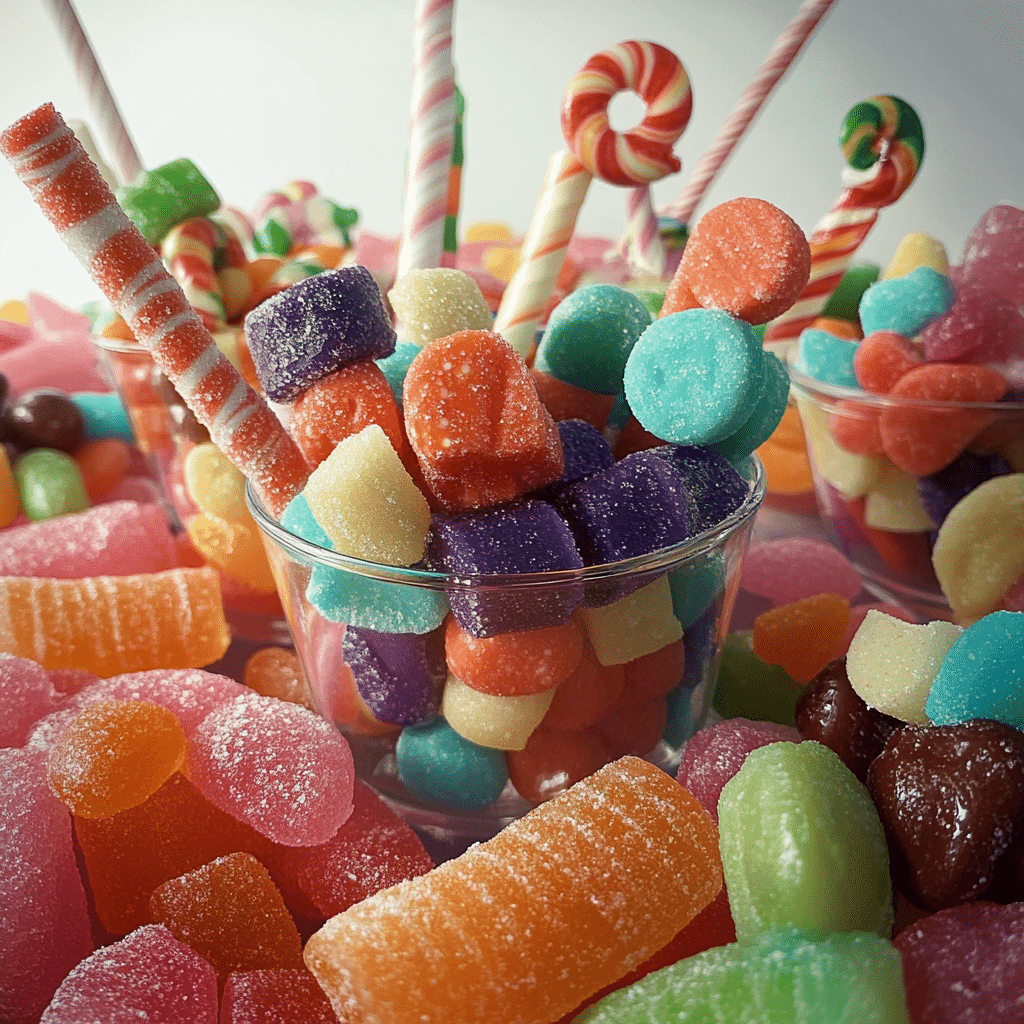
There’s something undeniably magical about a beautifully arranged charcuterie board, but what if we take that concept and sprinkle it with sugar and whimsy? Enter the Candy Land Jarcuterie—a fun, colorful twist on the classic charcuterie that brings out the kid in all of us! Imagine digging into a jar filled with vibrant candies, savory snacks, and delightful surprises that make your taste buds dance. This is not just a dessert; it’s an experience that’s perfect for parties, movie nights, or even just a cozy evening at home.
I first stumbled upon the idea of a jarcuterie while prepping for my niece’s birthday party. As I was scouring Pinterest for inspiration, I thought, why not create a treat that’s as much about the visual feast as it is about the flavor? The idea blossomed into something that everyone—kids and adults alike—could enjoy, and it quickly became a hit at every gathering. My family can’t get enough of it, and neither will yours!
Whether you’re a seasoned chef or a kitchen newbie, I promise you’ll find this recipe easy and incredibly fun to assemble. So gather your favorite sweets, and let’s dive into this colorful world of Candy Land Jarcuterie!
Why You’ll Love This Recipe
- Easy to Assemble: With no cooking required, this recipe is perfect for anyone, no matter your culinary skills. Just layer and enjoy!
- Customizable: Use your favorite candies and snacks. The options are endless, allowing you to tailor it to your taste or dietary needs.
- Visually Stunning: The vibrant colors and fun textures make for an eye-catching display. Perfect for parties or gatherings where you want to impress!
- Family-Friendly Fun: Kids will love picking out their favorite candies, making it an interactive experience. It’s a great way to get everyone involved!
Imagine biting into a layer of crunchy pretzels that give way to a soft marshmallow, all while rich chocolate candies melt in your mouth. This jarcuterie is not just a treat; it’s a delightful exploration of flavors and textures that you won’t want to miss!
Preparation Time and Servings
- Total Time: 15-20 minutes
- Servings: This recipe makes about 4-6 jars, depending on the size.
- Nutrition Facts: Approximately 300 calories per serving (1 jar), with variations based on ingredient choices.
Ingredients
Here’s what you’ll need to create your very own Candy Land Jarcuterie:
- 1 cup of gummy candies (like gummy bears or worms): These add a chewy texture and a burst of fruity flavor.
- 1 cup of chocolate candies (M&M’s, chocolate-covered almonds): Rich and sweet, they provide a lovely contrast to the chewy candies.
- 1 cup of pretzel sticks: For a salty crunch that balances out the sweetness.
- 1 cup of popcorn (caramel or cheese-flavored): Adds a delightful crunch and a bit of surprise.
- 1 cup of marshmallows: Soft and fluffy, they’re a sweet treat that kids adore.
- 1 cup of assorted nuts (optional): Almonds or cashews add a nutty flavor and healthy fats.
- Decorative jars: Small mason jars or clear cups work great for showcasing your colorful creations.
Feel free to mix and match according to your personal preferences or what you have on hand. The beauty of jarcuterie is in its versatility!
Step-by-Step Instructions
Creating your Candy Land Jarcuterie is as easy as 1-2-3! Here’s a step-by-step guide to assembling your jars:
- Gather Your Ingredients: Before you start, gather all your candies, snacks, and jars. This makes the assembly process a breeze!
- Start Layering:
- Begin with a layer of pretzel sticks at the bottom of each jar. This will provide a sturdy base and a lovely crunch.
- Next, add a layer of chocolate candies. This can be M&M’s, chocolate-covered nuts, or any of your favorites.
- Follow that with a layer of gummy candies. The colors will start to pop, making your jars look inviting.
- Add Popcorn: Sprinkle in a layer of popcorn. If you’re using caramel popcorn, it’ll add a sweet surprise with each bite!
- Layer in Marshmallows: Toss in a handful of marshmallows for that fluffy sweetness. They also add a soft texture that complements the crunch of the pretzels.
- Finish with Nuts: If you’re including nuts, now’s the time to add them. They offer a great flavor contrast and make the jar look even more interesting.
- Repeat Layers: Depending on the size of your jar, feel free to repeat the layers until you reach the top. You can mix and match as you go to create a beautiful visual display.
- Seal and Enjoy: Once your jars are filled, seal them up with a lid or some decorative wrap. You can keep them in the fridge for a few days, or serve them right away!
Cooking Tips:
- Don’t stress about making it perfect; the charm of jarcuterie lies in its whimsical, layered look.
- Encourage kids to get creative! Let them choose their favorite snacks and design their own jars.
How to Serve
Your Candy Land Jarcuterie is not just a treat; it’s a fantastic centerpiece for any occasion. Here are a few ideas on how to serve them:
- Party Favors: Use small jars as party favors for kids’ birthday parties. They can take home their own creation!
- Dessert Table: Place the jars on a dessert table alongside other treats for a colorful display.
- Movie Night: Set up a jarcuterie bar where everyone can fill their own jars while enjoying a movie.
- Themed Gatherings: Match your candy choices to the theme of your party—think Halloween colors or pastel shades for spring celebrations.
Additional Tips
Here are five tips to ensure your Candy Land Jarcuterie turns out amazing:
- Balance Sweet and Savory: Aim for a mix of sweet and salty snacks to keep everyone’s taste buds happy.
- Use Clear Jars: This way, the vibrant layers are on display, making it more enticing!
- Don’t Overfill: Leave a little space at the top of the jars for easy snacking.
- Keep it Fresh: If making ahead of time, store the jars in a cool place to keep the ingredients fresh.
- Personalize: Add tags with fun messages or each person’s name to make them feel special.
Recipe Variations
Feeling adventurous? Here are some fun ways to customize your Candy Land Jarcuterie:
- Themed Candy Choices: Create a holiday-themed jarcuterie by using seasonal candies, like red and green for Christmas or pastel colors for Easter.
- Healthy Twist: Swap out sugary candies for dried fruits and nuts for a healthier version while still keeping it colorful and fun.
- Savory Options: Mix in cheese cubes or beef jerky for a savory twist. It’s a fun way to combine different flavors!
- Chocolate Lovers: Make an all-chocolate jar with chocolate-covered pretzels, M&M’s, and chocolate bars. A chocoholic’s dream come true!
Serving Suggestions
To complement your Candy Land Jarcuterie, consider these side dish and beverage ideas:
- Side Dishes: Serve with fresh fruit platters or a simple veggie tray for a balanced snack.
- Beverages: Pair with fruit-infused water, sparkling lemonade, or even fun mocktails for a festive touch.
- For Kids: Offer colorful fruit skewers or juice boxes to keep the theme lively and fun.
Freezing and Storage
Wondering how to keep your jarcuterie fresh? Here’s what you need to know:
- Storage: Store any leftover jars in an airtight container at room temperature for up to 5 days. If you’ve used fresh ingredients, it’s best to enjoy them within a few days.
- Freezing: While this jarcuterie is best enjoyed fresh, if you have extra ingredients, you can freeze some candies in a freezer-safe bag. Just remember that gummies may change texture when thawed.
Special Equipment
You don’t need much to create your Candy Land Jarcuterie, but here are a few tools that can help:
- Mason Jars: Perfect for layering your snacks and displaying them beautifully.
- Scoop or Tongs: Helpful for filling your jars without spilling.
- Labels or Tags: Great for personalizing each jar if you’re making them for a group.
FAQ Section
Can I use different types of candies?
Absolutely! Feel free to mix and match your favorite candies, nuts, and snacks.
How can I make this ahead of time?
You can prep the jars a day in advance and store them in a cool, dry place until you’re ready to serve.
What if I don’t have mason jars?
Any clear container or cup will work! Just make sure it’s see-through so everyone can admire the layers.
Can I make this healthier?
Yes! Substitute candies with dried fruits and add more nuts for a nutritious twist.
How do I keep my ingredients fresh?
Store your jars in a cool, dry place, and if you’re using fresh ingredients, enjoy them within a few days.
Conclusion
I can’t wait for you to dive into this delightful world of Candy Land Jarcuterie! It’s not just a treat; it’s a fun, interactive way to bring everyone together. So grab your favorite candies, layer them up, and enjoy this colorful adventure. This sweet creation is perfect for sparking joy and conversation, making it a fantastic addition to any gathering. Don’t forget to snap a photo of your masterpiece and tag me on Instagram—I love seeing all your sweet masterpieces! Your Candy Land Jarcuterie is sure to be a hit, so get ready for smiles all around!
Print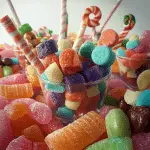
Candy Land Jarcuterie: A Sweet Adventure in Every Bite
- Total Time: 15-20 minutes
Ingredients
- 1 cup of gummy candies (like gummy bears or worms): These add a chewy texture and a burst of fruity flavor.
- 1 cup of chocolate candies (M&M’s, chocolate-covered almonds): Rich and sweet, they provide a lovely contrast to the chewy candies.
- 1 cup of pretzel sticks: For a salty crunch that balances out the sweetness.
- 1 cup of popcorn (caramel or cheese-flavored): Adds a delightful crunch and a bit of surprise.
- 1 cup of marshmallows: Soft and fluffy, they’re a sweet treat that kids adore.
- 1 cup of assorted nuts (optional): Almonds or cashews add a nutty flavor and healthy fats.
- Decorative jars: Small mason jars or clear cups work great for showcasing your colorful creations.
Instructions
- Gather Your Ingredients: Before you start, gather all your candies, snacks, and jars. This makes the assembly process a breeze!
- Start Layering:
- Begin with a layer of pretzel sticks at the bottom of each jar. This will provide a sturdy base and a lovely crunch.
- Next, add a layer of chocolate candies. This can be M&M’s, chocolate-covered nuts, or any of your favorites.
- Follow that with a layer of gummy candies. The colors will start to pop, making your jars look inviting.
- Add Popcorn: Sprinkle in a layer of popcorn. If you’re using caramel popcorn, it’ll add a sweet surprise with each bite!
- Layer in Marshmallows: Toss in a handful of marshmallows for that fluffy sweetness. They also add a soft texture that complements the crunch of the pretzels.
- Finish with Nuts: If you’re including nuts, now’s the time to add them. They offer a great flavor contrast and make the jar look even more interesting.
- Repeat Layers: Depending on the size of your jar, feel free to repeat the layers until you reach the top. You can mix and match as you go to create a beautiful visual display.
- Seal and Enjoy: Once your jars are filled, seal them up with a lid or some decorative wrap. You can keep them in the fridge for a few days, or serve them right away!
- Prep Time: 10 minutes
- Cook Time: 10 minutes
Nutrition
- Calories: 300 kcal
- Fat: 10g
- Carbohydrates: 45g
- Protein: 2g

