Introduction
Christmas is a time for festive cheer, twinkling lights, and, of course, delicious holiday treats. Among the most beloved of these treats are cookies. There’s something magical about the aroma of freshly baked cookies wafting through the house, filling the air with warmth and anticipation. And when it comes to holiday baking, few cookies are as universally adored as chocolate Christmas cookies.
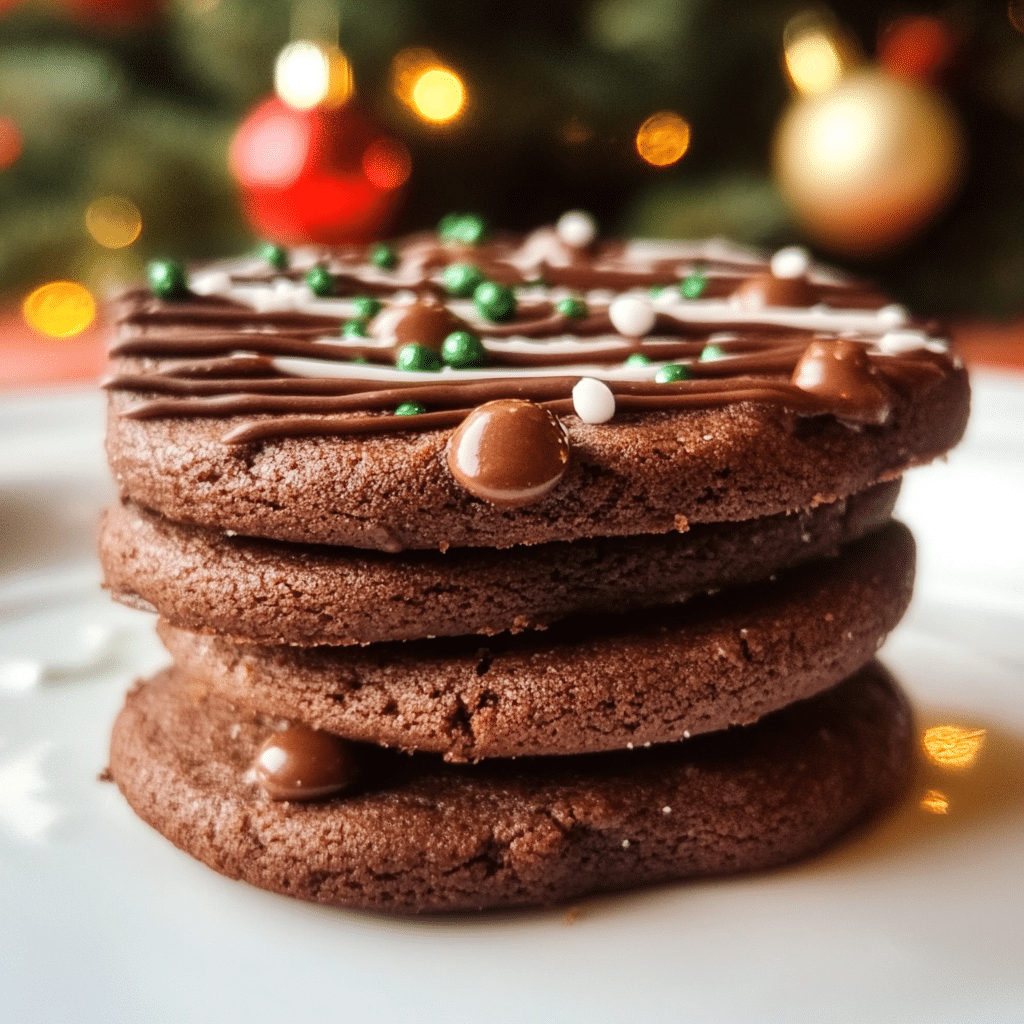
These cookies are rich, fudgy, and full of decadent chocolate flavor. Whether you’re baking for family, friends, or neighbors, these Chocolate Christmas Cookies are sure to become a holiday favorite. With their soft, chewy texture and melt-in-your-mouth goodness, they make the perfect gift or festive treat for any celebration.
In this recipe, we’ll explore how to make these cookies from scratch, along with tips and tricks to ensure perfect results every time. Plus, we’ll talk about fun variations and ways to customize them to suit your taste, making this recipe a go-to in your holiday baking repertoire.
Why You’ll Love This Recipe
Decadent and Rich: These chocolate cookies are loaded with chocolate flavor in every bite, thanks to a combination of cocoa powder and chocolate chips. The result is a deliciously indulgent cookie that everyone will love.
Perfectly Soft and Chewy: The secret to these cookies’ irresistible texture is a careful balance of ingredients that creates a soft, chewy interior with slightly crisp edges.
Easy to Make: This recipe is straightforward and requires no complicated techniques. With simple ingredients and clear instructions, even novice bakers can create these cookies with ease.
Customizable: While the base of these cookies is delicious on its own, you can easily make them your own by adding mix-ins like white chocolate chips, crushed peppermint, or festive sprinkles.
Perfect for Gifting: Chocolate Christmas cookies make the perfect holiday gift. Packaged in a cute tin or cellophane bag with a ribbon, they’re a thoughtful and delicious present for loved ones.
Preparation Time and Servings
- Total Time: 1 hour 15 minutes (15 minutes prep, 10 minutes per batch baking, plus cooling time)
- Servings: This recipe makes about 24 cookies, depending on the size of your dough balls.
- Nutrition Facts (per serving):
- Calories: 180
- Protein: 2g
- Carbs: 24g
- Fat: 9g
- Fiber: 2g
Ingredients
For the Cookies:
- 1 1/2 cups all-purpose flour: The base of the dough. Be sure to measure the flour correctly to avoid overly dense cookies.
- 1/2 cup unsweetened cocoa powder: For a rich chocolate flavor. You can use Dutch-processed cocoa for a smoother taste or regular cocoa for a more intense chocolate experience.
- 1 teaspoon baking soda: Helps the cookies rise and gives them their chewy texture.
- 1/4 teaspoon salt: Balances the sweetness and enhances the chocolate flavor.
- 1/2 cup unsalted butter, softened: Adds richness and helps create a soft, chewy texture.
- 1 cup brown sugar: Adds moisture and depth of flavor.
- 1/2 cup granulated sugar: Sweetens the cookies and helps them spread.
- 2 large eggs: Bind the ingredients together and give the cookies structure.
- 2 teaspoons vanilla extract: Enhances the chocolate flavor and adds a warm, aromatic note.
- 1 1/2 cups semi-sweet chocolate chips: For melty pockets of chocolate in every bite. You can use milk chocolate, dark chocolate, or a combination.
- 1/2 cup white chocolate chips (optional): For extra sweetness and a festive touch.
- Crushed candy canes (optional): For a peppermint twist and a touch of holiday cheer.
Step-by-Step Instructions
STEP 1: PREHEAT THE OVEN AND PREPARE BAKING SHEETS
Start by preheating your oven to 350°F (175°C). This ensures that your cookies will bake evenly and develop a beautiful golden-brown color. Line two baking sheets with parchment paper or silicone baking mats to prevent the cookies from sticking.
STEP 2: MIX DRY INGREDIENTS
In a medium-sized bowl, whisk together the all-purpose flour, cocoa powder, baking soda, and salt. These dry ingredients will give the cookies their structure and help them rise evenly. Set the bowl aside.
STEP 3: CREAM BUTTER AND SUGARS
In a large mixing bowl, beat together the softened unsalted butter, brown sugar, and granulated sugar using an electric mixer or stand mixer. Start on low speed and gradually increase to medium-high. Cream the mixture for about 2-3 minutes until it becomes light and fluffy. This step is important because it incorporates air into the dough, helping the cookies to be soft and chewy.
STEP 4: ADD EGGS AND VANILLA
Once the butter and sugars are creamed, add the eggs one at a time, mixing well after each addition. Then, add the vanilla extract and mix until combined. The mixture should be smooth and light.
STEP 5: COMBINE DRY AND WET INGREDIENTS
Gradually add the dry ingredients to the wet ingredients, mixing on low speed until everything is just combined. Be careful not to overmix, as this can lead to tough cookies. The dough will be thick and slightly sticky.
STEP 6: FOLD IN CHOCOLATE CHIPS AND OPTIONAL MIX-INS
Using a spatula, fold in the semi-sweet chocolate chips, white chocolate chips (if using), and any optional mix-ins like crushed candy canes or festive sprinkles. These additions will not only enhance the flavor of the cookies but also make them extra festive for the holiday season.
STEP 7: SCOOP AND FORM DOUGH BALLS
Using a cookie scoop or tablespoon, scoop out dough and roll it into balls about 1 to 1 1/2 inches in diameter. Place the dough balls on the prepared baking sheets, spacing them about 2 inches apart. This gives the cookies room to spread while baking.
STEP 8: BAKE THE COOKIES
Bake the cookies in the preheated oven for 9-11 minutes, or until the edges are set but the centers are still soft. The cookies will continue to firm up as they cool. Keep an eye on them during the last couple of minutes to ensure they don’t overbake.
STEP 9: COOL AND ENJOY
Once baked, remove the cookies from the oven and let them cool on the baking sheets for 5 minutes. Then, transfer them to a wire rack to cool completely. This helps prevent them from becoming too soft or breaking apart while still warm.
How to Serve
As a Festive Dessert: Chocolate Christmas cookies are perfect for serving at holiday parties, family gatherings, or as an after-dinner treat. They pair wonderfully with a hot cup of cocoa, coffee, or even a glass of milk.
Gifting: These cookies make a delightful holiday gift. Arrange them in a cute holiday tin or package them in clear bags tied with festive ribbons for a personalized touch. They’re perfect for sharing with friends, family, and neighbors.
With Ice Cream: For a fun twist, serve the cookies with a scoop of vanilla or peppermint ice cream. Sandwich two cookies with ice cream in the middle for an extra-special holiday dessert.
Additional Tips
- Don’t Overmix the Dough: When combining the dry and wet ingredients, be careful not to overmix the dough, as this can lead to tough cookies. Mix until just combined for the best texture.
- Use Room Temperature Ingredients: Make sure the butter and eggs are at room temperature before starting. This helps them mix more easily and creates a smoother dough.
- Chill the Dough: If you have the time, you can chill the dough in the refrigerator for 30 minutes before baking. This helps prevent the cookies from spreading too much and results in thicker, chewier cookies.
- Customize the Flavor: Feel free to experiment with different chocolate types, such as dark chocolate or milk chocolate chips. You can also add festive spices like cinnamon, nutmeg, or ginger for a warm holiday flavor.
Recipe Variations
- Mint Chocolate: Add a teaspoon of peppermint extract to the dough and sprinkle crushed candy canes on top for a minty twist.
- Double Chocolate: For even more chocolatey goodness, swap half of the all-purpose flour for more cocoa powder.
- Nutty Delight: Add chopped nuts like walnuts, pecans, or hazelnuts to the dough for added texture and flavor.
- White Chocolate Raspberry: Use white chocolate chips and freeze-dried raspberries for a fruity, creamy alternative to the classic chocolate chip cookie.
Freezing and Storage
- Storage: Store the cookies in an airtight container at room temperature for up to 1 week. To keep them fresh, place a piece of parchment paper between layers of cookies.
- Freezing: These cookies freeze beautifully. To freeze, place the baked cookies in a single layer on a baking sheet and freeze for 1-2 hours. Then, transfer the cookies to a freezer bag or airtight container for up to 3 months. You can also freeze unbaked cookie dough balls and bake them directly from the freezer, adding a couple of minutes to the baking time.
FAQ Section
Can I use milk chocolate chips instead of semi-sweet?
Yes, milk chocolate chips can be used in place of semi-sweet chocolate chips if you prefer a sweeter flavor. Keep in mind that this will result in
a less intense chocolate taste.
What can I do if I don’t have cocoa powder?
If you don’t have cocoa powder, you can use a chocolate cake mix or chocolate pudding mix as a substitute, although the flavor and texture may vary slightly.
Can I use margarine instead of butter?
While margarine can be used in place of butter, it may affect the texture and flavor of the cookies. For best results, use unsalted butter.
Can I make the dough in advance?
Absolutely! You can make the dough up to 2 days in advance and store it in the refrigerator. Chilling the dough can actually improve the flavor and texture of the cookies.
Conclusion
Chocolate Christmas cookies are a festive and indulgent treat that bring warmth and joy to any holiday gathering. Whether you’re baking for family, friends, or just to enjoy yourself, these cookies are sure to become a tradition in your kitchen. With their rich, chocolatey flavor and customizable options, they’ll quickly become a favorite for everyone who takes a bite.
So, gather your ingredients, preheat your oven, and get ready to bake these delicious cookies. And don’t forget to share the love by gifting them to someone special. Happy baking, and may your holiday season be filled with sweetness and cheer!
Print
Chocolate Christmas Cookies: A Sweet Holiday Tradition
- Total Time: 1 hour and 15 minutes
Description
Chocolate Christmas Cookies are a festive, rich treat that brings together the deep, indulgent flavor of chocolate with a holiday spirit. These cookies are made with a soft, fudgy chocolate dough, often studded with chocolate chips or chunks for an extra chocolatey bite. Their deep brown color is perfect for the season, and they can be decorated with colorful sprinkles, drizzled with white chocolate, or topped with festive candies like M&Ms or candy canes. These cookies are both delicious and fun, making them a perfect choice for holiday cookie exchanges or family gatherings. They offer the warmth and joy of Christmas in every bite.
Ingredients
For the Cookies:
- 1 1/2 cups all-purpose flour: The base of the dough. Be sure to measure the flour correctly to avoid overly dense cookies.
- 1/2 cup unsweetened cocoa powder: For a rich chocolate flavor. You can use Dutch-processed cocoa for a smoother taste or regular cocoa for a more intense chocolate experience.
- 1 teaspoon baking soda: Helps the cookies rise and gives them their chewy texture.
- 1/4 teaspoon salt: Balances the sweetness and enhances the chocolate flavor.
- 1/2 cup unsalted butter, softened: Adds richness and helps create a soft, chewy texture.
- 1 cup brown sugar: Adds moisture and depth of flavor.
- 1/2 cup granulated sugar: Sweetens the cookies and helps them spread.
- 2 large eggs: Bind the ingredients together and give the cookies structure.
- 2 teaspoons vanilla extract: Enhances the chocolate flavor and adds a warm, aromatic note.
- 1 1/2 cups semi-sweet chocolate chips: For melty pockets of chocolate in every bite. You can use milk chocolate, dark chocolate, or a combination.
- 1/2 cup white chocolate chips (optional): For extra sweetness and a festive touch.
- Crushed candy canes (optional): For a peppermint twist and a touch of holiday cheer.
Instructions
STEP 1: PREHEAT THE OVEN AND PREPARE BAKING SHEETS
Start by preheating your oven to 350°F (175°C). This ensures that your cookies will bake evenly and develop a beautiful golden-brown color. Line two baking sheets with parchment paper or silicone baking mats to prevent the cookies from sticking.
STEP 2: MIX DRY INGREDIENTS
In a medium-sized bowl, whisk together the all-purpose flour, cocoa powder, baking soda, and salt. These dry ingredients will give the cookies their structure and help them rise evenly. Set the bowl aside.
STEP 3: CREAM BUTTER AND SUGARS
In a large mixing bowl, beat together the softened unsalted butter, brown sugar, and granulated sugar using an electric mixer or stand mixer. Start on low speed and gradually increase to medium-high. Cream the mixture for about 2-3 minutes until it becomes light and fluffy. This step is important because it incorporates air into the dough, helping the cookies to be soft and chewy.
STEP 4: ADD EGGS AND VANILLA
Once the butter and sugars are creamed, add the eggs one at a time, mixing well after each addition. Then, add the vanilla extract and mix until combined. The mixture should be smooth and light.
STEP 5: COMBINE DRY AND WET INGREDIENTS
Gradually add the dry ingredients to the wet ingredients, mixing on low speed until everything is just combined. Be careful not to overmix, as this can lead to tough cookies. The dough will be thick and slightly sticky.
STEP 6: FOLD IN CHOCOLATE CHIPS AND OPTIONAL MIX-INS
Using a spatula, fold in the semi-sweet chocolate chips, white chocolate chips (if using), and any optional mix-ins like crushed candy canes or festive sprinkles. These additions will not only enhance the flavor of the cookies but also make them extra festive for the holiday season.
STEP 7: SCOOP AND FORM DOUGH BALLS
Using a cookie scoop or tablespoon, scoop out dough and roll it into balls about 1 to 1 1/2 inches in diameter. Place the dough balls on the prepared baking sheets, spacing them about 2 inches apart. This gives the cookies room to spread while baking.
STEP 8: BAKE THE COOKIES
Bake the cookies in the preheated oven for 9-11 minutes, or until the edges are set but the centers are still soft. The cookies will continue to firm up as they cool. Keep an eye on them during the last couple of minutes to ensure they don’t overbake.
STEP 9: COOL AND ENJOY
Once baked, remove the cookies from the oven and let them cool on the baking sheets for 5 minutes. Then, transfer them to a wire rack to cool completely. This helps prevent them from becoming too soft or breaking apart while still warm.
- Prep Time: 15 minutes
- Baking Time: 10 minutes per batch
Nutrition
- Calories: 180 kcal
- Fat: 9g
- Carbohydrates: 24g
- Protein: 2g

