Introduction
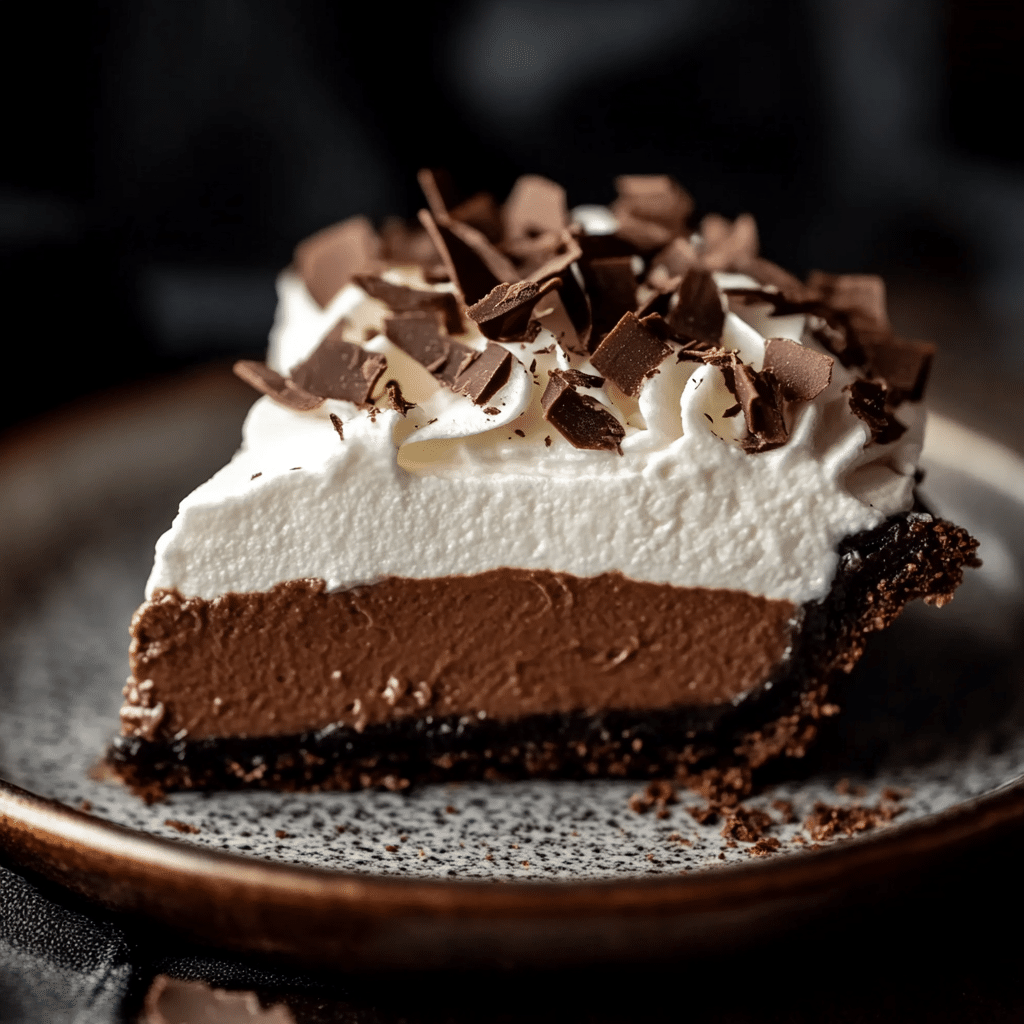
When it comes to desserts that truly impress, few can rival the rich, velvety indulgence of a Chocolate Cream Pie. This classic dessert is a favorite for its luscious chocolate filling, smooth whipped cream topping, and buttery crust that come together to create a blissful experience in every bite. Whether it’s a holiday gathering, a special celebration, or simply a craving for something sweet, this Chocolate Cream Pie is sure to be a showstopper.
I first fell in love with Chocolate Cream Pie during a family gathering, where my grandmother’s recipe stole the show. The combination of deep chocolate flavor and creamy texture left an unforgettable impression on me. Now, I want to share this delectable dessert with you, complete with tips and tricks to make it perfectly every time. Let’s dive into the reasons why you’ll adore this recipe and how to create this chocolate masterpiece.
Why You’ll Love This Recipe
- Decadent Chocolate Flavor: The rich chocolate filling is made with high-quality cocoa powder and chocolate, delivering an intense flavor that chocolate lovers will crave.
- Creamy Texture: The smooth, velvety filling paired with light, fluffy whipped cream creates a delightful contrast in textures that enhances the overall experience.
- Easy to Make: With a straightforward recipe and common ingredients, this pie is accessible for bakers of all skill levels.
- Customizable: You can easily tweak the flavors by adding different extracts, toppings, or even a dash of coffee to enhance the chocolate.
- Beautiful Presentation: The layers of chocolate filling and whipped cream make for an elegant dessert that’s perfect for impressing guests.
Preparation Time and Servings
- Total Time: 4 hours (30 minutes prep, 30 minutes cooking, 3 hours chilling)
- Servings: This recipe serves about 8 people.
- Nutrition Facts: Calories per serving: 400, Protein: 5g, Carbs: 40g, Fat: 25g.
Ingredients
For the Pie Crust:
- 1 ½ cups graham cracker crumbs: The base for a classic, buttery crust.
- ⅓ cup granulated sugar: Adds sweetness to the crust.
- ½ cup unsalted butter, melted: Binds the crumbs and adds richness.
For the Chocolate Filling:
- 1 cup granulated sugar: Sweetens the filling.
- ⅓ cup unsweetened cocoa powder: Provides deep chocolate flavor.
- ¼ cup cornstarch: Thickens the filling for a creamy texture.
- ½ teaspoon salt: Balances the sweetness.
- 2 ¾ cups whole milk: The base for a rich, creamy filling.
- 4 large egg yolks: Adds richness and depth of flavor.
- 2 tablespoons unsalted butter: Enhances creaminess.
- 2 teaspoons vanilla extract: Adds warmth and flavor.
- 4 ounces bittersweet or semi-sweet chocolate, chopped: Intensifies the chocolate flavor.
For the Whipped Cream Topping:
- 1 cup heavy whipping cream: Forms the base for the fluffy topping.
- 2 tablespoons powdered sugar: Sweetens the cream.
- 1 teaspoon vanilla extract: Enhances flavor.
Step-by-Step Instructions
STEP 1: PREHEAT THE OVEN
Start by preheating your oven to 350°F (175°C). This ensures that the pie crust bakes evenly and achieves a lovely golden color.
STEP 2: MAKE THE PIE CRUST
In a medium bowl, combine the graham cracker crumbs, granulated sugar, and melted butter. Mix until the crumbs are well-coated and resemble wet sand.
STEP 3: PRESS THE CRUST INTO THE PAN
Transfer the crumb mixture into a 9-inch pie pan. Using the back of a measuring cup or your fingers, firmly press the mixture into the bottom and up the sides of the pan to form a compact crust.
STEP 4: BAKE THE CRUST
Bake the crust in the preheated oven for about 10 minutes, or until it’s set and lightly golden. Remove from the oven and let it cool completely while you prepare the filling.
STEP 5: MAKE THE CHOCOLATE FILLING
In a medium saucepan, whisk together the granulated sugar, cocoa powder, cornstarch, and salt. Gradually add the milk while whisking to prevent lumps from forming.
STEP 6: COOK THE FILLING
Place the saucepan over medium heat and continue to whisk constantly until the mixture begins to thicken and bubble. This usually takes about 5-7 minutes.
STEP 7: TEMPER THE EGGS
In a separate bowl, lightly beat the egg yolks. Once the chocolate mixture has thickened, gradually add a small amount of the hot mixture to the egg yolks while whisking continuously. This step is crucial to prevent the eggs from scrambling.
STEP 8: COMBINE AND COOK
Once the egg yolks are tempered, pour them back into the saucepan with the remaining chocolate mixture. Continue cooking while whisking for another 2-3 minutes, or until the mixture is thick and coats the back of a spoon.
STEP 9: ADD CHOCOLATE AND BUTTER
Remove the saucepan from the heat and stir in the chopped chocolate, butter, and vanilla extract. Mix until the chocolate and butter are completely melted and the filling is smooth and glossy.
STEP 10: FILL THE CRUST
Pour the chocolate filling into the cooled graham cracker crust, smoothing the top with a spatula. Let it cool at room temperature for about 30 minutes before refrigerating.
STEP 11: CHILL THE PIE
Cover the pie with plastic wrap and chill in the refrigerator for at least 3 hours, or until fully set. This chilling step is crucial for achieving the perfect texture.
STEP 12: MAKE THE WHIPPED CREAM TOPPING
Just before serving, whip the heavy cream in a large bowl until soft peaks form. Gradually add the powdered sugar and vanilla extract, continuing to whip until stiff peaks form.
STEP 13: TOP THE PIE
Once the pie is set, remove it from the refrigerator. Spread the whipped cream evenly over the chocolate filling, using a spatula to create peaks if desired.
STEP 14: GARNISH AND SERVE
For an elegant touch, consider garnishing the whipped cream with chocolate shavings or cocoa powder. Slice the pie into wedges and serve chilled.
How to Serve
- Garnish Options: Sprinkle chocolate shavings or a dusting of cocoa powder over the whipped cream for a beautiful presentation.
- Pairing Suggestions: This pie pairs wonderfully with a scoop of vanilla ice cream or a dollop of additional whipped cream on the side.
- Serving Style: For a more casual gathering, consider serving slices on colorful plates or in individual dessert bowls for easy serving.
Additional Tips
- Use Quality Chocolate: Opt for high-quality chocolate for the filling to enhance the flavor. The better the chocolate, the richer the pie will be.
- Chill Your Bowl: For perfectly whipped cream, chill your mixing bowl and beaters in the refrigerator for about 15 minutes before whipping the cream.
- Don’t Rush the Chilling: Allowing the pie to chill thoroughly is essential for achieving the right texture. Don’t skip this step!
- Add a Touch of Coffee: For an extra layer of flavor, add a teaspoon of instant coffee granules to the chocolate filling for a mocha twist.
- Store Properly: Leftover pie can be stored in the refrigerator for up to 3 days. Cover it well to maintain freshness.
Recipe Variations
- Nutty Crust: Substitute some of the graham cracker crumbs with crushed nuts for added texture and flavor.
- Flavored Whipped Cream: Infuse the whipped cream with flavors like peppermint extract or almond extract for a unique twist.
- Chocolate Variations: Experiment with different types of chocolate, such as dark chocolate or white chocolate, to create a customized filling.
- Layered Version: Make individual servings in jars by layering chocolate filling and whipped cream for a fun presentation.
- Fruit Topping: Add fresh berries or sliced bananas on top of the whipped cream for a fruity contrast.
Serving Suggestions
- Side Dishes: Pair this rich dessert with a light salad or fresh fruit to balance the sweetness.
- Beverage Pairing: Serve with a cup of coffee, hot chocolate, or dessert wine to complement the flavors.
- Kid-Friendly Option: For a fun twist, let kids decorate their slices with sprinkles or chocolate chips.
Freezing and Storage
Storage
- Leftover Chocolate Cream Pie can be stored in an airtight container in the refrigerator for up to 3 days. Make sure to cover the pie well to prevent it from absorbing odors.
Freezing
- If you want to prepare the pie in advance, you can freeze it before adding the whipped cream topping. Wrap the pie tightly in plastic wrap and aluminum foil to prevent freezer burn. It can be frozen for up to 1 month.
Thawing
- To thaw, simply move the frozen pie to the refrigerator for several hours or overnight. Once thawed, add the whipped cream topping before serving.
Special Equipment
- 9-Inch Pie Pan: Essential for baking and presenting your pie.
- Mixing Bowls: Use multiple sizes for mixing the filling and whipping cream.
- Electric Mixer: A hand or stand mixer will make whipping the cream a breeze.
- Saucepan :A medium-sized saucepan is needed for cooking the filling.
FAQ Section
Can I use a store-bought pie crust?
Yes, a store-bought pie crust can save time. Just follow the package instructions for baking if required.
Can I make this pie gluten-free?
Absolutely! Substitute the graham cracker crust with a gluten-free cookie option or a gluten-free pie crust.
How can I tell when the filling is thick enough?
The filling should coat the back of a spoon and hold a ribbon when drizzled from the whisk.
What can I use instead of whole milk?
You can substitute with almond milk or other non-dairy milk, but this may slightly change the texture and richness.
Can I use egg substitutes?
Yes, you can use egg substitutes like flax eggs or silken tofu, but the filling may vary in texture.
Conclusion
I hope you’re excited to make this Chocolate Cream Pie! It’s a decadent dessert that adds a touch of elegance and indulgence to any occasion. Whether it’s a festive celebration or a cozy family dinner, this pie is sure to delight your guests and leave them wanting more.
Don’t forget to share your creations! I can’t wait to see how your Chocolate Cream Pie turns out—be sure to leave a comment or tag me on social media with your delicious desserts. Happy baking, and enjoy every chocolaty bite!
Print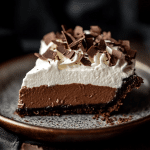
Chocolate Cream Pie: A Decadent Delight for Any Occasion
- Total Time: 4 hours
Description
Indulge in the rich and velvety goodness of Chocolate Cream Pie, a classic dessert that perfectly combines a silky chocolate filling with a flaky pie crust. This treat features a luscious layer of decadent chocolate custard, topped with fluffy whipped cream and sometimes garnished with chocolate shavings or a drizzle of chocolate sauce. Each bite offers a delightful balance of sweetness and richness, making it an irresistible choice for any chocolate lover. Perfect for celebrations or cozy family dinners, this pie is sure to satisfy your cravings and leave everyone wanting more.
Ingredients
For the Pie Crust:
- 1 ½ cups graham cracker crumbs: The base for a classic, buttery crust.
- ⅓ cup granulated sugar: Adds sweetness to the crust.
- ½ cup unsalted butter, melted: Binds the crumbs and adds richness.
For the Chocolate Filling:
- 1 cup granulated sugar: Sweetens the filling.
- ⅓ cup unsweetened cocoa powder: Provides deep chocolate flavor.
- ¼ cup cornstarch: Thickens the filling for a creamy texture.
- ½ teaspoon salt: Balances the sweetness.
- 2 ¾ cups whole milk: The base for a rich, creamy filling.
- 4 large egg yolks: Adds richness and depth of flavor.
- 2 tablespoons unsalted butter: Enhances creaminess.
- 2 teaspoons vanilla extract: Adds warmth and flavor.
- 4 ounces bittersweet or semi-sweet chocolate, chopped: Intensifies the chocolate flavor.
For the Whipped Cream Topping:
- 1 cup heavy whipping cream: Forms the base for the fluffy topping.
- 2 tablespoons powdered sugar: Sweetens the cream.
- 1 teaspoon vanilla extract: Enhances flavor.
Instructions
STEP 1: PREHEAT THE OVEN
Start by preheating your oven to 350°F (175°C). This ensures that the pie crust bakes evenly and achieves a lovely golden color.
STEP 2: MAKE THE PIE CRUST
In a medium bowl, combine the graham cracker crumbs, granulated sugar, and melted butter. Mix until the crumbs are well-coated and resemble wet sand.
STEP 3: PRESS THE CRUST INTO THE PAN
Transfer the crumb mixture into a 9-inch pie pan. Using the back of a measuring cup or your fingers, firmly press the mixture into the bottom and up the sides of the pan to form a compact crust.
STEP 4: BAKE THE CRUST
Bake the crust in the preheated oven for about 10 minutes, or until it’s set and lightly golden. Remove from the oven and let it cool completely while you prepare the filling.
STEP 5: MAKE THE CHOCOLATE FILLING
In a medium saucepan, whisk together the granulated sugar, cocoa powder, cornstarch, and salt. Gradually add the milk while whisking to prevent lumps from forming.
STEP 6: COOK THE FILLING
Place the saucepan over medium heat and continue to whisk constantly until the mixture begins to thicken and bubble. This usually takes about 5-7 minutes.
STEP 7: TEMPER THE EGGS
In a separate bowl, lightly beat the egg yolks. Once the chocolate mixture has thickened, gradually add a small amount of the hot mixture to the egg yolks while whisking continuously. This step is crucial to prevent the eggs from scrambling.
STEP 8: COMBINE AND COOK
Once the egg yolks are tempered, pour them back into the saucepan with the remaining chocolate mixture. Continue cooking while whisking for another 2-3 minutes, or until the mixture is thick and coats the back of a spoon.
STEP 9: ADD CHOCOLATE AND BUTTER
Remove the saucepan from the heat and stir in the chopped chocolate, butter, and vanilla extract. Mix until the chocolate and butter are completely melted and the filling is smooth and glossy.
STEP 10: FILL THE CRUST
Pour the chocolate filling into the cooled graham cracker crust, smoothing the top with a spatula. Let it cool at room temperature for about 30 minutes before refrigerating.
STEP 11: CHILL THE PIE
Cover the pie with plastic wrap and chill in the refrigerator for at least 3 hours, or until fully set. This chilling step is crucial for achieving the perfect texture.
STEP 12: MAKE THE WHIPPED CREAM TOPPING
Just before serving, whip the heavy cream in a large bowl until soft peaks form. Gradually add the powdered sugar and vanilla extract, continuing to whip until stiff peaks form.
STEP 13: TOP THE PIE
Once the pie is set, remove it from the refrigerator. Spread the whipped cream evenly over the chocolate filling, using a spatula to create peaks if desired.
STEP 14: GARNISH AND SERVE
For an elegant touch, consider garnishing the whipped cream with chocolate shavings or cocoa powder. Slice the pie into wedges and serve chilled.
- Prep Time: 30 minutes
- Chilling Time: 3 hours
- Cook Time: 30 minutes
Nutrition
- Calories: 400 kcal
- Fat: 25g
- Carbohydrates: 40g
- Protein: 5g

