Introduction
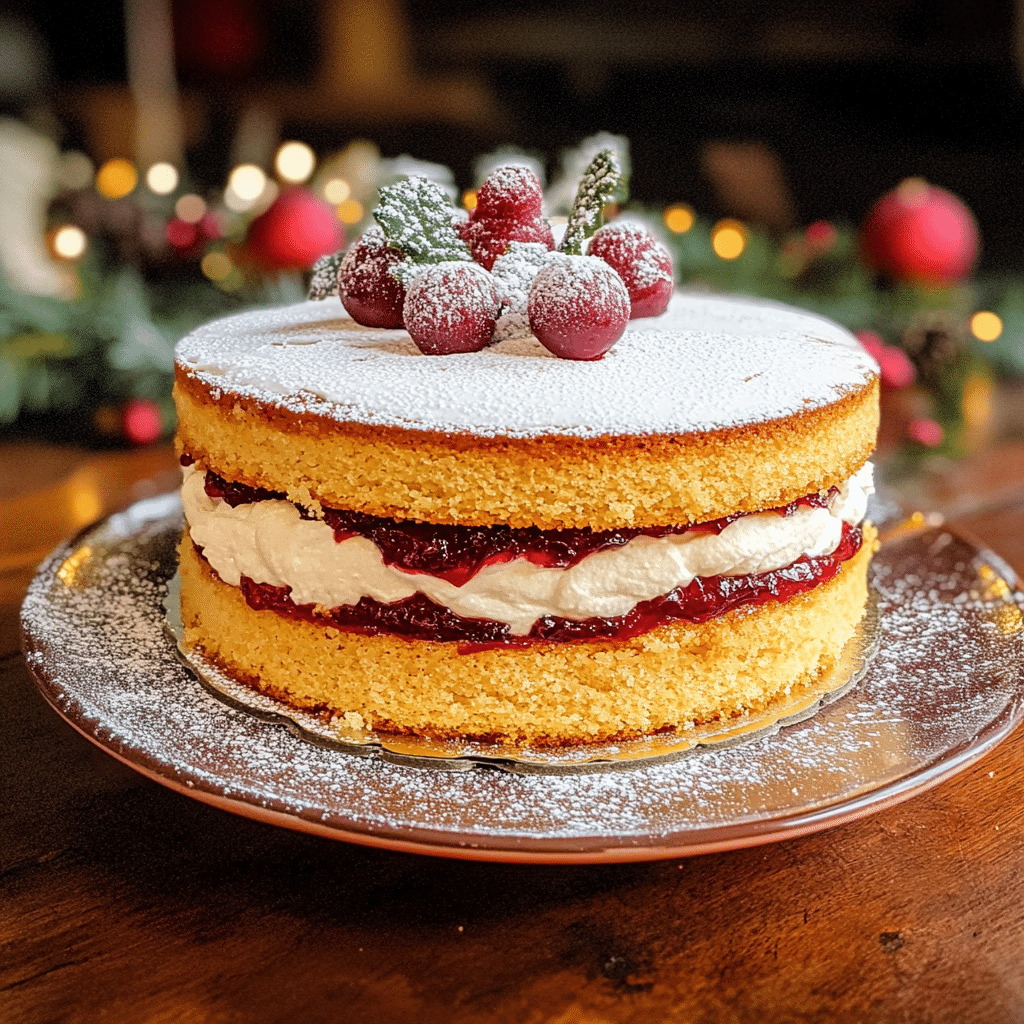
When it comes to holiday baking, there’s something magical about the perfect cake. The Christmas Spiced Victoria Sponge Cake combines the light, airy texture of the traditional Victoria sponge with the warm, comforting flavors of Christmas spices like cinnamon, nutmeg, and cloves. This cake is a delightful twist on the British classic, ideal for holiday gatherings, tea time, or as the showstopper for your Christmas dinner dessert.
The Victoria Sponge Cake has long been a favorite in British baking, known for its simplicity, elegance, and delicious flavors. What makes this version particularly special is the festive spices that bring a cozy, seasonal warmth to every bite. The cake is not overly rich but has just enough flavor and sweetness to feel indulgent. Pair it with a dusting of powdered sugar, a dollop of whipped cream, or a few fresh berries, and you have a dessert that will be a hit at any Christmas table.
I’ve always loved the classic Victoria Sponge for its tender crumb and versatility. This Christmas Spiced version has quickly become a favorite of mine during the holiday season. Not only does it look stunning with its soft golden layers, but it also delivers a perfect balance of flavors that bring a bit of spice and cheer to the season. Whether you are looking for a traditional yet festive cake for your family or a delicious treat for a holiday gathering, this cake is bound to impress.
Why You’ll Love This Recipe
- Festive Flavors: The combination of Christmas spices like cinnamon, nutmeg, and cloves adds a warm, aromatic twist to the classic sponge cake.
- Light and Fluffy: True to the Victoria sponge tradition, this cake is light, airy, and melt-in-your-mouth soft. It’s perfect for those who prefer a lighter dessert that’s not too heavy after a hearty holiday meal.
- Easy to Make: The recipe is simple to follow, and the cake itself comes together quickly. Despite its elegant appearance, there’s no complicated technique involved.
- Customizable: You can adjust the spices to suit your taste or add extra festive touches like dried fruit, glacé cherries, or even a layer of spiced rum-soaked raisins.
- Perfect for Sharing: This cake is made for celebration. With two fluffy layers of sponge cake, it’s ideal for sharing with family and friends over a cup of tea or a glass of mulled wine.
Preparation Time and Servings
- Total Time: 1 hour 30 minutes (including baking and cooling time)
- Servings: This recipe makes 8-10 generous slices.
- Nutrition Facts (per slice): Calories: 350, Protein: 4g, Carbs: 48g, Fat: 15g
Ingredients
Here’s what you’ll need to create this festive Christmas Spiced Victoria Sponge Cake:
For the Cake:
- 1 cup (225g) unsalted butter, softened (This is the base for the light, fluffy texture of the cake)
- 1 cup (225g) granulated sugar (Sweetness is key, but you can reduce it slightly if you prefer a less sweet cake)
- 4 large eggs, at room temperature (Ensure they’re at room temperature to help them incorporate better into the batter)
- 1 ½ cups (190g) all-purpose flour (The foundation of the cake, giving it structure and lightness)
- 1 teaspoon baking powder (To help the sponge rise beautifully)
- ½ teaspoon ground cinnamon (For that warm, aromatic spice)
- ½ teaspoon ground nutmeg (Another holiday spice that adds warmth and depth)
- ¼ teaspoon ground cloves (A little goes a long way in adding festive flavor)
- Pinch of salt (To balance the sweetness and enhance the overall flavor)
- 2 tablespoons milk (This helps adjust the consistency of the batter for a perfect sponge texture)
Filling:
- ¾ cup (200ml) heavy cream (For a rich, creamy filling that complements the spiced cake)
- 2 tablespoons powdered sugar (To sweeten the whipped cream slightly)
- 1 teaspoon vanilla extract (For a smooth and fragrant flavor)
- ½ cup (100g) raspberry jam (The classic filling for a Victoria Sponge; the tartness of the jam balances the sweetness of the cake)
Decorative Finish:
- Powdered sugar, for dusting (For a snowy, festive look)
- Fresh berries (Raspberries or strawberries, optional, for added color and flavor)
- Fresh mint leaves (Optional, for a pop of color and a hint of freshness)
Step-by-Step Instructions
Step 1: Preheat the Oven
Start by preheating your oven to 350°F (175°C). Grease and line two 8-inch round cake pans with parchment paper, ensuring that the pans are well-prepared so the cake comes out easily after baking.
Step 2: Cream the Butter and Sugar
In a large mixing bowl, cream together the softened butter and granulated sugar using an electric hand mixer or stand mixer on medium speed. Beat for about 5 minutes until the mixture is light, fluffy, and pale in color. This step is key to achieving the cake’s light and airy texture, so take your time to beat the mixture well.
Step 3: Add the Eggs
Add the eggs, one at a time, ensuring each is fully incorporated before adding the next. This helps prevent the batter from curdling and ensures a smooth texture. Scrape down the sides of the bowl as necessary.
Step 4: Sift the Dry Ingredients
In a separate bowl, sift together the flour, baking powder, cinnamon, nutmeg, cloves, and salt. Sifting the dry ingredients helps prevent lumps and ensures they’re evenly distributed throughout the batter. Once sifted, gradually add this dry mixture to the wet ingredients, folding it in with a spatula or mixing on low speed. Be careful not to overmix; just combine until the batter is smooth.
Step 5: Add Milk to Adjust Consistency
Add 2 tablespoons of milk to the batter and gently fold it in. This will help loosen the batter slightly and make it easier to spread in the pans.
Step 6: Divide and Bake
Divide the batter evenly between the prepared cake pans and smooth the tops with a spatula. Tap the pans lightly on the counter to remove any air bubbles.
Bake the cakes in the preheated oven for about 25-30 minutes, or until the cakes are golden brown on top and a toothpick inserted into the center comes out clean. Keep an eye on them after 20 minutes to prevent overbaking, as oven times can vary.
Once done, remove the cakes from the oven and allow them to cool in the pans for 10 minutes. Then, turn them out onto a wire rack to cool completely.
Step 7: Prepare the Whipped Cream
While the cakes are cooling, prepare the filling. In a chilled mixing bowl, whip the heavy cream and powdered sugar together until soft peaks form. Be careful not to overwhip, as you want the cream to be light and smooth, not too stiff. Add the vanilla extract and give it one final mix to incorporate.
Step 8: Assemble the Cake
Once the cakes have cooled, place one layer on a serving plate or cake stand. Spread a generous layer of raspberry jam on top of the cake, leaving a small border around the edges to prevent the jam from spilling over. Next, spread the whipped cream over the jam, creating a nice, even layer.
Top with the second cake layer and gently press down to help it adhere. You can also dust the top of the cake with a little powdered sugar for a snowy, festive effect.
Step 9: Decorate (Optional)
For an extra touch, decorate the cake with fresh berries (like raspberries or strawberries) and a few fresh mint leaves. This not only adds a pop of color but also complements the flavor of the cake.
Step 10: Serve and Enjoy!
Slice the cake into 8-10 pieces, serve with a cup of tea or coffee, and enjoy the warm, spiced flavors of Christmas.
How to Serve
- Pairing with Beverages: This cake pairs beautifully with hot drinks like mulled wine, spiced apple cider, or a classic cup of English breakfast tea. The warmth of the spices in both the drink and the cake makes for a perfect festive pairing.
- Side Dishes: While this cake can stand on its own, you can also serve it alongside other holiday treats like shortbread cookies, mince pies, or a bowl of fresh fruit.
- Breakfast Option: This cake is light enough to enjoy for breakfast on Christmas morning. Serve it with a dollop of cream or alongside a hot cup of coffee for a festive start to the day.
Additional Tips
- Room Temperature Ingredients: Ensure your butter and eggs are at room temperature to achieve the best texture in your cake. Cold ingredients can cause the batter to seize and prevent proper mixing.
- Make It Ahead: The cake layers can be baked a day or two in advance. Just wrap them tightly in plastic wrap and store them in an airtight container at room temperature. Assemble the cake on the day you plan to serve it.
- Customize the Spices: If you love a particular spice, feel free to adjust the amounts. Add more cinnamon for a stronger flavor, or experiment with ginger or cardamom for a different spice profile.
- Check for Doneness: Always check for doneness by inserting a toothpick into the center of the cakes. If it comes out clean or with a few moist crumbs, the cakes are ready.
Recipe Variations
- Nutty Version: Add chopped walnuts or pecans to the batter for extra texture and a nutty flavor that pairs beautifully with the spices.
- Citrus Twist: Add the zest of one orange or lemon to the batter for a hint of citrus freshness that contrasts with the warm spices.
- Vegan Version: Swap the butter for vegan margarine and use flax eggs or another egg substitute to make this cake suitable for a vegan diet.
Freezing and Storage
- Storage: Leftover cake can be stored in an airtight container for up to 3 days at room temperature. For longer storage, refrigerate the cake and consume it within 5 days.
- Freezing: You can freeze the cake layers (without filling) for up to 3 months. Wrap each layer tightly in plastic wrap and foil, then thaw at room temperature before assembling and serving.
FAQ Section
Can I use a different jam for the filling?
Yes, you can substitute the raspberry jam with other fruit jams like strawberry, blackberry, or even a citrus marmalade for a different flavor profile.
Can I make this cake ahead of time?
Absolutely! Bake the cake layers a day in advance and assemble it on the day of serving. The cake will stay fresh and flavorful for a couple of days.
Is this recipe gluten-free?
No, this recipe contains gluten. However, you can substitute the all-purpose flour with a gluten-free flour blend if necessary.
Can I make this cake without whipped cream?
Yes! If you prefer a lighter filling, you can simply serve the cake with just the jam and dust it with powdered sugar for a more minimalist approach.
Conclusion
The Christmas Spiced Victoria Sponge Cake is a festive, flavorful treat that brings the warmth and joy of the holiday season to your dessert table. Whether you’re celebrating with family, hosting a holiday tea, or looking for a unique dessert for Christmas dinner, this cake is sure to impress. With its airy texture, rich jam filling, and warm spices, it’s the perfect way to wrap up any holiday meal.
Enjoy baking, and I’d love to see how your cake turns out—be sure to tag me on social media and share your holiday baking adventures!
Happy holidays and happy baking!
Print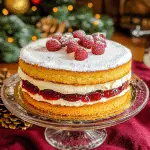
Christmas Spiced Victoria Sponge Cake: A Festive Twist on a Classic Dessert
- Total Time: 1 hour 30 minutes
Description
The Christmas Spiced Victoria Sponge Cake is a festive twist on the classic British favorite. This light, fluffy cake is infused with warm, aromatic Christmas spices like cinnamon, nutmeg, and cloves, creating a cozy, comforting flavor that’s perfect for the holiday season. Two golden layers of sponge cake are filled with a luscious combination of raspberry jam and freshly whipped cream, offering a delightful balance of sweetness and richness. Topped with a dusting of powdered sugar and festive berries, this cake is a stunning centerpiece for any holiday gathering. Whether you’re serving it at Christmas dinner or enjoying it with a cup of tea, the Christmas Spiced Victoria Sponge Cake brings a touch of seasonal magic to every bite.
Ingredients
For the Cake:
- 1 cup (225g) unsalted butter, softened (This is the base for the light, fluffy texture of the cake)
- 1 cup (225g) granulated sugar (Sweetness is key, but you can reduce it slightly if you prefer a less sweet cake)
- 4 large eggs, at room temperature (Ensure they’re at room temperature to help them incorporate better into the batter)
- 1 ½ cups (190g) all-purpose flour (The foundation of the cake, giving it structure and lightness)
- 1 teaspoon baking powder (To help the sponge rise beautifully)
- ½ teaspoon ground cinnamon (For that warm, aromatic spice)
- ½ teaspoon ground nutmeg (Another holiday spice that adds warmth and depth)
- ¼ teaspoon ground cloves (A little goes a long way in adding festive flavor)
- Pinch of salt (To balance the sweetness and enhance the overall flavor)
- 2 tablespoons milk (This helps adjust the consistency of the batter for a perfect sponge texture)
For the Filling:
- ¾ cup (200ml) heavy cream (For a rich, creamy filling that complements the spiced cake)
- 2 tablespoons powdered sugar (To sweeten the whipped cream slightly)
- 1 teaspoon vanilla extract (For a smooth and fragrant flavor)
- ½ cup (100g) raspberry jam (The classic filling for a Victoria Sponge; the tartness of the jam balances the sweetness of the cake)
For the Decorative Finish:
- Powdered sugar, for dusting (For a snowy, festive look)
- Fresh berries (Raspberries or strawberries, optional, for added color and flavor)
- Fresh mint leaves (Optional, for a pop of color and a hint of freshness)
Instructions
Step 1: Preheat the Oven
Start by preheating your oven to 350°F (175°C). Grease and line two 8-inch round cake pans with parchment paper, ensuring that the pans are well-prepared so the cake comes out easily after baking.
Step 2: Cream the Butter and Sugar
In a large mixing bowl, cream together the softened butter and granulated sugar using an electric hand mixer or stand mixer on medium speed. Beat for about 5 minutes until the mixture is light, fluffy, and pale in color. This step is key to achieving the cake’s light and airy texture, so take your time to beat the mixture well.
Step 3: Add the Eggs
Add the eggs, one at a time, ensuring each is fully incorporated before adding the next. This helps prevent the batter from curdling and ensures a smooth texture. Scrape down the sides of the bowl as necessary.
Step 4: Sift the Dry Ingredients
In a separate bowl, sift together the flour, baking powder, cinnamon, nutmeg, cloves, and salt. Sifting the dry ingredients helps prevent lumps and ensures they’re evenly distributed throughout the batter. Once sifted, gradually add this dry mixture to the wet ingredients, folding it in with a spatula or mixing on low speed. Be careful not to overmix; just combine until the batter is smooth.
Step 5: Add Milk to Adjust Consistency
Add 2 tablespoons of milk to the batter and gently fold it in. This will help loosen the batter slightly and make it easier to spread in the pans.
Step 6: Divide and Bake
Divide the batter evenly between the prepared cake pans and smooth the tops with a spatula. Tap the pans lightly on the counter to remove any air bubbles.
Bake the cakes in the preheated oven for about 25-30 minutes, or until the cakes are golden brown on top and a toothpick inserted into the center comes out clean. Keep an eye on them after 20 minutes to prevent overbaking, as oven times can vary.
Once done, remove the cakes from the oven and allow them to cool in the pans for 10 minutes. Then, turn them out onto a wire rack to cool completely.
Step 7: Prepare the Whipped Cream
While the cakes are cooling, prepare the filling. In a chilled mixing bowl, whip the heavy cream and powdered sugar together until soft peaks form. Be careful not to overwhip, as you want the cream to be light and smooth, not too stiff. Add the vanilla extract and give it one final mix to incorporate.
Step 8: Assemble the Cake
Once the cakes have cooled, place one layer on a serving plate or cake stand. Spread a generous layer of raspberry jam on top of the cake, leaving a small border around the edges to prevent the jam from spilling over. Next, spread the whipped cream over the jam, creating a nice, even layer.
Top with the second cake layer and gently press down to help it adhere. You can also dust the top of the cake with a little powdered sugar for a snowy, festive effect.
Step 9: Decorate (Optional)
For an extra touch, decorate the cake with fresh berries (like raspberries or strawberries) and a few fresh mint leaves. This not only adds a pop of color but also complements the flavor of the cake.
Step 10: Serve and Enjoy!
Slice the cake into 8-10 pieces, serve with a cup of tea or coffee, and enjoy the warm, spiced flavors of Christmas.
- Baking and Cooling Time: Baking time: 25-30 minutes | Cooling time: 40-55 minutes
Nutrition
- Calories: 350 kcal
- Fat: 15g
- Carbohydrates: 48g
- Protein: 4g

