Introduction
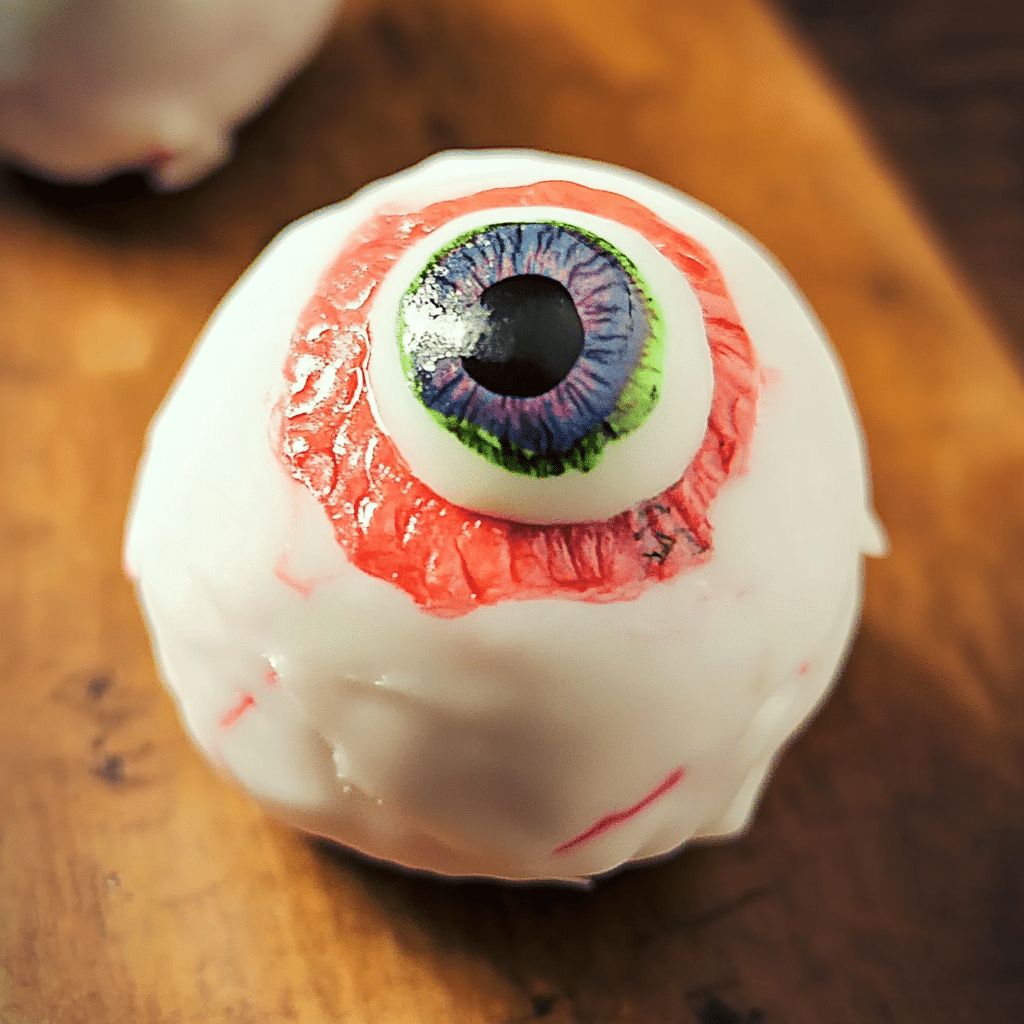
As Halloween approaches, the excitement in the air grows thicker, filled with the anticipation of costumes, decorations, and, most importantly, festive treats. One of the most playful and creative ideas to grace your Halloween table is Halloween Candy Eyeballs—a spooky, delicious confection that will enchant your guests and make your celebration unforgettable. These candy eyeballs are not only visually striking but also incredibly easy to make, combining a medley of flavors and textures that will delight kids and adults alike.
I discovered this idea while looking for unique Halloween snacks to impress my little goblins. What began as a fun experiment quickly turned into a family tradition, captivating everyone with their eerie appearance and delightful taste. Perfect for parties, school events, or even just a fun night at home, these candy eyeballs are sure to add an element of surprise and delight to your Halloween festivities.
Let’s dive into why you’ll love this recipe, how to prepare it step-by-step, and tips to make your Halloween Candy Eyeballs the ultimate spooky treat!
Why You’ll Love This Recipe
Fun and Festive Appearance
Halloween Candy Eyeballs are visually stunning, with vibrant colors and playful designs that will captivate anyone who lays eyes on them. Their ghoulish look makes them the perfect centerpiece for any Halloween spread, guaranteed to provoke squeals of delight (and perhaps a few playful shrieks) from your guests.
Simple to Make
With just a handful of ingredients and straightforward steps, this recipe is approachable for cooks of all skill levels. You don’t need to be a professional baker to create these fun treats! Whether you’re a novice or a seasoned chef, you’ll find the process enjoyable and rewarding.
Customizable Flavors
One of the best aspects of this recipe is its flexibility. You can easily experiment with different flavors and ingredients to make each eyeball unique. Use various chocolates, fillings, and colors to cater to different tastes and preferences, making it a versatile treat for everyone.
Perfect for Sharing
These candy eyeballs are ideal for sharing at Halloween parties or school events. They’re easy to transport and serve, making them a crowd-pleaser wherever you go. Just imagine the joy on kids’ faces when they receive a spooky treat that looks like it came straight from a mad scientist’s lab!
Great for Kids
Not only are these treats fun to eat, but they’re also a fantastic way to get kids involved in the kitchen. Let them help with the decorating and assembling, turning it into a fun family activity that fosters creativity and bonding.
Preparation Time and Servings
- Total Time: 1 hour (30 minutes prep, 30 minutes cooling)
- Servings: This recipe makes about 12-16 candy eyeballs.
- Nutrition Facts: Calories per eyeball: approximately 100, depending on ingredients used.
Ingredients
To create these spooky Halloween Candy Eyeballs, you will need the following ingredients:
- 1 cup white chocolate chips: The base for your candy eyeballs.
- 1 cup milk chocolate chips: For the “pupil” of the eyeball.
- 1-2 tablespoons coconut oil: To help the chocolate melt smoothly.
- Colored candy melts (red, green, blue, etc.): For the “iris” of the eyeball.
- Mini M&Ms or chocolate chips: For the pupils.
- Edible eyes (optional): For an extra spooky touch.
- Wax paper: For cooling the eyeballs.
Step-by-Step Instructions
STEP 1: MELT THE WHITE CHOCOLATE
Begin by melting the white chocolate chips. You can do this in a microwave-safe bowl in 30-second intervals, stirring in between, until smooth. If you prefer a smoother consistency, add 1 tablespoon of coconut oil while melting. This will give the chocolate a nice sheen and make it easier to work with.
STEP 2: FORM THE BASE
Once melted, use a spoon to scoop out small balls of the white chocolate onto a sheet of wax paper. Aim for about 1 to 1.5 inches in diameter for each eyeball. The size can vary, but keep in mind that larger eyeballs may require longer cooling time. Allow them to cool and harden slightly for about 10-15 minutes.
STEP 3: ADD THE IRIS
While the white chocolate is cooling, melt your colored candy melts in a separate bowl. Again, use the microwave in 30-second intervals to avoid overheating. Once melted, use a spoon to create small, colorful circles on top of each white chocolate base. You can choose different colors for each eyeball to create a variety of designs, allowing your creativity to shine.
STEP 4: CREATE THE PUPILS
Next, take the mini M&Ms or chocolate chips and press them gently into the center of the colored candy melts to create the pupils. You can mix and match colors for fun and unique designs. The pupils can be placed off-center for an even more playful look, as if the eyeballs are looking in different directions.
STEP 5: FINAL TOUCHES
If you’re using edible eyes, you can place them on top of the eyeballs for an extra creepy effect. These can be found in most baking aisles or craft stores during the Halloween season. Allow the candy eyeballs to cool completely, which should take another 15-20 minutes. If you’re in a hurry, you can pop them in the fridge to speed up the cooling process.
STEP 6: SERVE
Once the eyeballs have fully set and cooled, carefully transfer them to a serving platter. You can also place them in spooky cupcake liners for a fun presentation. Consider garnishing the platter with fake spiders or cobwebs to enhance the Halloween vibe. Enjoy your Halloween Candy Eyeballs!
How to Serve
Halloween Party Platter
Arrange the candy eyeballs on a large platter, creating an eye-catching display. You can add additional Halloween-themed decorations, like plastic spiders or cobwebs, to enhance the spooky atmosphere. Your guests will love the creativity and attention to detail.
Individual Treat Bags
For a fun party favor, consider placing each eyeball in a small treat bag. Tie them with Halloween-themed ribbon and distribute them to guests as they leave. This not only adds a personal touch but also encourages your friends and family to remember the fun they had at your gathering.
Dessert Table
Incorporate the candy eyeballs into a larger Halloween dessert table. Pair them with other spooky treats, like ghost-shaped cookies or pumpkin cupcakes, to create a cohesive theme. Mixing and matching treats will entice your guests and keep the energy festive throughout the event.
Additional Tips
- Use High-Quality Chocolate: For the best flavor and texture, opt for high-quality chocolate chips. This will make a significant difference in the final taste of your eyeballs.
- Experiment with Flavors: Feel free to add flavor extracts, like almond or peppermint, to the melted chocolate for a fun twist. This adds depth to the flavor and makes your eyeballs stand out even more.
- Make Them Ahead: These candy eyeballs can be made in advance and stored in an airtight container for up to a week. This is great for reducing stress as Halloween approaches! Prepare them ahead of time, and you’ll be able to enjoy the festivities without the last-minute rush.
- Get Creative with Colors: Use food coloring to tint white chocolate or candy melts if you want unique colors for your eyeballs. This is an excellent way to match your theme or use the colors of your favorite sports team!
- Include a Spooky Tag: For an added touch, create fun tags that describe the eyeballs, like “Witch’s Eyeballs” or “Zombie Eyeballs.” This adds a whimsical element to your display and engages your guests in the fun.
Recipe Variations
Ghostly Eyeballs
Make your eyeballs ghostly by using dark chocolate for the base and white chocolate for the iris. This gives a fun contrast and adds an eerie feel to the treat. You can also add a bit of edible glitter to the dark chocolate for a shimmering effect.
Spooky Spider Eyes
For a twist, you can add edible black gel or icing around the edges to resemble spider webs. This adds an extra creepy touch! Use a piping bag to create thin lines and shapes, making your candy eyeballs look like they’re being watched by creepy crawlers.
Vegan Option
To make a vegan version, substitute the white and milk chocolate with dairy-free chocolate options and use plant-based candy melts. You can also use natural food colorings to achieve the vibrant colors without animal products.
Different Fillings
Get creative by adding fillings to your eyeballs. You can stuff them with peanut butter, caramel, or even fruit jams for an unexpected burst of flavor. This will take your candy eyeballs to a whole new level!
Serving Suggestions
Drink Pairings
Pair your candy eyeballs with spooky drinks like “witches’ brew” punch or Halloween-themed mocktails. A bright green punch or a bubbling potion adds to the festive spirit and complements your treats perfectly.
Themed Treats
Serve alongside other Halloween-themed snacks, like caramel apples, pumpkin spice popcorn, or spooky cheese platters. A well-rounded selection will keep guests happy and entertained, making your gathering a hit.
Kid-Friendly Options
For a family gathering, consider adding fun games or activities related to Halloween. This can make the candy eyeballs part of a more extensive, engaging event. Think pumpkin carving contests, costume parades, or Halloween bingo to keep everyone entertained.
Freezing and Storage
Storage
Store leftover candy eyeballs in an airtight container at room temperature for up to one week. Keep them away from direct sunlight and heat to maintain their shape and flavor. They make for a fun treat to enjoy throughout the week leading up to Halloween!
Freezing
While it’s not ideal to freeze these candy eyeballs due to their texture, if necessary, you can place them in a single layer in a freezer-safe container for up to one month. When you’re ready to serve, thaw them in the refrigerator for a few hours to maintain their appearance and flavor.
Special Equipment
Microwave-Safe Bowls
Having several microwave-safe bowls on hand will make melting the chocolate and candy melts easier. This will also help keep your workspace organized and efficient.
Wax Paper
Wax paper is essential for cooling the candy eyeballs without them sticking. It provides a non-stick surface that allows for easy removal once the chocolate has hardened.
Serving Platters
Use festive serving platters or decorative bowls to present your candy eyeballs and other treats. This adds flair to your display and enhances the overall Halloween ambiance.
FAQ Section
Can I use different types of chocolate?
Absolutely! Feel free to mix and match different types of chocolate, such as dark, milk, or white, to create unique flavors. This variety will keep your guests intrigued and eager to taste them all.
What if I can’t find colored candy melts?
If you can’t find colored candy melts, you can use food coloring to tint white chocolate or simply use more colorful candies like jelly beans. This flexibility ensures you can achieve the desired effect no matter what ingredients are available.
Can I make these ahead of time?
Yes! These candy eyeballs can be made a few days in advance and stored in an airtight container. They’ll still taste great! Preparing them ahead of time allows you to focus on other aspects of your Halloween celebration.
How do I know when the chocolate is melted?
The chocolate should be smooth and creamy, with no lumps. Stirring every 30 seconds while melting ensures it doesn’t overheat. Pay attention to the texture; it should be pourable and shiny.
Can I use other decorations?
Definitely! Get creative with your decorations—try using sprinkles, colored sugars, or even edible glitter to make your eyeballs even more festive. The more imaginative you get, the more fun your treats will be!
Conclusion
I hope you’re excited to make Halloween Candy Eyeballs! These delightful treats combine fun, creativity, and deliciousness, making them the perfect addition to your Halloween celebrations. Whether you’re hosting a spooky gathering or enjoying a cozy night in, these candy eyeballs are sure to impress.
Don’t forget to share your creations and tag your friends! I can’t wait to see how your Halloween Candy Eyeballs turn out. Enjoy making this festive treat, and may your Halloween be filled with laughter, fun, and delicious food!
Print
Halloween Eyeballs: A Spooktacular Treat
- Total Time: 2 hours
Description
Add a touch of whimsy to your Halloween festivities with Candy Eyeballs! These playful treats combine sweet flavors and a creepy appearance, making them perfect for parties or trick-or-treating. Crafted from melted chocolate and colorful candy melts, these edible eyeballs are easy to make and can be customized with various decorations. Whether you display them on a spooky platter or use them to surprise your guests, these candy eyeballs will spark joy and laughter, ensuring your Halloween is filled with sweetness and fun!
Ingredients
- 1 cup white chocolate chips: The base for your candy eyeballs.
- 1 cup milk chocolate chips: For the “pupil” of the eyeball.
- 1–2 tablespoons coconut oil: To help the chocolate melt smoothly.
- Colored candy melts (red, green, blue, etc.): For the “iris” of the eyeball.
- Mini M&Ms or chocolate chips: For the pupils.
- Edible eyes (optional): For an extra spooky touch.
- Wax paper: For cooling the eyeballs.
Instructions
STEP 1: MELT THE WHITE CHOCOLATE
Begin by melting the white chocolate chips. You can do this in a microwave-safe bowl in 30-second intervals, stirring in between, until smooth. If you prefer a smoother consistency, add 1 tablespoon of coconut oil while melting. This will give the chocolate a nice sheen and make it easier to work with.
STEP 2: FORM THE BASE
Once melted, use a spoon to scoop out small balls of the white chocolate onto a sheet of wax paper. Aim for about 1 to 1.5 inches in diameter for each eyeball. The size can vary, but keep in mind that larger eyeballs may require longer cooling time. Allow them to cool and harden slightly for about 10-15 minutes.
STEP 3: ADD THE IRIS
While the white chocolate is cooling, melt your colored candy melts in a separate bowl. Again, use the microwave in 30-second intervals to avoid overheating. Once melted, use a spoon to create small, colorful circles on top of each white chocolate base. You can choose different colors for each eyeball to create a variety of designs, allowing your creativity to shine.
STEP 4: CREATE THE PUPILS
Next, take the mini M&Ms or chocolate chips and press them gently into the center of the colored candy melts to create the pupils. You can mix and match colors for fun and unique designs. The pupils can be placed off-center for an even more playful look, as if the eyeballs are looking in different directions.
STEP 5: FINAL TOUCHES
If you’re using edible eyes, you can place them on top of the eyeballs for an extra creepy effect. These can be found in most baking aisles or craft stores during the Halloween season. Allow the candy eyeballs to cool completely, which should take another 15-20 minutes. If you’re in a hurry, you can pop them in the fridge to speed up the cooling process.
STEP 6: SERVE
Once the eyeballs have fully set and cooled, carefully transfer them to a serving platter. You can also place them in spooky cupcake liners for a fun presentation. Consider garnishing the platter with fake spiders or cobwebs to enhance the Halloween vibe. Enjoy your Halloween Candy Eyeballs!
- Prep Time: 30 minutes
- Cooling Time: 30 minutes
- Cook Time: 1 hour
Nutrition
- Calories: 100 kcal

