Introduction
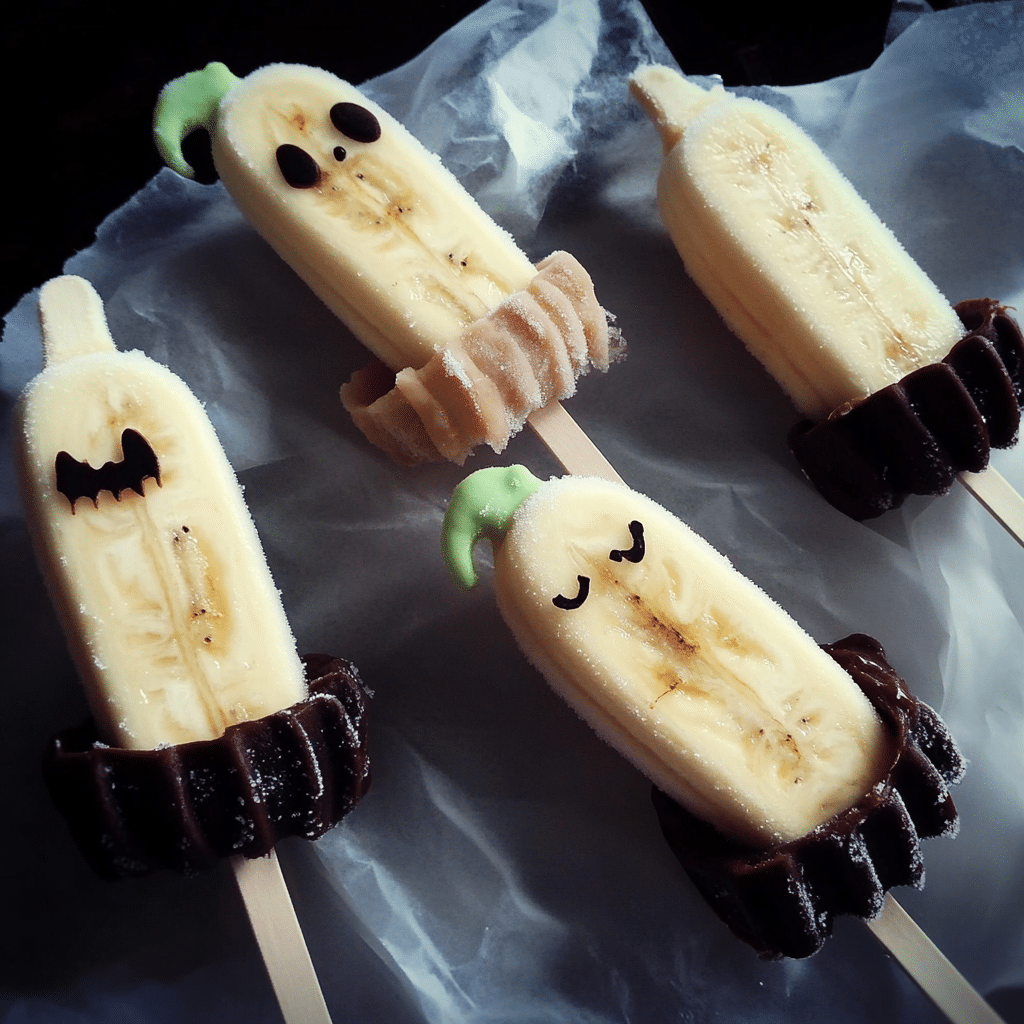
Hey there, spooky snack lovers! If you’re on the hunt for a fun and healthy Halloween treat that’s sure to impress, look no further than these Halloween Frozen Banana Treats. They’re not just adorable; they’re also incredibly easy to make and a great way to sneak some fruit into your Halloween festivities. Imagine biting into a creamy banana covered in chocolate, adorned with ghoulish eyes and spooky sprinkles. It’s the perfect combination of fun and nutritious!
These treats are not only a hit with kids, but they’ll also be a crowd-pleaser at any Halloween gathering. Whether you’re hosting a party, prepping snacks for a classroom, or just looking for something festive to enjoy at home, these frozen bananas will tick all the boxes. Plus, they’re customizable! You can decorate them however you like, making each treat uniquely yours.
I discovered this idea during a Halloween party a few years ago when a friend brought them along. The kids went wild for them! It was such a hit that we made it a tradition to whip them up every Halloween. Now, it’s a fun family activity where we get creative with designs, and it’s amazing to see how the kids’ imaginations run wild when decorating. It’s a great way to bond, laugh, and make delicious memories together!
Why You’ll Love This Recipe
- Quick and Easy: With minimal prep time, these treats can be ready in just 30 minutes. Perfect for those busy Halloween nights when you need something sweet but don’t want to spend hours in the kitchen!
- Healthy Option: Made with bananas and dark chocolate, they offer a guilt-free sweet treat that’s still festive and fun. They’re a fantastic alternative to traditional sugary snacks that can leave you feeling sluggish.
- Customizable: Use your favorite toppings and decorations, making each banana treat a unique creation. The kids will love getting involved in the decorating process! Plus, you can change up the designs each year, keeping things fresh and exciting.
Just imagine the creamy texture of the frozen banana mingling with the rich chocolate coating, all topped off with playful decorations. It’s a delightful treat that’s sure to be a favorite at any Halloween gathering. Whether you’re looking to impress guests or just indulge in a little Halloween fun, these treats will do the trick!
Preparation Time and Servings
- Total Time: 30 minutes (10 minutes prep, 20 minutes freezing)
- Servings: About 6-8 treats, depending on the size of your bananas. You can easily double or triple the recipe if you’re feeding a crowd!
- Calories per serving: Approximately 100 (based on toppings and banana size), making them a guilt-free treat.
Ingredients
Here’s what you’ll need to whip up these festive Halloween Frozen Banana Treats:
For the Frozen Bananas:
- 2 ripe bananas: Choose bananas that are firm but ripe for the best flavor and texture. Overripe bananas can be too mushy and may not hold up well during freezing.
- 1 cup dark chocolate chips: Melted for dipping; dark chocolate adds a rich flavor and is a healthier choice compared to milk chocolate. Plus, it pairs perfectly with the sweetness of bananas.
- 1 tablespoon coconut oil: This helps the chocolate melt smoothly and adds a nice sheen to the coating. It also helps the chocolate to harden more quickly once the bananas are dipped.
For Decorating:
- Candy eyes: You can find these at craft stores, baking supply shops, or online. They’re essential for that spooky touch! You can even mix and match different sizes for added fun.
- Sprinkles or crushed nuts: Use Halloween-themed sprinkles, colored sugar, or crushed nuts to add some fun texture. The crunchy bits can really elevate the experience!
- Optional: White chocolate chips: Melted and drizzled for additional decoration (think ghostly effects!). This can add a fun contrast to the dark chocolate.
Step-by-Step Instructions
Let’s get into the fun part—making these delicious treats! Here’s how to create your Halloween Frozen Banana Treats step by step.
Step 1: Prepare the Bananas
- Slice the Bananas: Peel your bananas and slice them into about 1-inch thick rounds. You can also cut them in half for larger pops. Make sure they’re even for consistent freezing. If you’re making banana pops, cutting them in half works perfectly, and they’re easier for little hands to hold!
- Insert Sticks (Optional): If you want to make banana pops, insert a popsicle stick into the cut end of each banana piece. This makes them easier to dip and eat! Kids love having something to hold onto, and it adds to the fun presentation.
Step 2: Melt the Chocolate
- Melt the Chocolate Chips: In a microwave-safe bowl, combine the chocolate chips and coconut oil. Microwave in 30-second intervals, stirring in between until smooth. Be careful not to overheat; you want a nice, silky chocolate! If you don’t have a microwave, you can melt the chocolate using a double boiler on the stove.
Step 3: Dip the Bananas
- Coat the Bananas: Dip each banana slice or pop into the melted chocolate, ensuring it’s fully coated. Use a fork to lift them out and let any excess chocolate drip off. You want a good, thick coating for that decadent taste!
- Place on a Baking Sheet: Line a baking sheet with parchment paper and place the chocolate-covered bananas on it. The parchment paper will prevent them from sticking and make cleanup super easy.
Step 4: Decorate!
- Add Candy Eyes and Sprinkles: While the chocolate is still wet, quickly add candy eyes and any other decorations you want. This is where you can get creative—make some look like ghosts, mummies, or even silly monsters! Don’t be shy with the toppings; the more, the merrier!
- Drizzle with White Chocolate: If you’re using white chocolate for extra decoration, melt it in a separate bowl, then drizzle it over the dipped bananas for a ghostly effect. This step is optional, but it can really make your treats pop!
Step 5: Freeze
- Freeze Until Set: Place the baking sheet in the freezer for about 20-30 minutes, or until the chocolate has fully hardened. This will ensure your treats are nice and firm for serving. If you want to speed up the process, you can pop them in the freezer for 10-15 minutes, but keep an eye on them!
How to Serve
- At a Halloween Party: Serve your Halloween Frozen Banana Treats on a fun platter decorated with fake spiders or cobwebs for a spooky touch. You can even use themed napkins and plates to really bring the festive spirit to life!
- As a Fun Snack: These make for a great after-school snack! Pair them with a spooky drink like a “witch’s brew” smoothie for a complete Halloween experience. Kids will love the fun presentation, and it’s a healthy way to satisfy their sweet tooth.
- Creative Packaging: Wrap them up in clear bags tied with orange or black ribbons for cute party favors or gifts. They’re perfect for handing out to trick-or-treaters, too!
Additional Tips
- Use Ripe Bananas: Make sure your bananas are ripe but not overly soft; this ensures they hold up during freezing and are sweet without being mushy. A little firmness goes a long way in making these treats last.
- Make Ahead: You can prepare these treats a day in advance and store them in the freezer. Just make sure to keep them in an airtight container to avoid freezer burn!
- Get Creative: Try different toppings! Crushed graham crackers can resemble mummies, and colored coconut can add a fun texture. You can even use edible glitter for an extra touch of magic!
- Vegan Option: Use dairy-free chocolate chips and enjoy this treat while keeping it vegan! There are plenty of delicious vegan chocolate options available.
- Involve the Kids: Let the little ones help with dipping and decorating. It’s a fun way to spend time together and create lasting memories. Plus, they’ll be more excited to eat something they’ve made themselves!
Recipe Variations
- Fruit Variations: Try using other fruits like strawberries or apple slices. You can also make banana boats by cutting a slit in a whole banana and filling it with toppings before dipping. This adds even more fun and variety to your snack!
- Nut Butter Surprise: For an extra treat, fill the banana slices with nut butter before dipping them in chocolate. This adds a delightful flavor and makes them even more filling. Plus, it gives an extra dose of protein!
- Coconut-Coated: After dipping in chocolate, roll them in shredded coconut for a tropical twist! This gives a fun texture and makes them look like little ghosts.
Serving Suggestions
- Pair with Other Treats: Serve alongside Halloween-themed cupcakes or spooky cookies for a complete dessert table. This variety will keep everyone excited and coming back for more!
- Spooky Drinks: Offer a fun drink like a green smoothie or pumpkin spice hot chocolate for a festive touch. The combination of sweet and spooky will create a memorable experience for everyone.
- For Kids: Create a mini snack board with these bananas, some fun-sized candy bars, and fresh fruit for a balanced Halloween snack. This way, everyone can nibble on their favorites while enjoying the festivities.
Freezing and Storage
Storage
- Keep your leftover Frozen Banana Treats in an airtight container in the freezer for up to a month. They make for a great quick snack any time of year! You can grab one whenever you have a sweet craving without the guilt.
Freezing
- To freeze, simply layer them in a container separated by parchment paper. This prevents them from sticking together and makes it easy to grab a treat whenever the craving strikes. You can also label the container with the date so you know when they were made!
Special Equipment
- Parchment Paper: Perfect for lining your baking sheet to prevent sticking and make cleanup easier. You can also use wax paper, but parchment is preferable for freezing.
- Microwave-Safe Bowls: Essential for melting chocolate smoothly. A glass bowl works best, as it retains heat well and allows for easy stirring.
- Popsicle Sticks: If you’re making banana pops, these make for easier handling and eating. They add an extra layer of fun, especially for kids!
FAQ Section
Can I use milk chocolate instead of dark chocolate?
Absolutely! Feel free to use any type of chocolate you like. Just keep in mind that dark chocolate has a richer flavor and is slightly healthier. You could even try using white chocolate for a sweeter treat!
How can I make these ahead of time?
You can make these up to a day in advance and store them in the freezer. Just be sure they’re in an airtight container to maintain freshness. They’ll be ready to go when you need a quick dessert!
What if I don’t have coconut oil?
You can omit the coconut oil, but it helps the chocolate to melt smoothly and adds a nice sheen. If you don’t have it, just use chocolate alone, but you might want to stir in a splash of vegetable oil for similar results.
Can I use other fruits?
Yes! These treats can be made with strawberries, apple slices, or even oranges. Just keep in mind the freezing time may vary depending on the fruit. Each fruit will give a different flavor profile, making them even more fun!
How do I prevent the chocolate from cracking?
Make sure the bananas are thoroughly frozen before dipping, and let any excess chocolate drip off before placing them on the baking sheet. If you find they’re still cracking, try dipping them in the chocolate a second time after the first coat has hardened.
Conclusion
And there you have it—Halloween Frozen Banana Treats that are not only a hit with kids but also a fun and healthy option for your Halloween celebrations! I can’t wait to see how you decorate yours. Be sure to snap some photos and tag me on Instagram; I love seeing your spooky creations! Enjoy making these delightful treats and have a frightfully fun Halloween filled with laughter, creativity, and sweet surprises! Each bite is a reminder that healthy snacks can be fun, especially during the spookiest time of the year!
Print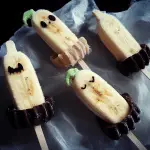
Halloween Frozen Banana Treats: A Spooktacular Snack
- Total Time: 1 hour
Ingredients
For the Frozen Bananas:
- 2 ripe bananas: Choose bananas that are firm but ripe for the best flavor and texture. Overripe bananas can be too mushy and may not hold up well during freezing.
- 1 cup dark chocolate chips: Melted for dipping; dark chocolate adds a rich flavor and is a healthier choice compared to milk chocolate. Plus, it pairs perfectly with the sweetness of bananas.
- 1 tablespoon coconut oil: This helps the chocolate melt smoothly and adds a nice sheen to the coating. It also helps the chocolate to harden more quickly once the bananas are dipped.
For Decorating:
- Candy eyes: You can find these at craft stores, baking supply shops, or online. They’re essential for that spooky touch! You can even mix and match different sizes for added fun.
- Sprinkles or crushed nuts: Use Halloween-themed sprinkles, colored sugar, or crushed nuts to add some fun texture. The crunchy bits can really elevate the experience!
- Optional: White chocolate chips: Melted and drizzled for additional decoration (think ghostly effects!). This can add a fun contrast to the dark chocolate.
Instructions
Step 1: Prepare the Bananas
- Slice the Bananas: Peel your bananas and slice them into about 1-inch thick rounds. You can also cut them in half for larger pops. Make sure they’re even for consistent freezing. If you’re making banana pops, cutting them in half works perfectly, and they’re easier for little hands to hold!
- Insert Sticks (Optional): If you want to make banana pops, insert a popsicle stick into the cut end of each banana piece. This makes them easier to dip and eat! Kids love having something to hold onto, and it adds to the fun presentation.
Step 2: Melt the Chocolate
- Melt the Chocolate Chips: In a microwave-safe bowl, combine the chocolate chips and coconut oil. Microwave in 30-second intervals, stirring in between until smooth. Be careful not to overheat; you want a nice, silky chocolate! If you don’t have a microwave, you can melt the chocolate using a double boiler on the stove.
Step 3: Dip the Bananas
- Coat the Bananas: Dip each banana slice or pop into the melted chocolate, ensuring it’s fully coated. Use a fork to lift them out and let any excess chocolate drip off. You want a good, thick coating for that decadent taste!
- Place on a Baking Sheet: Line a baking sheet with parchment paper and place the chocolate-covered bananas on it. The parchment paper will prevent them from sticking and make cleanup super easy.
Step 4: Decorate!
- Add Candy Eyes and Sprinkles: While the chocolate is still wet, quickly add candy eyes and any other decorations you want. This is where you can get creative—make some look like ghosts, mummies, or even silly monsters! Don’t be shy with the toppings; the more, the merrier!
- Drizzle with White Chocolate: If you’re using white chocolate for extra decoration, melt it in a separate bowl, then drizzle it over the dipped bananas for a ghostly effect. This step is optional, but it can really make your treats pop!
Step 5: Freeze
- Freeze Until Set: Place the baking sheet in the freezer for about 20-30 minutes, or until the chocolate has fully hardened. This will ensure your treats are nice and firm for serving. If you want to speed up the process, you can pop them in the freezer for 10-15 minutes, but keep an eye on them!
- Prep Time: 10 minutes
- Freezing Time: 20 minutes
- Cook Time: 30 minutes
Nutrition
- Serving Size: 6-8 treats
- Calories: 100 kcal

