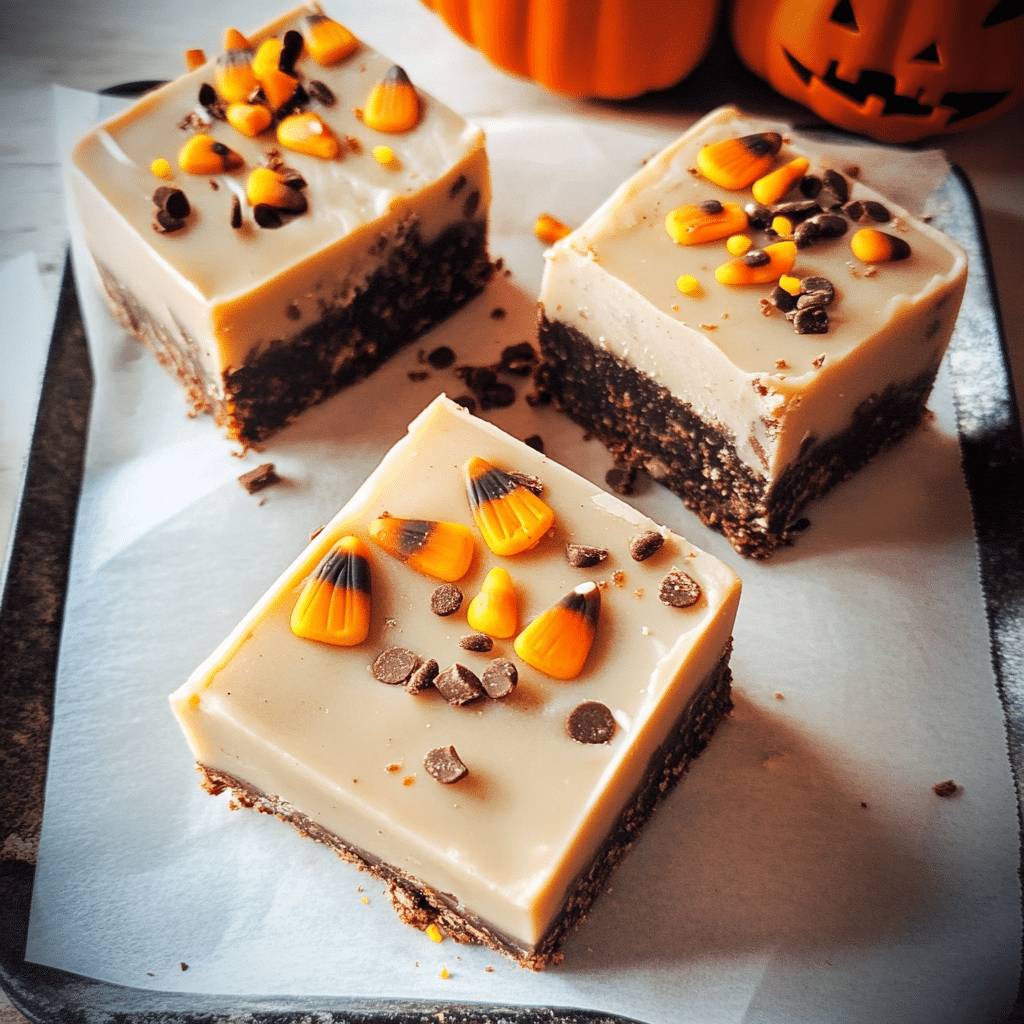
Halloween is all about fun, spooky treats that can satisfy any sweet tooth, and Halloween Fudge is one of the easiest and most delicious ways to celebrate the season. This creamy, rich fudge is a perfect canvas for all things Halloween, from festive orange and black sprinkles to candy corn, edible googly eyes, and more. Whether you’re hosting a Halloween party, making treats for the neighborhood trick-or-treaters, or simply looking for a fun dessert to share with family, Halloween Fudge is the perfect treat.
Fudge is an indulgent dessert that’s known for its smooth, creamy texture and rich flavor. It’s also incredibly versatile. With a simple base of sweetened condensed milk, butter, and chocolate, you can add a variety of Halloween-themed toppings, colors, and flavors to create a treat that’s as spooky as it is delicious. One of the best parts about making fudge is how easy it is—there’s no need for fancy equipment or long hours in the kitchen. It’s a quick, no-bake dessert that can be made in advance, making it ideal for party prep or giving as a gift.
This Halloween Fudge recipe is customizable, so you can go wild with your imagination. Whether you want to keep it classic with chocolate fudge or create layers of different flavors and colors, the possibilities are endless. You can also add festive sprinkles, candies, or even swirl in peanut butter or marshmallow for extra fun. Let’s get started with why you’ll love making Halloween Fudge and how to do it.
Why You’ll Love This Recipe
- Easy and Quick: This fudge recipe comes together in just minutes, making it a perfect last-minute treat. With just a few ingredients and no need for baking, it’s a stress-free dessert.
- Festive and Fun: Halloween Fudge is all about creativity. You can decorate it with spooky sprinkles, candy corn, Halloween-themed candies, and even edible eyeballs to make it fun for kids and adults alike.
- Customizable: Whether you prefer chocolate, white chocolate, or even a combination of flavors, this fudge can be adapted to suit your taste. You can also play with different colors and toppings to make it fit your Halloween theme.
- Make-Ahead Friendly: Fudge is a great make-ahead dessert. You can prepare it a day or two before your event, store it in the fridge, and it’ll be ready to go when you need it.
- Perfect for Gifting: Wrap up pieces of Halloween fudge in festive cellophane bags or gift boxes for a sweet Halloween treat that friends and family will love.
Preparation Time and Servings
- Prep Time: 10 minutes
- Chill Time: 2-3 hours
- Total Time: 2 hours 10 minutes (including chilling)
- Servings: 24 pieces
Ingredients
For the Base Fudge:
- 3 cups semisweet chocolate chips (or a mix of milk and dark chocolate)
- 1 (14 oz) can sweetened condensed milk
- ¼ cup unsalted butter
- 1 tsp vanilla extract
For the Decorations and Toppings:
- Halloween sprinkles (orange, black, purple, green)
- Candy corn
- Edible googly eyes
- Mini marshmallows
- Candy pumpkins
- Orange and black food coloring gel (optional, for layering colors)
- White chocolate chips (optional, for a white fudge layer)
- Peanut butter or Nutella (optional, for swirling)
Step-by-Step Instructions
1. Prepare the Pan:
Line an 8×8-inch or 9×9-inch baking dish with parchment paper or aluminum foil, leaving some overhang on the sides for easy removal. Lightly grease the parchment or foil with non-stick spray or butter to prevent the fudge from sticking.
2. Melt the Chocolate and Butter:
In a medium saucepan, combine the semisweet chocolate chips, sweetened condensed milk, and butter. Place the saucepan over medium heat, stirring constantly, until the chocolate chips and butter are fully melted and the mixture is smooth and glossy. Make sure to stir frequently to avoid scorching the chocolate. Once the mixture is smooth, remove it from the heat and stir in the vanilla extract.
3. Create Halloween Fudge Layers (Optional):
If you want to add a fun Halloween twist with different colored layers, divide the fudge mixture into two or three separate bowls. Add a few drops of orange, black, or purple food coloring gel to each portion, and stir until the desired color is achieved. Be careful not to add too much food coloring, as it can alter the consistency of the fudge.
4. Pour the Fudge into the Pan:
Pour the melted fudge mixture (or your first layer, if you’re doing colored layers) into the prepared baking dish. Use a spatula to spread it out evenly, making sure it reaches the corners of the pan. If you’re layering different colors, pour each layer gently over the previous one and smooth it out before adding the next layer. For a marbled effect, you can swirl the colors together using a toothpick or skewer.
5. Decorate the Fudge:
Once the fudge is evenly spread in the pan, it’s time to decorate! Sprinkle the top of the fudge with your favorite Halloween-themed toppings. Use candy corn, edible googly eyes, mini marshmallows, candy pumpkins, and Halloween sprinkles to make the fudge festive and fun. Press the decorations gently into the surface of the fudge so they stick.
6. Chill the Fudge:
Place the baking dish in the refrigerator and allow the fudge to chill for at least 2-3 hours, or until it’s fully set. If you’re in a hurry, you can speed up the process by placing the fudge in the freezer for about 30-45 minutes. Make sure the fudge is completely firm before cutting.
7. Slice and Serve:
Once the fudge is set, lift it out of the pan using the parchment paper overhang. Place it on a cutting board and use a sharp knife to cut the fudge into squares or rectangles. For a cleaner cut, wipe the knife with a warm, damp cloth between each slice. Arrange the fudge pieces on a platter and serve!
How to Serve
Halloween Fudge is perfect for serving at parties, gifting to friends, or enjoying as a sweet treat during the Halloween season. Here are a few ways to serve and enjoy your Halloween Fudge:
- On a Dessert Table: Arrange the fudge pieces on a festive Halloween platter or cake stand, and place them alongside other spooky treats like cupcakes, cookies, and candy. You can also surround the fudge with Halloween-themed decorations like plastic spiders, fake cobwebs, or mini pumpkins for a festive touch.
- In Gift Bags: Halloween fudge makes a great edible gift! Wrap individual pieces in plastic wrap or parchment paper, and place them in Halloween-themed cellophane bags or small gift boxes. Tie them with a ribbon for a fun and thoughtful treat.
- For Trick-or-Treaters: If you’re looking for a unique homemade treat to give out to trick-or-treaters, Halloween fudge is a great option. Just be sure to wrap each piece individually in wax paper or place them in small treat bags to keep them fresh and clean.
- With Coffee or Hot Chocolate: Serve Halloween fudge alongside a hot cup of coffee, tea, or hot chocolate for a cozy afternoon treat. The rich, creamy fudge pairs perfectly with a warm beverage.
Additional Tips for Success
- Use High-Quality Chocolate: For the best flavor and texture, use high-quality chocolate chips or bars. Semisweet chocolate is the classic choice, but you can also use milk chocolate, dark chocolate, or a combination depending on your taste.
- Don’t Overcook the Chocolate: When melting the chocolate, be sure to use medium heat and stir constantly to avoid burning or overheating the chocolate. If the mixture becomes too thick, you can add a tablespoon of milk to smooth it out.
- Let the Fudge Set Completely: It’s important to give the fudge enough time to set in the refrigerator. If you cut it too early, it may be too soft and won’t hold its shape. For best results, let it chill for at least 2-3 hours.
- Customize the Toppings: Feel free to get creative with the toppings! You can add anything from chopped nuts and crushed cookies to mini M&Ms and chocolate chips. The key is to choose toppings that add both flavor and visual appeal.
- Use Gel Food Coloring: If you’re coloring the fudge, use gel food coloring rather than liquid food coloring. Gel food coloring provides more vibrant colors without affecting the texture of the fudge.
- Make it Peanut Butter Swirl: For a fun twist, melt some peanut butter or Nutella and drizzle it over the top of the fudge. Use a toothpick to swirl it into the fudge for a marbled effect.
Recipe Variations
- White Chocolate Halloween Fudge: For a different flavor, swap out the semisweet chocolate for white chocolate chips. You can also divide the fudge into two portions, keeping one white and coloring the other orange or black for a layered look.
- Peanut Butter Halloween Fudge: Add a layer of peanut butter fudge by mixing 1 cup of peanut butter with 1 cup of sweetened condensed milk and 1 tsp vanilla extract. Pour this over the chocolate fudge layer and swirl the two together for a delicious peanut butter-chocolate combination.
- Rocky Road Halloween Fudge: Add ½ cup of mini marshmallows, chopped nuts, and chocolate chips to the fudge mixture before pouring it into the pan. Top with more marshmallows and Halloween-themed sprinkles for a fun, rocky road twist.
- Mint Chocolate Halloween Fudge: For a minty twist, add ½ tsp of peppermint extract to the chocolate fudge mixture. You can also create a green fudge layer by adding a few drops of green food coloring to white chocolate fudge and layering it with the chocolate fudge.
Freezing and Storage
Storage: Store leftover fudge in an airtight container in the refrigerator for up to 1 week. Be sure to separate the layers with parchment paper to prevent them from sticking together. If you prefer softer fudge, let it sit at room temperature for 10-15 minutes before serving.
Freezing: Fudge freezes well, making it a great make-ahead dessert. To freeze, wrap individual pieces in plastic wrap or wax paper, then place them in a freezer-safe bag or container. Freeze for up to 3 months. Thaw the fudge in the refrigerator overnight before serving.
Refrigeration: While the fudge can be kept at room temperature for a day or two, it’s best to store it in the refrigerator to maintain its firmness and prevent it from becoming too soft, especially in warmer climates.
Special Equipment
- Medium Saucepan: You’ll need a medium saucepan for melting the chocolate, butter, and sweetened condensed milk.
- 8×8 or 9×9 Baking Dish: Use a square baking dish lined with parchment paper or aluminum foil to set the fudge. The size of the dish will determine the thickness of the fudge.
- Spatula or Wooden Spoon: A silicone spatula or wooden spoon works best for stirring the chocolate mixture and spreading the fudge evenly in the pan.
- Parchment Paper or Aluminum Foil: Line the baking dish with parchment paper or foil to make removing the fudge easier.
FAQ Section
1. Can I make this fudge without sweetened condensed milk?
- Sweetened condensed milk is key to achieving the creamy, smooth texture of the fudge. However, you can make a stovetop fudge using sugar, butter, and milk if you prefer to avoid condensed milk. The process is a bit more involved, but it can be done.
2. How do I keep the fudge from being too soft?
- To keep the fudge firm, make sure to refrigerate it for the full 2-3 hours or longer if necessary. You can also add more chocolate if the fudge mixture seems too thin before pouring it into the pan.
3. Can I make this fudge vegan?
- Yes! Simply use dairy-free chocolate chips and a dairy-free sweetened condensed milk alternative, such as coconut condensed milk, to make a vegan version of this fudge. Make sure any add-ins or toppings are also vegan-friendly.
4. How do I cut clean slices of fudge?
- To achieve clean, sharp slices, refrigerate the fudge until it’s fully set. Use a sharp knife dipped in warm water, wiping it clean between each cut.
5. Can I use different types of chocolate in the fudge?
- Absolutely! You can experiment with different types of chocolate, such as dark chocolate, milk chocolate, or even white chocolate, depending on your taste preferences.
6. How do I fix grainy fudge?
- Grainy fudge usually happens when the chocolate overheats or when the fudge is stirred too much. To avoid this, melt the chocolate slowly over medium heat and stir just until smooth. If the fudge does turn grainy, you can try adding a bit of milk or cream and stirring gently to smooth it out.
7. Can I add flavors to the fudge?
- Yes! You can add a variety of extracts like peppermint, almond, or coconut to enhance the flavor of your fudge. Just be sure to add them in small amounts, as extracts can be potent.
Conclusion
Halloween is a time for creative, spooky fun, and Halloween Fudge is the perfect treat to bring some festive flavor to your celebration. With its creamy texture, rich chocolate flavor, and endless possibilities for decoration, this fudge is a crowd-pleaser that’s sure to delight kids and adults alike. Whether you’re hosting a Halloween party, making treats for trick-or-treaters, or just looking for a fun and delicious dessert, this Halloween Fudge is guaranteed to be a hit.
Not only is it easy and quick to make, but it’s also a customizable recipe that allows you to get creative with colors, flavors, and toppings. From candy corn to spooky sprinkles, the options are endless when it comes to decorating your Halloween fudge. Plus, it’s a great make-ahead treat that can be stored in the fridge or freezer until you’re ready to serve.
So get into the Halloween spirit and whip up a batch of this delicious fudge for your next spooky celebration. I can’t wait to see how you decorate your Halloween Fudge—don’t forget to share your creations on social media and tag me! Have a fun and spooky Halloween! 🎃👻
Print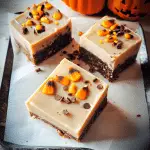
Halloween Fudge
- Total Time: 2 hours and 15 minutes
Ingredients
- 2 cups semi-sweet chocolate chips
- 1 can (14 oz) sweetened condensed milk
- 1 teaspoon vanilla extract
- 1/4 teaspoon salt
- 1 cup powdered sugar
- Halloween-themed sprinkles (or candies)
- Optional: orange and black food coloring
Instructions
- Prepare the Pan: Line an 8×8-inch baking dish with parchment paper, leaving some overhang for easy removal.
- Melt the Chocolate: In a medium saucepan over low heat, combine the chocolate chips and sweetened condensed milk. Stir continuously until melted and smooth.
- Add Flavorings: Remove from heat and stir in the vanilla extract and salt. If using food coloring, add a few drops until you reach your desired color.
- Incorporate Powdered Sugar: Gradually sift in the powdered sugar, mixing until fully combined and the fudge is thick.
- Pour into Pan: Pour the mixture into the prepared baking dish, spreading it evenly.
- Decorate: Top with Halloween-themed sprinkles or candies before the fudge sets.
- Chill: Refrigerate for at least 2 hours or until fully set. Once set, lift the fudge out using the parchment overhang and cut into squares.
- Prep Time: 15 minutes
Nutrition
- Serving Size: 16 servings
- Calories: 160 kcal
- Fat: 7g
- Carbohydrates: 24g
- Protein: 2g

