Introduction
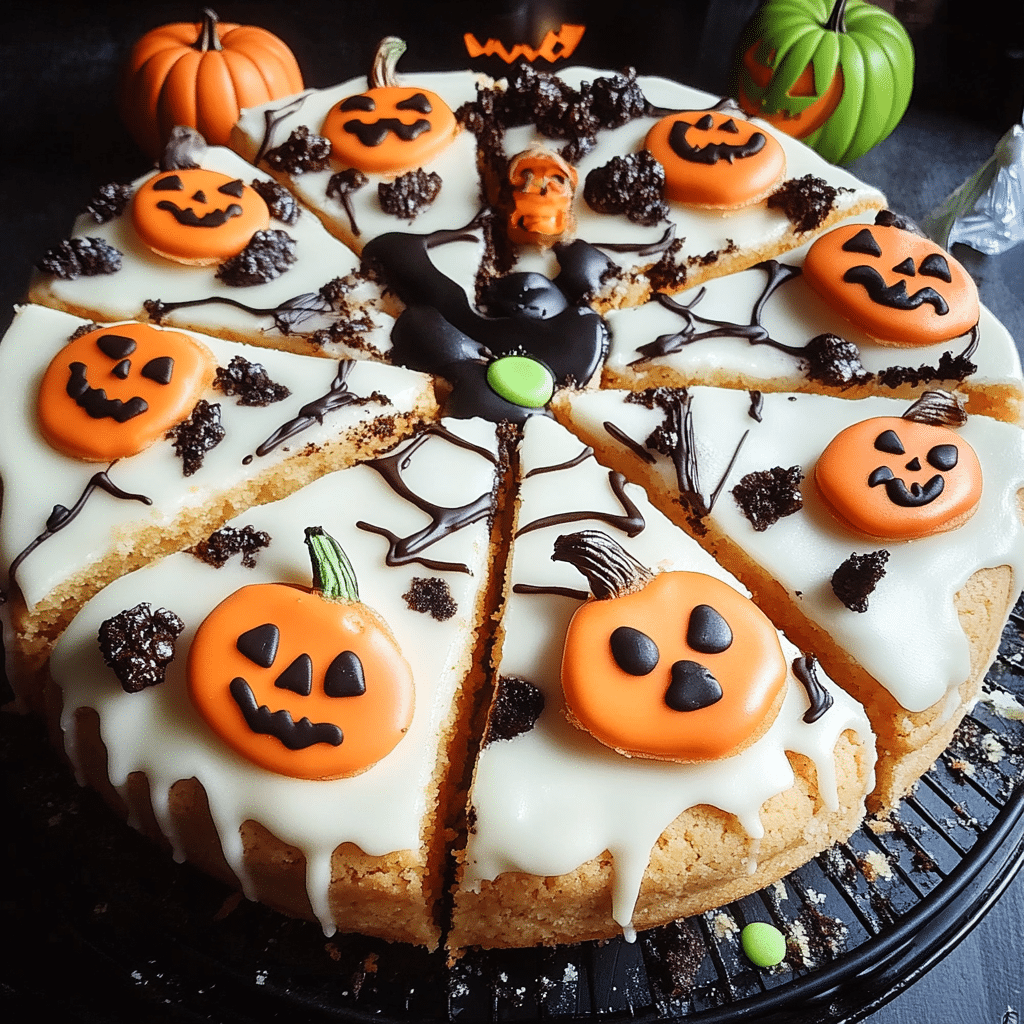
There’s something magical about Halloween—ghosts, goblins, and all the sweet treats that come with it. If you’re looking for a dessert that’s both festive and utterly delicious, look no further than this Halloween Sugar Cookie Cake! Imagine biting into a soft, buttery cookie cake decorated with vibrant orange and black icing, sprinkled with festive candies that scream Halloween. It’s like a giant, sweet hug for your taste buds!
What makes this cake extra special is its simplicity. You can whip it up in no time, making it perfect for busy weeknights or last-minute parties. Plus, it’s a hit with both kids and adults, making it an excellent choice for family gatherings or Halloween parties. I first stumbled upon this recipe at a friend’s Halloween get-together, and I was hooked from the first bite. It became a tradition in my household, with everyone eagerly awaiting this treat each October. The kids love helping decorate it, turning the kitchen into a mini Halloween wonderland filled with laughter and creativity.
So, if you’re ready to impress your friends and family with a dessert that’s as fun to make as it is to eat, grab your apron, and let’s get baking!
Why You’ll Love This Recipe
- Easy to Make: Seriously, if you can mix ingredients, you can make this cake! It’s all about combining simple ingredients into a delicious masterpiece.
- Family-Friendly: Everyone, from the littlest goblin to the biggest monster, will love this cake. You can even get the kids involved in the decorating!
- Customizable: The beauty of this recipe is that you can add your favorite Halloween candies or sprinkles, making it your own. The options are endless!
Imagine sinking your teeth into this cake—the soft, buttery texture of the cookie meets the sweet, creamy frosting, and every bite is bursting with fun Halloween flavors. The crunchy candies on top add an irresistible texture that keeps you coming back for more. It’s a delightful mix of flavors and textures that make it the perfect Halloween treat!
Preparation Time and Servings
- Total Time: 1 hour (30 minutes prep, 30 minutes baking)
- Servings: 12-16 slices
- Calories per serving: Approximately 250
Ingredients
Here’s what you’ll need to create this spooky treat:
- 2 ½ cups all-purpose flour: This is the base of your cookie cake, giving it that soft, cake-like texture.
- 1 teaspoon baking soda: Helps the cake rise and gives it a nice, fluffy texture.
- ½ teaspoon salt: Enhances all the flavors and balances the sweetness.
- 1 cup unsalted butter, softened: Adds richness and creates that melt-in-your-mouth texture.
- 1 cup granulated sugar: For sweetness and a lovely golden color.
- 1 cup brown sugar, packed: Adds moisture and a hint of caramel flavor.
- 2 large eggs: Binds everything together and adds richness.
- 2 teaspoons vanilla extract: For that classic cookie flavor.
- 1 cup Halloween-themed sprinkles: Because who can resist colorful sprinkles?
For the Frosting:
- 1 cup unsalted butter, softened: Creates a creamy base for your frosting.
- 4 cups powdered sugar: For sweetness and that smooth texture.
- 2 tablespoons milk: Helps achieve the perfect consistency for spreading.
- 1 teaspoon vanilla extract: Adds flavor to the frosting.
- Black and orange food coloring: To make your frosting festive and fun!
For Decoration:
- Assorted Halloween candies: Think gummy worms, candy corn, or chocolate bats—get creative!
Step-by-Step Instructions
Let’s dive into the baking process! Don’t worry if this seems overwhelming; I’ll walk you through every step with tips to keep you confident and on track.
Step 1: Preheat the Oven
- Preheat your oven to 350°F (175°C). This ensures your cake bakes evenly.
Step 2: Prepare the Pan
- Grease a 9×13-inch baking pan or line it with parchment paper. This will prevent the cake from sticking and make for easy cleanup.
Step 3: Mix the Dry Ingredients
- In a medium bowl, whisk together the flour, baking soda, and salt. This helps to evenly distribute the leavening agent.
Step 4: Cream the Butter and Sugars
- In a large mixing bowl, using a hand mixer or stand mixer, cream the softened butter, granulated sugar, and brown sugar until light and fluffy. This should take about 2-3 minutes.
Step 5: Add the Eggs and Vanilla
- Add the eggs, one at a time, mixing well after each addition. Then, add the vanilla extract and mix until combined.
Step 6: Combine Wet and Dry Ingredients
- Gradually add the dry ingredients to the wet mixture, mixing until just combined. Be careful not to overmix—this will keep your cake tender.
Step 7: Fold in the Sprinkles
- Gently fold in ½ cup of the Halloween sprinkles. This adds a festive touch and fun bursts of color throughout the cake!
Step 8: Bake the Cake
- Pour the batter into your prepared baking pan and spread it evenly. Bake for 25-30 minutes, or until a toothpick inserted in the center comes out clean. The cake should be golden and slightly firm to the touch.
Step 9: Cool the Cake
- Allow the cake to cool in the pan for about 10 minutes, then transfer it to a wire rack to cool completely. Patience is key here—frosting a warm cake can lead to a melty mess!
Step 10: Make the Frosting
- While the cake cools, prepare your frosting. In a large mixing bowl, beat the softened butter until creamy. Gradually add the powdered sugar, mixing well after each addition. Add the milk and vanilla extract, and mix until smooth and fluffy. If your frosting is too thick, add a little more milk until it reaches your desired consistency.
Step 11: Divide and Color the Frosting
- Divide the frosting into two bowls. Use black food coloring in one bowl and orange in the other, mixing until you reach your desired shades.
Step 12: Frost the Cake
- Once the cake is completely cool, spread a layer of orange frosting on top. Then, use a spatula or piping bag to add black frosting in fun swirls or patterns. Don’t be afraid to get creative!
Step 13: Decorate!
- Finally, sprinkle the remaining Halloween sprinkles on top, and add your favorite candies for a spooktacular finish.
Optional Step: Serve It Up
- Cut the cake into squares and serve it at your next Halloween gathering. Everyone will love the festive look and delicious taste!
How to Serve
- Cut into squares and serve on a festive platter.
- Pair with a scoop of vanilla ice cream for a delicious dessert combo.
- Serve with a side of apple cider or a festive Halloween punch to keep the spirit alive.
Additional Tips
- Room Temperature Ingredients: Make sure your butter and eggs are at room temperature for the best results—this helps with mixing and creates a smoother batter.
- Don’t Overmix: When combining the wet and dry ingredients, mix just until combined. Overmixing can lead to a dense cake.
- Decorating Fun: Let the kids go wild with the decorating! They’ll love creating their spooky designs.
- Make It Ahead: This cake can be made a day in advance. Just frost it on the day you plan to serve it for the freshest taste.
- Storing Leftovers: If you have leftovers (which is rare!), store them in an airtight container at room temperature for up to 3 days.
Recipe Variations
- Chocolate Chip Version: Add 1 cup of chocolate chips for a delicious twist on the classic cookie cake.
- Nutty Surprise: Incorporate chopped nuts or a nut butter swirl for added flavor and texture.
- Gluten-Free Option: Substitute all-purpose flour with a 1:1 gluten-free blend for a gluten-free treat.
Serving Suggestions
- Side Dishes: Serve with fresh fruit like apple slices or strawberries for a refreshing contrast.
- Festive Drinks: Pair with hot cocoa or warm apple cider for a cozy, seasonal touch.
- For Kids: Serve slices on Halloween-themed plates to make it extra special!
Freezing and Storage
Storage
- Store leftover cake in an airtight container at room temperature for up to 3 days. If you want to keep it fresh longer, consider freezing it.
Freezing
- To freeze the cake, wrap individual slices in plastic wrap and place them in a freezer-safe container. They’ll keep for up to 2 months. When you’re ready to enjoy, just thaw them at room temperature or warm them in the microwave for a few seconds.
Special Equipment
- Mixing Bowls: Having a set of various sizes helps in organizing your ingredients and mixing.
- Spatula: A good rubber spatula is essential for spreading frosting evenly.
- Piping Bags: Optional, but perfect for creating fun designs with your frosting!
FAQ Section
Can I use margarine instead of butter?
Yes, you can! Just be aware that it might change the flavor slightly.
How can I make this recipe ahead of time?
You can prepare the cake a day in advance and store it in an airtight container. Frost it just before
serving for the best texture.
What if I don’t have Halloween sprinkles?
No worries! You can use any colorful sprinkles you have on hand. Just make it fun!
Can I freeze the frosting?
Absolutely! You can freeze the frosting separately in an airtight container for up to 2 months. Just thaw it in the fridge overnight before using.
What if I want a more chocolatey flavor?
You can replace half of the flour with cocoa powder for a chocolate sugar cookie cake. Just be sure to adjust the sugar accordingly!
Conclusion
I can’t wait for you to try this Halloween Sugar Cookie Cake! It’s such a fun and festive treat that’s sure to bring smiles and joy to your gathering. Don’t forget to snap a photo of your creation and tag me on Instagram—I love seeing how you put your spin on this recipe! Happy baking, and have a spooktacular Halloween!
Print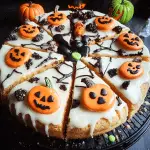
Halloween Sugar Cookie Cake: A Spooktacular Treat
- Total Time: 1 hour
Ingredients
- 2 ½ cups all-purpose flour: This is the base of your cookie cake, giving it that soft, cake-like texture.
- 1 teaspoon baking soda: Helps the cake rise and gives it a nice, fluffy texture.
- ½ teaspoon salt: Enhances all the flavors and balances the sweetness.
- 1 cup unsalted butter, softened: Adds richness and creates that melt-in-your-mouth texture.
- 1 cup granulated sugar: For sweetness and a lovely golden color.
- 1 cup brown sugar, packed: Adds moisture and a hint of caramel flavor.
- 2 large eggs: Binds everything together and adds richness.
- 2 teaspoons vanilla extract: For that classic cookie flavor.
- 1 cup Halloween-themed sprinkles: Because who can resist colorful sprinkles?
For the Frosting:
- 1 cup unsalted butter, softened: Creates a creamy base for your frosting.
- 4 cups powdered sugar: For sweetness and that smooth texture.
- 2 tablespoons milk: Helps achieve the perfect consistency for spreading.
- 1 teaspoon vanilla extract: Adds flavor to the frosting.
- Black and orange food coloring: To make your frosting festive and fun!
For Decoration:
- Assorted Halloween candies: Think gummy worms, candy corn, or chocolate bats—get creative!
Instructions
Step 1: Preheat the Oven
- Preheat your oven to 350°F (175°C). This ensures your cake bakes evenly.
Step 2: Prepare the Pan
- Grease a 9×13-inch baking pan or line it with parchment paper. This will prevent the cake from sticking and make for easy cleanup.
Step 3: Mix the Dry Ingredients
- In a medium bowl, whisk together the flour, baking soda, and salt. This helps to evenly distribute the leavening agent.
Step 4: Cream the Butter and Sugars
- In a large mixing bowl, using a hand mixer or stand mixer, cream the softened butter, granulated sugar, and brown sugar until light and fluffy. This should take about 2-3 minutes.
Step 5: Add the Eggs and Vanilla
- Add the eggs, one at a time, mixing well after each addition. Then, add the vanilla extract and mix until combined.
Step 6: Combine Wet and Dry Ingredients
- Gradually add the dry ingredients to the wet mixture, mixing until just combined. Be careful not to overmix—this will keep your cake tender.
Step 7: Fold in the Sprinkles
- Gently fold in ½ cup of the Halloween sprinkles. This adds a festive touch and fun bursts of color throughout the cake!
Step 8: Bake the Cake
- Pour the batter into your prepared baking pan and spread it evenly. Bake for 25-30 minutes, or until a toothpick inserted in the center comes out clean. The cake should be golden and slightly firm to the touch.
Step 9: Cool the Cake
- Allow the cake to cool in the pan for about 10 minutes, then transfer it to a wire rack to cool completely. Patience is key here—frosting a warm cake can lead to a melty mess!
Step 10: Make the Frosting
- While the cake cools, prepare your frosting. In a large mixing bowl, beat the softened butter until creamy. Gradually add the powdered sugar, mixing well after each addition. Add the milk and vanilla extract, and mix until smooth and fluffy. If your frosting is too thick, add a little more milk until it reaches your desired consistency.
Step 11: Divide and Color the Frosting
- Divide the frosting into two bowls. Use black food coloring in one bowl and orange in the other, mixing until you reach your desired shades.
Step 12: Frost the Cake
- Once the cake is completely cool, spread a layer of orange frosting on top. Then, use a spatula or piping bag to add black frosting in fun swirls or patterns. Don’t be afraid to get creative!
Step 13: Decorate!
- Finally, sprinkle the remaining Halloween sprinkles on top, and add your favorite candies for a spooktacular finish.
Optional Step: Serve It Up
- Cut the cake into squares and serve it at your next Halloween gathering. Everyone will love the festive look and delicious taste!
- Prep Time: 30 minutes
- Baking Time: 30 minutes
Nutrition
- Serving Size: Per Slice
- Calories: 250 kcal

