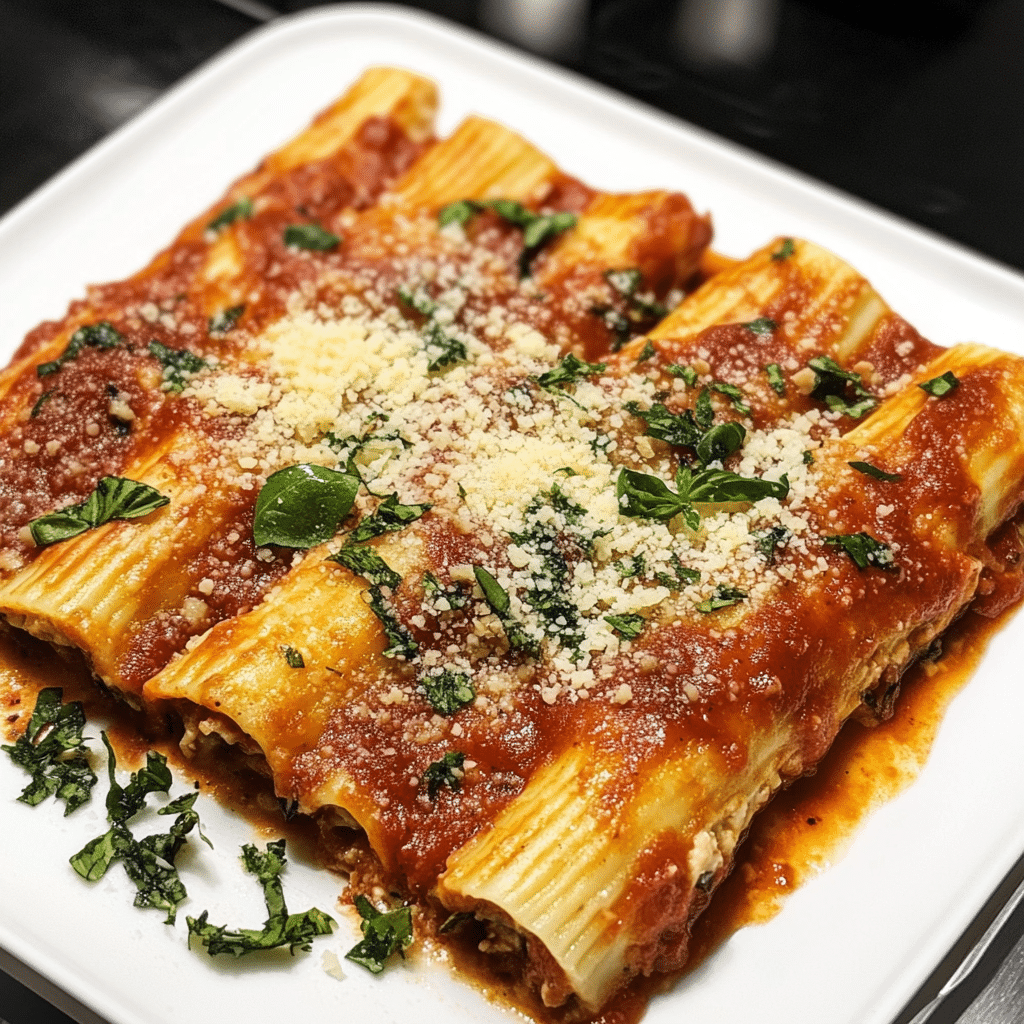
There’s something so comforting about a plate of cheesy, saucy manicotti fresh out of the oven. Homemade manicotti is an Italian-American favorite, perfect for cozy family dinners, special occasions, or when you just want to treat yourself to a meal that feels like a warm hug. This dish features tender pasta tubes stuffed with a creamy ricotta filling, baked in marinara sauce, and topped with gooey melted cheese. Every bite is rich, cheesy, and absolutely irresistible.
While making manicotti might seem like a big undertaking, it’s actually much simpler than you might think. With a few simple ingredients and a little bit of time, you can create a restaurant-worthy dish right in your own kitchen. Plus, the process of filling and rolling the pasta is fun and even a bit therapeutic. It’s the perfect dish for a weekend cooking project or a dinner party that will impress your guests.
I first fell in love with manicotti as a kid—my grandmother used to make it for special family gatherings. I remember watching her fill each pasta shell with care, then baking the whole dish until it was bubbling and golden. It became a tradition, and now, every time I make manicotti, I’m reminded of those warm family dinners. I’ve made some tweaks to her recipe over the years, but it’s still the same cozy, cheesy dish that brings everyone together.
Why You’ll Love This Recipe
- Classic Italian Comfort: There’s nothing like the combination of pasta, cheese, and marinara sauce. This is the ultimate comfort food.
- Easy to Make: While homemade manicotti sounds impressive, it’s actually quite easy. You’ll be surprised at how simple it is to stuff the pasta and layer it in sauce.
- Great for Entertaining: This dish is perfect for serving at a dinner party or family gathering. You can even prepare it ahead of time and bake it just before your guests arrive.
- Customizable: You can make this manicotti vegetarian, add meat to the sauce, or swap out some ingredients to suit your taste.
- Freezer-Friendly: Manicotti freezes beautifully, so you can make a big batch and freeze it for future meals. It’s a great option for meal prep!
Preparation Time and Servings
- Prep Time: 30 minutes
- Cook Time: 45 minutes
- Total Time: 1 hour 15 minutes
- Servings: 4-6 (about 12-14 manicotti)
- Nutrition per serving (approximate): 400 calories, 20g fat, 35g carbs, 18g protein
Ingredients
For the Ricotta Filling:
- 1 ½ cups ricotta cheese (drain if too watery)
- 1 cup shredded mozzarella cheese
- ½ cup grated Parmesan cheese
- 2 large eggs
- 1 tbsp fresh parsley, chopped (or 1 tsp dried)
- ½ tsp garlic powder
- ½ tsp onion powder
- Salt and pepper, to taste
For the Marinara Sauce:
- 2 cups marinara sauce (store-bought or homemade)
- 1 small onion, finely chopped
- 2 cloves garlic, minced
- 1 tbsp olive oil
- 1 tsp dried oregano
- 1 tsp dried basil
- ¼ tsp red pepper flakes (optional for a little heat)
For the Manicotti:
- 12-14 manicotti pasta tubes (you can use cannelloni tubes if preferred)
- 1 cup shredded mozzarella cheese (for topping)
- ¼ cup grated Parmesan cheese (for topping)
- Fresh basil or parsley for garnish (optional)
Ingredient Breakdown:
- Ricotta Cheese: The base of the filling. Ricotta is rich, creamy, and slightly sweet. Drain it if it’s too watery to avoid making the filling runny.
- Mozzarella & Parmesan Cheese: Mozzarella adds that ooey-gooey texture, while Parmesan adds a salty, nutty flavor to the filling and the topping.
- Eggs: Eggs help bind the filling together, giving it structure when baked.
- Herbs and Spices: Fresh parsley adds brightness, while garlic and onion powder give depth of flavor to the ricotta mixture. Basil and oregano are classic in the marinara sauce.
- Marinara Sauce: Whether you use homemade or store-bought, marinara sauce ties everything together with its sweet, tangy tomato base.
Step-by-Step Instructions
Step 1: Prepare the Pasta
- Bring a large pot of salted water to a boil. Cook the manicotti tubes according to package instructions, usually about 7-9 minutes, until they’re al dente (slightly firm but cooked through). Be careful not to overcook them, as they’ll continue to cook in the oven.
- Drain the pasta and rinse with cold water to stop the cooking process. Lay the pasta tubes on a baking sheet lined with parchment paper to prevent sticking while you prepare the filling.
Step 2: Make the Ricotta Filling
- In a large mixing bowl, combine the ricotta cheese, shredded mozzarella, grated Parmesan, eggs, parsley, garlic powder, onion powder, salt, and pepper. Stir everything together until well combined and smooth.
- Taste the mixture and adjust seasoning if needed. Set aside while you prepare the sauce.
Step 3: Prepare the Marinara Sauce
- Heat 1 tablespoon of olive oil in a medium saucepan over medium heat. Add the finely chopped onion and sauté for 3-4 minutes until soft and translucent. Add the minced garlic and cook for another minute until fragrant.
- Stir in the marinara sauce, dried oregano, dried basil, and red pepper flakes (if using). Let the sauce simmer on low heat for about 10 minutes to allow the flavors to meld together. Taste and adjust the seasoning with salt and pepper as needed.
Step 4: Fill the Manicotti
- Preheat your oven to 375°F (190°C).
- Spoon about 1/2 cup of the marinara sauce into the bottom of a large baking dish, spreading it evenly to cover the surface.
- To fill the manicotti tubes, you can either use a piping bag (or a ziplock bag with the tip cut off) to pipe the ricotta mixture into each tube, or simply use a small spoon. Carefully fill each tube, being gentle to avoid breaking the pasta.
Step 5: Assemble the Dish
- Place the filled manicotti in a single layer in the prepared baking dish on top of the marinara sauce. You may need to squeeze them together slightly to fit.
- Once all the manicotti are in the dish, pour the remaining marinara sauce over the top, making sure each tube is covered with sauce.
- Sprinkle the shredded mozzarella and grated Parmesan evenly over the top of the dish.
Step 6: Bake
- Cover the baking dish with aluminum foil and bake in the preheated oven for 30 minutes.
- After 30 minutes, remove the foil and bake for an additional 10-15 minutes, or until the cheese is melted, bubbly, and lightly golden on top.
Step 7: Garnish and Serve
- Once the manicotti is done, remove it from the oven and let it cool for 5 minutes before serving.
- Garnish with fresh basil or parsley for a pop of color and freshness, and serve with extra Parmesan on the side.
How to Serve
Homemade manicotti is a satisfying, hearty dish that doesn’t need much else to make it a complete meal. However, here are a few ideas for serving:
- With a Side Salad: A crisp, fresh green salad with a light vinaigrette balances the richness of the cheesy manicotti.
- Garlic Bread: Serve with warm, buttery garlic bread or focaccia to soak up all that delicious marinara sauce.
- Roasted Vegetables: Roasted zucchini, bell peppers, or broccoli make a great side dish to add some veggies to your meal.
- Wine Pairing: A glass of light red wine like Chianti or Pinot Noir complements the rich, cheesy flavors of the manicotti.
Additional Tips for Perfect Manicotti
- Don’t Overcook the Pasta: When boiling the manicotti, cook it al dente, as it will finish cooking in the oven. Overcooked pasta can become too soft and break when you try to fill it.
- Use a Piping Bag: To make filling the manicotti tubes easier and less messy, use a piping bag or a resealable plastic bag with the corner snipped off.
- Make it Ahead: You can prepare the manicotti ahead of time and store it in the fridge (uncooked) for up to 24 hours. When you’re ready to bake, just add a few extra minutes to the baking time.
- Add Spinach: For a boost of nutrition, mix some sautéed spinach into the ricotta filling. It adds color and flavor without altering the texture.
- Meat Sauce Option: If you prefer a heartier dish, you can add cooked ground beef or Italian sausage to the marinara sauce before layering it with the manicotti.
Recipe Variations
- Vegetarian Manicotti: This recipe is already vegetarian, but you can add extra vegetables like sautéed spinach, mushrooms, or zucchini to the ricotta filling for more texture and flavor.
- Gluten-Free Manicotti: Swap out regular manicotti pasta for gluten-free pasta or use gluten-free lasagna sheets rolled up with the ricotta filling inside.
- Meat Lovers Manicotti
: For a more filling version, brown some Italian sausage or ground beef and mix it into the marinara sauce before layering it with the manicotti.
- Four-Cheese Manicotti: Add some extra cheese to the filling, such as fontina, provolone, or Asiago, for a richer, cheesier dish.
Freezing and Storage
- Storing Leftovers: Store leftover manicotti in an airtight container in the fridge for up to 3 days. Reheat in the microwave or oven until warmed through.
- Freezing: Manicotti freezes beautifully! To freeze before baking, assemble the manicotti as instructed but don’t bake it. Cover the dish tightly with plastic wrap and aluminum foil and freeze for up to 3 months. When ready to bake, thaw overnight in the fridge and bake as directed, adding 10-15 minutes to the cooking time.
- Reheating: Reheat individual portions in the microwave for 1-2 minutes, or reheat the entire dish in the oven at 350°F for about 20 minutes.
Special Equipment
- Piping Bag: While not necessary, a piping bag makes filling the manicotti much easier.
- Large Baking Dish: A 9×13-inch baking dish works perfectly for this recipe.
- Aluminum Foil: Use foil to cover the dish during baking to keep the pasta from drying out before the cheese melts.
FAQ
- Can I use store-bought sauce?
Absolutely! If you’re short on time, a good quality store-bought marinara sauce will work just fine. - Can I make this with no-boil lasagna noodles instead?
Yes! Simply spread the filling along the length of the lasagna noodle, then roll it up and place it seam-side down in the baking dish. - How do I keep the manicotti from breaking?
To avoid breaking the pasta tubes, be sure to cook them al dente and handle them gently when filling. - Can I add more cheese?
Of course! If you’re a cheese lover, feel free to add more mozzarella or Parmesan on top before baking for an extra cheesy finish.
This Homemade Manicotti recipe is the perfect way to enjoy a comforting, cheesy Italian meal without having to leave your house. Whether you’re making it for a cozy family dinner or a special occasion, this dish is guaranteed to impress. I hope you love it as much as I do! Don’t forget to snap a photo and share your manicotti creations—I’d love to see how it turns out!
Print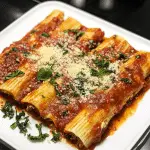
Homemade Manicotti
- Total Time: 1 hour
Ingredients
For the Manicotti:
- 1 box (8 oz) manicotti pasta (or homemade, see below)
- 15 oz ricotta cheese (or cottage cheese)
- 1 1/2 cups shredded mozzarella cheese (plus extra for topping)
- 1/2 cup grated Parmesan cheese
- 1 large egg
- 1 tablespoon fresh parsley (chopped)
- 1 teaspoon dried oregano
- 1/2 teaspoon garlic powder
- Salt and pepper, to taste
For the Sauce:
- 4 cups marinara sauce (store-bought or homemade)
- 2 cloves garlic (minced)
- 1 tablespoon olive oil
- 1 teaspoon dried basil
- 1/2 teaspoon red pepper flakes (optional, for heat)
- Fresh basil or parsley (for garnish, optional)
Instructions
1. Cook the Manicotti:
- Boil the Pasta: Cook the manicotti pasta according to the package directions, making sure to undercook it by about 2 minutes (al dente) since the pasta will cook further in the oven. Drain and set aside to cool slightly. Be careful not to overcook the pasta, or it may tear when stuffing.
- Prepare the Filling: In a large bowl, combine the ricotta cheese, 1 1/2 cups shredded mozzarella, Parmesan, egg, parsley, oregano, garlic powder, and a pinch of salt and pepper. Stir until the mixture is smooth and well combined.
2. Stuff the Manicotti:
- Using a spoon or a piping bag, carefully stuff each manicotti shell with the ricotta mixture. Fill them as much as possible without overstuffing, and place the filled shells in a greased 9×13-inch baking dish.
3. Prepare the Sauce:
- Cook the Garlic: In a small saucepan, heat the olive oil over medium heat. Add the minced garlic and sauté until fragrant, about 1-2 minutes.
- Add the Marinara: Stir in the marinara sauce, basil, and red pepper flakes (if using). Let the sauce simmer for about 5-10 minutes, allowing the flavors to meld together. Taste and adjust the seasoning with salt and pepper.
4. Assemble the Manicotti:
- Pour a generous layer of marinara sauce over the stuffed manicotti in the baking dish, making sure each shell is coated. Sprinkle with additional shredded mozzarella and Parmesan cheese on top.
- Cover and Bake: Cover the baking dish with aluminum foil and bake in a preheated oven at 375°F (190°C) for 25 minutes. Then, uncover the dish and bake for an additional 10 minutes to allow the cheese to melt and turn golden brown.
5. Serve and Enjoy:
- Once baked, remove the manicotti from the oven and let it rest for about 5 minutes before serving. Garnish with freshly chopped basil or parsley if desired. Serve with a side of garlic bread and a green salad for a complete meal.
- Prep Time: 25 minutes
- Cook Time: 35 minutes
Nutrition
- Calories: 400 kcal
- Fat: 22g
- Carbohydrates: 39g
- Protein: 20g

