Introduction
The holidays are all about celebration, delicious food, and gathering with friends and family. Among the many traditional dishes that grace our holiday tables, the Layered Christmas Pasta Salad stands out for its vibrant colors, fresh ingredients, and crowd-pleasing flavors. Whether you’re looking for a festive side dish to complement your holiday main courses or a dish that can be prepared in advance for a busy holiday season, this pasta salad is the perfect solution.
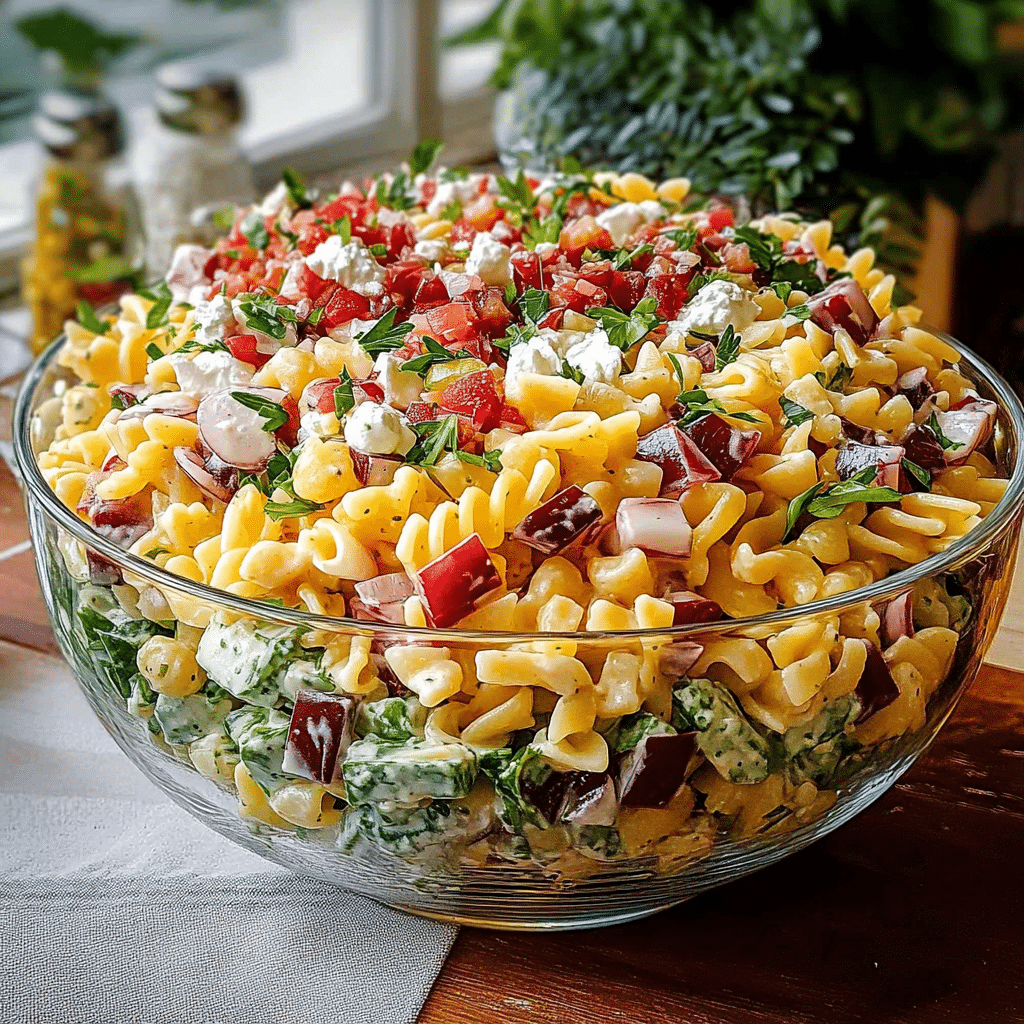
What makes this salad particularly special is its layered design. Each ingredient is arranged in layers, allowing you to visually appreciate the bright reds, greens, and creamy whites that are symbolic of the Christmas season. And beyond the gorgeous presentation, the flavor combinations in this salad are just as impressive. Fresh vegetables, creamy dressing, and pasta come together to create a harmonious and satisfying dish that will complement any holiday spread.
In this article, we will dive into the reasons why this Layered Christmas Pasta Salad is the ultimate holiday dish, step-by-step instructions for creating it, plus some tips, variations, and serving suggestions to make it your own. Whether you’re hosting a large family dinner, attending a holiday potluck, or simply looking for a delicious make-ahead option, this recipe is a winner.
Why You’ll Love This Recipe
- Festive and Vibrant: With its layers of colorful vegetables and creamy pasta, this salad looks like Christmas on a plate. It’s perfect for adding a splash of festive cheer to your holiday table.
- Make-Ahead Friendly: This salad is an excellent make-ahead dish. You can prepare it the day before your event, allowing the flavors to meld together for even more depth and richness.
- Easy to Customize: You can easily swap in your favorite ingredients or adjust the dressing to your taste. It’s flexible enough to suit various dietary preferences and can be made vegan or gluten-free with simple substitutions.
- Crowd-Pleasing: This pasta salad has something for everyone. From the creamy dressing to the crunch of fresh vegetables and the bite of pasta, it’s a dish that both kids and adults will enjoy.
- Versatile: Whether you serve it as a side dish, a main for vegetarians, or a light meal during the busy holiday season, the Layered Christmas Pasta Salad is versatile enough for any occasion.
Preparation Time and Servings
- Total Time: 45 minutes (15 minutes prep, 30 minutes chilling)
- Servings: Serves 8-10 people
- Nutrition Facts (per serving):
Calories: 250
Protein: 8g
Carbs: 35g
Fat: 12g
Fiber: 4g
Ingredients
For the Salad:
- 1 pound (450g) pasta (rotini, fusilli, or penne work well for layering)
- 1 cup cherry tomatoes, halved (for a pop of red)
- 1 cup cucumber, diced (for crunch and freshness)
- 1/2 cup red bell pepper, diced (adds color and sweetness)
- 1/2 cup green bell pepper, diced (for a crisp contrast)
- 1 cup shredded mozzarella cheese (or vegan cheese for a dairy-free option)
- 1/2 cup red onion, thinly sliced (for sharpness and bite)
- 1/2 cup pitted olives, sliced (optional, but they add a lovely briny flavor)
- 1/4 cup fresh basil, chopped (adds a fresh, aromatic element)
- 1/4 cup roasted pine nuts or walnuts (for extra texture and flavor)
For the Dressing:
- 1/2 cup mayonnaise (or a vegan alternative like avocado mayo)
- 1/4 cup Greek yogurt (or coconut yogurt for dairy-free)
- 2 tablespoons apple cider vinegar
- 1 tablespoon Dijon mustard
- 1 tablespoon honey (or maple syrup for a vegan version)
- 1/2 teaspoon garlic powder
- 1/2 teaspoon onion powder
- 1/4 teaspoon salt
- 1/4 teaspoon freshly ground black pepper
- 1/4 cup olive oil
- 1 teaspoon dried oregano (or fresh if you have it)
- 1 tablespoon fresh lemon juice (optional, for extra brightness)
Step-by-Step Instructions
Step 1: Prepare the Pasta
Start by cooking the pasta according to the package directions. Bring a large pot of salted water to a boil and cook the pasta until it is al dente (firm to the bite, but not hard). After draining the pasta, rinse it under cold water to stop the cooking process and cool it down quickly. Draining the pasta thoroughly is essential so that the salad doesn’t become soggy. Once it’s cooled, transfer the pasta to a large mixing bowl and set it aside.
Step 2: Prepare the Vegetables and Other Ingredients
While the pasta is cooking, prep the other ingredients. Dice the cucumber, red bell pepper, and green bell pepper. Cut the cherry tomatoes in half, and thinly slice the red onion. If you’re using olives, slice them up as well.
Chop the fresh basil into fine pieces, and toast the pine nuts or walnuts in a dry skillet over medium heat for about 2-3 minutes, just until they are golden brown and fragrant. Be sure to keep an eye on them, as nuts can burn quickly.
Shred the mozzarella cheese or prepare any other cheese you’re using. If you prefer a vegan version, consider using dairy-free mozzarella or another plant-based cheese option.
Step 3: Prepare the Dressing
In a small bowl, whisk together the mayonnaise, Greek yogurt, apple cider vinegar, Dijon mustard, honey, garlic powder, onion powder, salt, pepper, olive oil, oregano, and lemon juice (if using). Mix until smooth, and taste the dressing. Adjust seasoning as needed—add more honey for sweetness or more vinegar for tang. If the dressing is too thick, you can thin it with a tablespoon or two of water to achieve your desired consistency.
Step 4: Layer the Salad
Now, it’s time to start layering the salad. Begin with a layer of cooled pasta at the bottom of a large salad bowl or serving dish. Press it down slightly so that the dressing will coat the pasta evenly.
Next, layer the red bell peppers, green bell peppers, and cherry tomatoes on top of the pasta. Then, add the cucumber, followed by the red onion and olives (if using). Sprinkle the shredded mozzarella cheese evenly over the top of the vegetables, and garnish with fresh basil and toasted pine nuts or walnuts.
Step 5: Add the Dressing
Drizzle the prepared dressing over the entire salad, ensuring it gets distributed evenly across the layers. Using a large spoon or spatula, gently toss the salad to combine the layers. Be sure to mix the salad without disturbing the layers too much, as the visual effect is part of the beauty of the dish.
Step 6: Chill and Serve
Cover the salad with plastic wrap or a lid and place it in the refrigerator for at least 30 minutes to an hour. This gives the dressing time to penetrate the pasta and vegetables, making the salad even more flavorful. You can prepare the salad a day in advance if you prefer, as it will hold up well in the fridge.
Before serving, give the salad a quick toss again to ensure the dressing is evenly distributed. Add a few more toasted nuts or fresh herbs for garnish, if desired, and serve chilled or at room temperature.
How to Serve
- Holiday Main Course Side Dish: The Layered Christmas Pasta Salad makes a wonderful complement to roasted meats, such as turkey, ham, or prime rib. It balances well with heavier holiday dishes like mashed potatoes or stuffing.
- Potluck Dish: This salad is perfect for bringing to a potluck or holiday gathering. It’s easy to transport, and its layered presentation will wow your guests. Just make sure to chill it until you’re ready to serve.
- Vegetarian Option: While this salad is already vegetarian, you can make it a vegan option by swapping out the dairy ingredients (like the mayo and yogurt) for plant-based alternatives.
- Make it a Main Course: To turn this into a more substantial meal, consider adding some protein. Grilled chicken, shrimp, or even chickpeas or beans will make this salad a more filling option for lunch or dinner.
Additional Tips and Variations
- Make it Gluten-Free: For a gluten-free version, simply swap out the pasta for your favorite gluten-free variety. Brown rice pasta or quinoa pasta would work wonderfully here.
- Add More Veggies: You can always add more veggies to this salad to suit your preferences. Shredded carrots, spinach, or even roasted vegetables like butternut squash or Brussels sprouts would all be delicious additions.
- Change Up the Cheese: While mozzarella is the classic choice, you can use feta cheese for a tangy twist or even parmesan for a sharp, savory flavor.
- Make it Creamier: For an extra creamy texture, add a little extra yogurt or sour cream to the dressing.
- Swap the Nuts: If you prefer a different kind of nut, feel free to swap the pine nuts or walnuts for pecans, almonds, or even cashews.
Storage and Leftovers
The Layered Christmas Pasta Salad stores well in the refrigerator for up to 3 days. Just keep it tightly covered. As it sits, the flavors will continue to meld, making the salad even tastier after a day or two. If you need to store leftovers, you can also add a little extra dressing before serving to refresh the salad and prevent it from drying out.
Conclusion
This Layered Christmas Pasta Salad is more than just a dish—it’s a festive centerpiece for your holiday meals. With its vibrant colors, fresh ingredients, and creamy dressing, it brings a sense of joy and indulgence to your table. Whether served at a holiday dinner, as a potluck contribution, or even as a make-ahead meal for busy days, it’s bound to become a beloved recipe in your holiday repertoire.
The combination of crunchy vegetables, creamy pasta, and a tangy dressing offers a flavor-packed bite in every forkful. So, why not treat your guests to a gorgeous salad that’s as delicious as it is beautiful? Try it out this holiday season—you’ll be amazed at how quickly it becomes a new favorite!
Print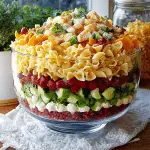
Layered Christmas Pasta Salad: A Festive and Flavorful Holiday Dish
- Total Time: 45 minutes
Description
A festive and vibrant dish perfect for holiday gatherings, the Layered Christmas Pasta Salad is a colorful mix of perfectly cooked pasta, fresh veggies, and a tangy dressing. The layers of red peppers, green cucumbers, and creamy cheese create a beautiful visual appeal, while each bite offers a burst of flavors. The salad is topped with holiday-inspired touches like cranberries or pomegranate seeds, adding a pop of color and a touch of sweetness. Customizable to suit any taste, this salad is a refreshing and flavorful addition to your Christmas spread. It’s make-ahead friendly, easy to assemble, and sure to be a crowd-pleaser!
Ingredients
For the Salad:
- 1 pound (450g) pasta (rotini, fusilli, or penne work well for layering)
- 1 cup cherry tomatoes, halved (for a pop of red)
- 1 cup cucumber, diced (for crunch and freshness)
- 1/2 cup red bell pepper, diced (adds color and sweetness)
- 1/2 cup green bell pepper, diced (for a crisp contrast)
- 1 cup shredded mozzarella cheese (or vegan cheese for a dairy-free option)
- 1/2 cup red onion, thinly sliced (for sharpness and bite)
- 1/2 cup pitted olives, sliced (optional, but they add a lovely briny flavor)
- 1/4 cup fresh basil, chopped (adds a fresh, aromatic element)
- 1/4 cup roasted pine nuts or walnuts (for extra texture and flavor)
For the Dressing:
- 1/2 cup mayonnaise (or a vegan alternative like avocado mayo)
- 1/4 cup Greek yogurt (or coconut yogurt for dairy-free)
- 2 tablespoons apple cider vinegar
- 1 tablespoon Dijon mustard
- 1 tablespoon honey (or maple syrup for a vegan version)
- 1/2 teaspoon garlic powder
- 1/2 teaspoon onion powder
- 1/4 teaspoon salt
- 1/4 teaspoon freshly ground black pepper
- 1/4 cup olive oil
- 1 teaspoon dried oregano (or fresh if you have it)
- 1 tablespoon fresh lemon juice (optional, for extra brightness)
Instructions
Step 1: Prepare the Pasta
Start by cooking the pasta according to the package directions. Bring a large pot of salted water to a boil and cook the pasta until it is al dente (firm to the bite, but not hard). After draining the pasta, rinse it under cold water to stop the cooking process and cool it down quickly. Draining the pasta thoroughly is essential so that the salad doesn’t become soggy. Once it’s cooled, transfer the pasta to a large mixing bowl and set it aside.
Step 2: Prepare the Vegetables and Other Ingredients
While the pasta is cooking, prep the other ingredients. Dice the cucumber, red bell pepper, and green bell pepper. Cut the cherry tomatoes in half, and thinly slice the red onion. If you’re using olives, slice them up as well.
Chop the fresh basil into fine pieces, and toast the pine nuts or walnuts in a dry skillet over medium heat for about 2-3 minutes, just until they are golden brown and fragrant. Be sure to keep an eye on them, as nuts can burn quickly.
Shred the mozzarella cheese or prepare any other cheese you’re using. If you prefer a vegan version, consider using dairy-free mozzarella or another plant-based cheese option.
Step 3: Prepare the Dressing
In a small bowl, whisk together the mayonnaise, Greek yogurt, apple cider vinegar, Dijon mustard, honey, garlic powder, onion powder, salt, pepper, olive oil, oregano, and lemon juice (if using). Mix until smooth, and taste the dressing. Adjust seasoning as needed—add more honey for sweetness or more vinegar for tang. If the dressing is too thick, you can thin it with a tablespoon or two of water to achieve your desired consistency.
Step 4: Layer the Salad
Now, it’s time to start layering the salad. Begin with a layer of cooled pasta at the bottom of a large salad bowl or serving dish. Press it down slightly so that the dressing will coat the pasta evenly.
Next, layer the red bell peppers, green bell peppers, and cherry tomatoes on top of the pasta. Then, add the cucumber, followed by the red onion and olives (if using). Sprinkle the shredded mozzarella cheese evenly over the top of the vegetables, and garnish with fresh basil and toasted pine nuts or walnuts.
Step 5: Add the Dressing
Drizzle the prepared dressing over the entire salad, ensuring it gets distributed evenly across the layers. Using a large spoon or spatula, gently toss the salad to combine the layers. Be sure to mix the salad without disturbing the layers too much, as the visual effect is part of the beauty of the dish.
Step 6: Chill and Serve
Cover the salad with plastic wrap or a lid and place it in the refrigerator for at least 30 minutes to an hour. This gives the dressing time to penetrate the pasta and vegetables, making the salad even more flavorful. You can prepare the salad a day in advance if you prefer, as it will hold up well in the fridge.
Before serving, give the salad a quick toss again to ensure the dressing is evenly distributed. Add a few more toasted nuts or fresh herbs for garnish, if desired, and serve chilled or at room temperature.
- Prep Time: 15 minutes
- Chilling Time: 30 minutes
Nutrition
- Calories: 250 kcal
- Fat: 12g
- Carbohydrates: 35g
- Protein: 8g

