Introduction
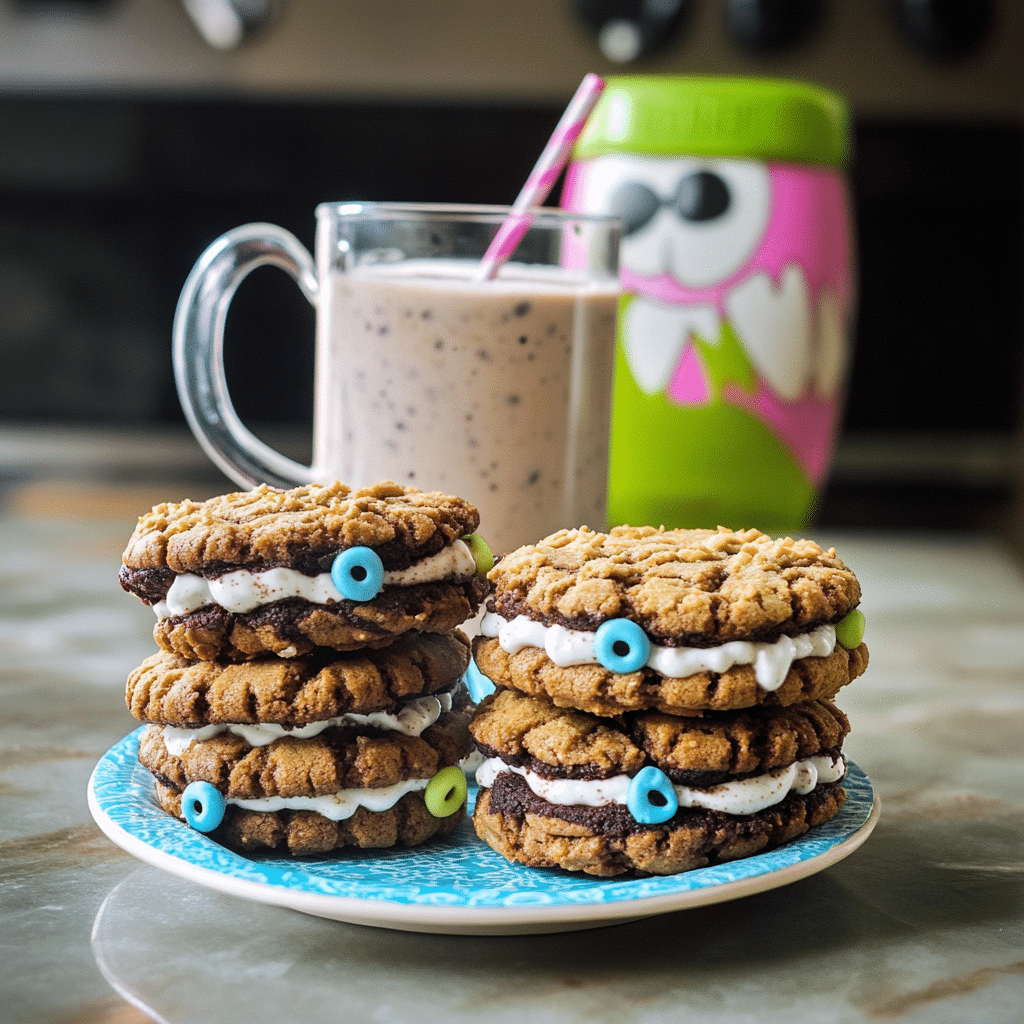
Okay, friends, if there’s one treat that’s sure to make your Halloween celebration unforgettable, it’s these Monster Milk and Cookie Sandwiches! Picture this: soft, chewy cookies sandwiched around creamy, colorful “monster milk” that’s just begging to be devoured. It’s the ultimate sweet treat that’s not only fun to eat but also a blast to make, especially with little helpers in the kitchen.
What makes this recipe special is the combination of classic flavors with a spooky twist. The cookies are perfectly soft, loaded with chocolate chips, and the monster milk is a delightful concoction of sweet creaminess with vibrant colors and flavors. It’s perfect for those busy weeknights when you want to whip up something special for your family or for a Halloween gathering that’ll impress everyone, big and small.
I first discovered this fun idea during a Halloween party at my friend’s house a few years ago. We had all gathered for some spooky treats, and when I saw the kids squealing over these cookie sandwiches, I knew I had to recreate them. Now, it’s a tradition in my household, and every October, we make them together. Watching the kids get creative with the colors and toppings brings me so much joy!
Why You’ll Love This Recipe
- Super Easy: With just a few simple ingredients, you can whip up these delicious cookies and monster milk in no time. Seriously, if you can mix and scoop, you can make this!
- Fun for the Family: This recipe is perfect for getting kids involved in the kitchen. They’ll love assembling the sandwiches and decorating their monster milk.
- Deliciously Versatile: You can customize the cookies and monster milk to your taste! Add in your favorite chocolate, sprinkle in some festive candies, or experiment with different flavors of milk.
Imagine biting into a warm cookie filled with gooey chocolate chips, then washing it down with a sip of sweet, colorful monster milk—it’s pure bliss! Plus, the vibrant colors and whimsical presentation make it a showstopper for any Halloween party.
Preparation Time and Servings
- Total Time: 1 hour (30 minutes prep, 30 minutes baking)
- Servings: 12-16 cookie sandwiches
- Calories per serving: Approximately 300
Ingredients
Here’s what you’ll need to make these delicious Monster Milk and Cookie Sandwiches:
For the Cookies:
- 2 ½ cups all-purpose flour: This is the base for your cookies, giving them that perfect chewy texture.
- 1 teaspoon baking soda: Helps the cookies rise and become soft and fluffy.
- ½ teaspoon salt: Balances out the sweetness and enhances the flavors.
- 1 cup unsalted butter, softened: Adds richness and creates that melt-in-your-mouth cookie texture.
- 1 cup granulated sugar: For sweetness and a lovely golden color.
- 1 cup brown sugar, packed: Adds moisture and a hint of caramel flavor.
- 2 large eggs: Binds the ingredients together and adds richness.
- 2 teaspoons vanilla extract: For that classic cookie flavor.
- 2 cups chocolate chips: The star of the show! Use semi-sweet, milk chocolate, or even fun-colored candies for a festive touch.
For the Monster Milk:
- 2 cups whole milk (or your favorite milk alternative): The creamy base for your monster milk.
- ½ cup heavy cream: Makes the milk extra rich and delicious.
- ¼ cup powdered sugar: For sweetness.
- 1 teaspoon vanilla extract: Adds flavor to the milk.
- Food coloring: Get creative! Use blue, green, or purple for your monster milk.
- Whipped cream (optional): For a fun topping.
For Decoration:
- Sprinkles and candies: Use Halloween-themed sprinkles, gummy worms, or chocolate eyeballs to make your monster milk even more festive!
Step-by-Step Instructions
Let’s get baking! Don’t worry if you’re new to this; I’ll guide you through each step with helpful tips to keep you confident in the kitchen.
Step 1: Preheat the Oven
- Preheat your oven to 350°F (175°C). This will ensure your cookies bake evenly.
Step 2: Prepare the Baking Sheets
- Line two baking sheets with parchment paper or silicone baking mats. This makes for easy cleanup and prevents sticking.
Step 3: Mix the Dry Ingredients
- In a medium bowl, whisk together the flour, baking soda, and salt. This helps to evenly distribute the leavening agent throughout the cookies.
Step 4: Cream the Butter and Sugars
- In a large mixing bowl, cream the softened butter, granulated sugar, and brown sugar until light and fluffy. This should take about 2-3 minutes with a hand mixer or stand mixer.
Step 5: Add the Eggs and Vanilla
- Beat in the eggs, one at a time, mixing well after each addition. Then, add the vanilla extract and mix until combined.
Step 6: Combine Wet and Dry Ingredients
- Gradually add the dry mixture to the wet mixture, mixing just until combined. Be careful not to overmix; this keeps your cookies soft and tender.
Step 7: Fold in the Chocolate Chips
- Gently fold in the chocolate chips (and any other mix-ins you’d like!). If you’re feeling festive, toss in some fun Halloween candies for extra color.
Step 8: Scoop the Cookie Dough
- Using a cookie scoop or a tablespoon, drop rounded balls of dough onto the prepared baking sheets, spacing them about 2 inches apart.
Step 9: Bake the Cookies
- Bake for 10-12 minutes, or until the edges are golden and the centers are still soft. Don’t worry if they look slightly underbaked; they’ll firm up as they cool.
Step 10: Cool the Cookies
- Let the cookies cool on the baking sheet for about 5 minutes, then transfer them to a wire rack to cool completely.
Step 11: Make the Monster Milk
- While the cookies are cooling, let’s whip up the monster milk! In a medium bowl, whisk together the milk, heavy cream, powdered sugar, and vanilla extract until smooth.
Step 12: Add the Color
- Divide the milk into separate containers if you want multiple colors. Add a few drops of food coloring to each container and stir until you achieve your desired shades. Get creative—mix colors for a fun effect!
Step 13: Serve the Milk
- Pour the colorful monster milk into tall glasses. Top with whipped cream, if using, and sprinkle with fun decorations like sprinkles or gummy worms.
Step 14: Assemble the Cookie Sandwiches
- Take two cookies and spread a generous amount of monster milk mixture (you can also use whipped cream or frosting) in between. Gently press them together to form a sandwich.
Step 15: Get Creative!
- Decorate the edges of the cookie sandwiches with more sprinkles or candies for that extra festive flair!
How to Serve
- Serve with a tall glass of monster milk for a fun pairing.
- Garnish with extra sprinkles or whipped cream on top of the milk for added festivity.
- Pair with a spooky movie night for the perfect Halloween vibe!
Additional Tips
- Room Temperature Ingredients: Make sure your butter and eggs are at room temperature for the best mixing results.
- Don’t Overmix: When combining the dry and wet ingredients, mix just until combined. This will ensure a tender cookie.
- Customize Your Cookies: Feel free to add nuts, dried fruits, or your favorite candies to the cookie dough for extra flavor and texture.
- Chill the Dough: If you have time, chill the cookie dough for 30 minutes before baking. This helps the cookies keep their shape and makes them even chewier.
- Decorating Fun: Let the kids help decorate the monster milk! They’ll love choosing their favorite toppings and colors.
Recipe Variations
- Chocolate Monster Milk: Add cocoa powder to the milk mixture for a chocolatey twist! This is perfect for chocolate lovers.
- Cookie Variations: Swap half of the chocolate chips for butterscotch or white chocolate chips for a fun flavor combo.
- Nut-Free Option: For those with allergies, ensure that any added candies are nut-free and choose a safe milk alternative.
Serving Suggestions
- Side Dishes: Serve with fresh fruit like apple slices or strawberries for a refreshing contrast to the sweet treats.
- Festive Drinks: Pair the monster milk with a fun Halloween punch or sparkling cider to keep the party going.
- For Kids: Consider serving the cookies and monster milk on fun Halloween-themed plates to make it extra special!
Freezing and Storage
Storage
- Store leftover cookies in an airtight container at room temperature for up to 3 days. If you have leftover monster milk, keep it in the fridge for 1-2 days.
Freezing
- To freeze the cookies, place them in a single layer on a baking sheet until solid, then transfer them to a freezer-safe bag. They’ll keep for up to 3 months. Thaw them at room temperature when you’re ready to enjoy!
Special Equipment
- Mixing Bowls: A good set of mixing bowls in various sizes is essential for organizing your ingredients.
- Cookie Scoop: This makes it easy to portion out your cookie dough evenly.
- Tall Glasses: For serving the monster milk and making it look extra festive!
FAQ Section
**Can I use margarine
instead of butter?**
Yes, but the flavor and texture might be slightly different. Butter gives a richer taste and better texture.
What if I can’t find Halloween sprinkles?
No problem! Use any colorful sprinkles you have, or even chop up some candies for a fun touch.
Can I make this recipe ahead of time?
Absolutely! You can make the cookies in advance and freeze them. Just assemble the sandwiches right before serving.
What’s the best way to store the monster milk?
Keep it in an airtight container in the fridge. Give it a good shake before serving again!
Can I make a gluten-free version?
Yes! You can substitute the all-purpose flour with a gluten-free flour blend to make these cookies gluten-free.
Conclusion
There you have it, folks! Monster Milk and Cookie Sandwiches are not only a delight to eat, but they’re also a fantastic way to get creative in the kitchen with your family. I can’t wait for you to try making these fun treats! Remember to snap a photo and tag me on Instagram; I love seeing how your creations turn out! Happy Halloween and happy baking!
Print
Monster Milk and Cookie Sandwiches: A Spooktacular Treat
- Total Time: 1 hour
Ingredients
For the Cookies:
- 2 ½ cups all-purpose flour: This is the base for your cookies, giving them that perfect chewy texture.
- 1 teaspoon baking soda: Helps the cookies rise and become soft and fluffy.
- ½ teaspoon salt: Balances out the sweetness and enhances the flavors.
- 1 cup unsalted butter, softened: Adds richness and creates that melt-in-your-mouth cookie texture.
- 1 cup granulated sugar: For sweetness and a lovely golden color.
- 1 cup brown sugar, packed: Adds moisture and a hint of caramel flavor.
- 2 large eggs: Binds the ingredients together and adds richness.
- 2 teaspoons vanilla extract: For that classic cookie flavor.
- 2 cups chocolate chips: The star of the show! Use semi-sweet, milk chocolate, or even fun-colored candies for a festive touch.
For the Monster Milk:
- 2 cups whole milk (or your favorite milk alternative): The creamy base for your monster milk.
- ½ cup heavy cream: Makes the milk extra rich and delicious.
- ¼ cup powdered sugar: For sweetness.
- 1 teaspoon vanilla extract: Adds flavor to the milk.
- Food coloring: Get creative! Use blue, green, or purple for your monster milk.
- Whipped cream (optional): For a fun topping.
For Decoration:
- Sprinkles and candies: Use Halloween-themed sprinkles, gummy worms, or chocolate eyeballs to make your monster milk even more festive!
Instructions
Step 1: Preheat the Oven
- Preheat your oven to 350°F (175°C). This will ensure your cookies bake evenly.
Step 2: Prepare the Baking Sheets
- Line two baking sheets with parchment paper or silicone baking mats. This makes for easy cleanup and prevents sticking.
Step 3: Mix the Dry Ingredients
- In a medium bowl, whisk together the flour, baking soda, and salt. This helps to evenly distribute the leavening agent throughout the cookies.
Step 4: Cream the Butter and Sugars
- In a large mixing bowl, cream the softened butter, granulated sugar, and brown sugar until light and fluffy. This should take about 2-3 minutes with a hand mixer or stand mixer.
Step 5: Add the Eggs and Vanilla
- Beat in the eggs, one at a time, mixing well after each addition. Then, add the vanilla extract and mix until combined.
Step 6: Combine Wet and Dry Ingredients
- Gradually add the dry mixture to the wet mixture, mixing just until combined. Be careful not to overmix; this keeps your cookies soft and tender.
Step 7: Fold in the Chocolate Chips
- Gently fold in the chocolate chips (and any other mix-ins you’d like!). If you’re feeling festive, toss in some fun Halloween candies for extra color.
Step 8: Scoop the Cookie Dough
- Using a cookie scoop or a tablespoon, drop rounded balls of dough onto the prepared baking sheets, spacing them about 2 inches apart.
Step 9: Bake the Cookies
- Bake for 10-12 minutes, or until the edges are golden and the centers are still soft. Don’t worry if they look slightly underbaked; they’ll firm up as they cool.
Step 10: Cool the Cookies
- Let the cookies cool on the baking sheet for about 5 minutes, then transfer them to a wire rack to cool completely.
Step 11: Make the Monster Milk
- While the cookies are cooling, let’s whip up the monster milk! In a medium bowl, whisk together the milk, heavy cream, powdered sugar, and vanilla extract until smooth.
Step 12: Add the Color
- Divide the milk into separate containers if you want multiple colors. Add a few drops of food coloring to each container and stir until you achieve your desired shades. Get creative—mix colors for a fun effect!
Step 13: Serve the Milk
- Pour the colorful monster milk into tall glasses. Top with whipped cream, if using, and sprinkle with fun decorations like sprinkles or gummy worms.
Step 14: Assemble the Cookie Sandwiches
- Take two cookies and spread a generous amount of monster milk mixture (you can also use whipped cream or frosting) in between. Gently press them together to form a sandwich.
Step 15: Get Creative!
- Decorate the edges of the cookie sandwiches with more sprinkles or candies for that extra festive flair!
- Prep Time: 30 minutes
- Baking Time: 30 minutes
Nutrition
- Serving Size: Per Cookie Sandwiches
- Calories: 300 kcal

