Introduction
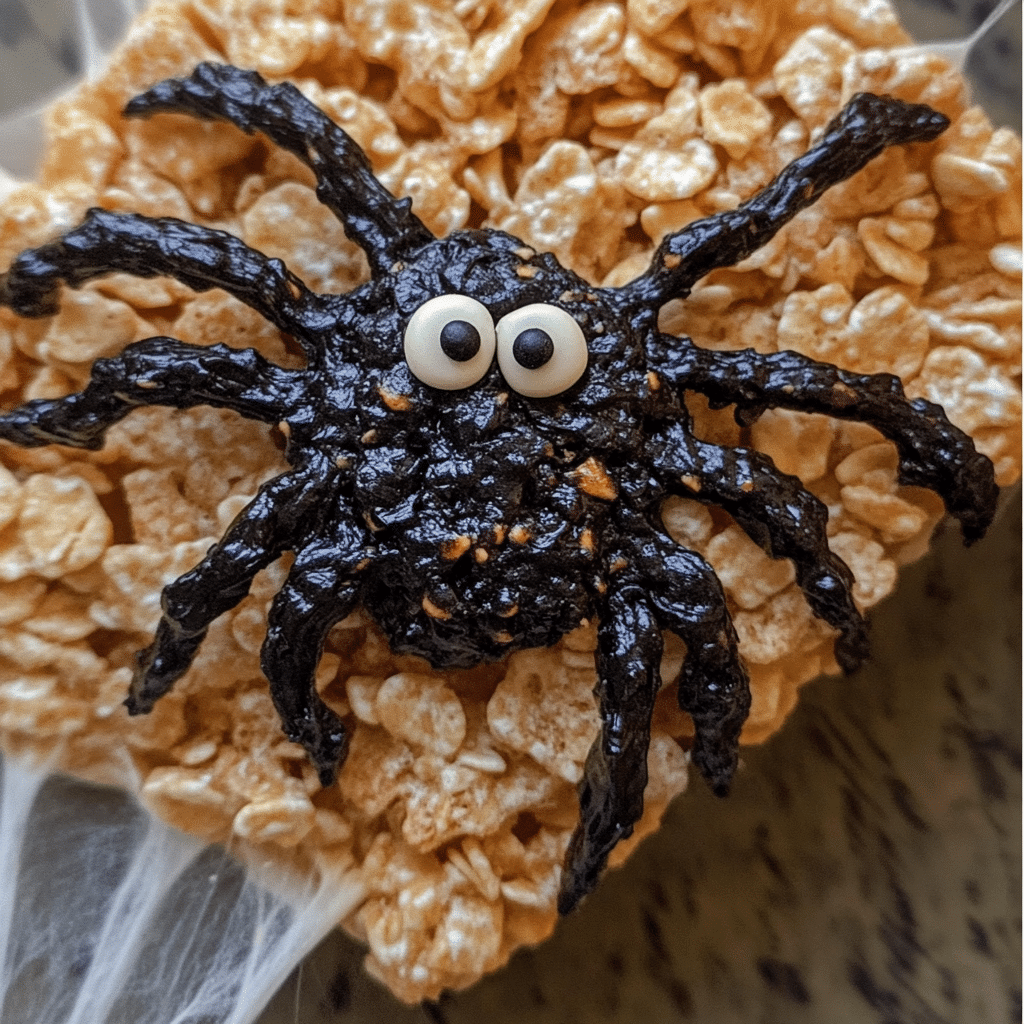
There’s something undeniably magical about Halloween, isn’t there? The crisp autumn air, the colorful leaves, and, of course, the chance to indulge in all sorts of spooky treats. One of my all-time favorites has to be these Spooky Spider Crispy Treats. They’re not just a blast to make; they also deliver that satisfying crunch and gooey sweetness that makes you feel like a kid again. Picture this: a chewy marshmallow and crispy rice cereal base, topped with rich chocolate and adorned with creepy little spider decorations. It’s a simple yet delightful treat that can brighten any Halloween gathering or family movie night.
I first discovered this recipe during a Halloween party at my best friend’s house back in college. We were on a quest to find the most creative snacks, and this one stood out among all the treats. We spent the evening in her kitchen, melting marshmallows, and laughing as we shaped the mixture into spooky shapes. Now, every Halloween, it’s a tradition to whip up a batch of these treats and reminisce about those fun times. They’re perfect for kids and adults alike, and trust me, you’ll want to share them with everyone!
Why You’ll Love This Recipe
- Easy to Make: If you’re new to the kitchen, fear not! This recipe requires minimal prep and cooking skills. Just melt, mix, and mold!
- Family-Friendly: Kids love them! These treats are a fantastic way to get everyone involved in the kitchen. Plus, they’re fun to decorate.
- Rich in Flavor: The gooey marshmallow pairs perfectly with the crispy rice, and the chocolate adds a luxurious touch. The slight saltiness of the butter balances out the sweetness beautifully.
- Versatile: You can customize the decorations and flavors. Want to make them extra spooky? Add more chocolate spiders or even a drizzle of colored candy melts!
Preparation Time and Servings
- Total Time: 30 minutes (10 minutes prep, 20 minutes cooling)
- Servings: About 12 large treats
- Calories per Serving: Approximately 180 calories per treat
Ingredients
To whip up these Spooky Spider Crispy Treats, you’ll need the following ingredients:
- 6 cups crispy rice cereal: The base of our treats; it adds that iconic crunch and texture.
- 1 bag (10 oz) mini marshmallows: These are the stars of the show, providing sweetness and chewiness.
- 3 tablespoons unsalted butter: For that rich, buttery flavor; it also helps the marshmallows melt smoothly.
- 1 cup semi-sweet chocolate chips: This will create the chocolate coating for our treats.
- Candy eyes: To give your spiders a cute (or creepy!) look.
- Black licorice or chocolate-covered pretzels: For the spider legs; you can use whatever you have on hand.
Step-by-Step Instructions
Step 1: Prepare Your Pan
First things first, grab a large baking dish (about 9×13 inches) and line it with parchment paper. This will prevent the treats from sticking and make cleanup a breeze. If you don’t have parchment paper, just give the dish a light spray with cooking spray.
Step 2: Melt the Marshmallows and Butter
In a large saucepan, melt the butter over low heat. Once it’s melted, add the mini marshmallows and stir constantly until they’re completely melted and smooth. This usually takes about 5-7 minutes. Don’t rush this step; low and slow is key here to prevent burning!
Step 3: Mix in the Cereal
Once the marshmallows are nice and gooey, remove the saucepan from the heat. Gradually add the crispy rice cereal, stirring gently until all the cereal is well-coated. Don’t worry if it feels a little sticky at first; this is normal!
Step 4: Shape the Treats
Transfer the mixture into your prepared baking dish. Using a spatula or your greased hands, press the mixture evenly into the pan. Aim for a thickness of about an inch. Let it cool for about 15-20 minutes.
Step 5: Cut into Shapes
Once cooled, lift the entire block of treats out of the pan using the parchment paper. Place it on a cutting board and use a sharp knife to cut it into squares or any shape you like. I usually go for squares, but Halloween-themed cookie cutters can make them even more fun!
Step 6: Melt the Chocolate
In a microwave-safe bowl, melt the chocolate chips in 30-second intervals, stirring in between until smooth. Be careful not to overheat, as chocolate can burn easily.
Step 7: Coat the Treats
Dip the top of each treat into the melted chocolate, ensuring it’s well-coated. Allow the excess chocolate to drip off before placing them back on the cutting board. If you want, you can also drizzle some chocolate over the treats for an extra decorative touch!
Step 8: Decorate with Spiders
Now comes the fun part! While the chocolate is still melted, attach candy eyes and use the black licorice or chocolate-covered pretzels to create spider legs. Get creative—there’s no wrong way to do this!
Step 9: Let Them Set
Allow the chocolate to set for about 10-15 minutes at room temperature or pop the treats in the fridge for quicker results. Once the chocolate is firm, they’re ready to devour!
How to Serve
- As a Halloween Party Snack: Place the treats on a festive platter and watch them disappear!
- For School Events: Individually wrap each treat in cellophane bags tied with a cute ribbon for a thoughtful touch.
- As a Movie Night Treat: Pair them with popcorn and your favorite Halloween movie for a cozy night in.
Additional Tips
- Use Fresh Ingredients: Make sure your marshmallows and chocolate are fresh for the best flavor and texture.
- Mix It Up: Feel free to swap out the chocolate for white chocolate or colored candy melts for a festive flair.
- Chill for Easier Cutting: If the treats are too sticky, pop them in the fridge for a few minutes before cutting for cleaner edges.
- Keep Them Soft: If you prefer softer treats, consider using slightly less cereal or a few more marshmallows.
- Involve the Kids: This is a great recipe for kids to help with! Let them shape and decorate their own treats.
Recipe Variations
- Chocolate Peanut Butter Crispy Treats: Mix in ½ cup of peanut butter with the melted marshmallows for a nutty twist.
- Halloween Colors: Use orange or purple food coloring in the marshmallow mixture for added festivity.
- Add Sprinkles: Top with Halloween-themed sprinkles along with the spiders for an extra pop of color.
- Nutty Crunch: Add chopped nuts or seeds for a delightful crunch and nutritional boost.
- Caramel Drizzle: Drizzle some caramel sauce on top for an extra layer of sweetness!
Serving Suggestions
To complement your Spooky Spider Crispy Treats, consider these side ideas:
- Apple Slices with Caramel Dip: A refreshing and healthy contrast to the sweetness of the treats.
- Hot Apple Cider or Pumpkin Spice Latte: Perfect for warming up on chilly Halloween evenings.
- Cheese Platter: A selection of cheeses can balance the sweetness with savory flavors.
- For Kids: Pair with juice boxes or fun Halloween-themed drinks.
Freezing and Storage
Storage
Store any leftover crispy treats in an airtight container at room temperature for up to 3 days. They’re best enjoyed fresh but can last a little longer if stored properly.
Freezing
If you want to make a big batch, freeze the uncoated treats in a single layer on a baking sheet until firm, then transfer them to a freezer-safe container. They’ll keep for up to 3 months. When you’re ready to enjoy them, just thaw and coat them in chocolate and decorate!
Special Equipment
- Large Baking Dish: For molding the crispy treat mixture.
- Parchment Paper: To line the baking dish for easy removal.
- Microwave-Safe Bowl: For melting the chocolate.
- Sharp Knife: For cutting the treats into squares or shapes.
- Cookie Cutters: If you want fun shapes!
FAQ Section
- Can I use any type of cereal?
Absolutely! While crispy rice cereal is traditional, feel free to experiment with other cereals like cornflakes or even fruity varieties. - How can I make these treats vegan?
Use vegan marshmallows and dairy-free chocolate chips for a delicious vegan alternative. - Can I make these gluten-free?
Yes! Ensure your rice cereal and any additional toppings are labeled gluten-free. - What if I don’t have black licorice?
You can substitute it with chocolate-covered pretzels, pipeable icing, or even gummy worms for a fun twist! - How can I prevent the chocolate from seizing?
Be sure to melt the chocolate at low heat and stir frequently. If it starts to clump, add a teaspoon of vegetable oil to help smooth it out. - What’s the best way to store leftovers?
Keep them in an airtight container to prevent them from getting stale or hard. - Can I make these ahead of time?
Definitely! You can prepare them a day or two in advance and store them until you’re ready to serve.
Conclusion
I can’t wait for you to try making these Spooky Spider Crispy Treats! They’re not just a hit at Halloween parties but also a fantastic way to create fun memories in the kitchen with family and friends. So grab your ingredients, gather the little ones, and get ready to whip up some deliciously creepy snacks! Don’t forget to snap a photo of your creations and tag me on Instagram—I love seeing how you bring this recipe to life! Happy Halloween!
Print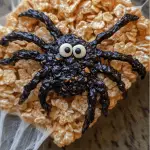
Spooky Spider Crispy Treats: A Fun and Festive Halloween Snack
- Total Time: 30 minutes
Ingredients
- 6 cups crispy rice cereal: The base of our treats; it adds that iconic crunch and texture.
- 1 bag (10 oz) mini marshmallows: These are the stars of the show, providing sweetness and chewiness.
- 3 tablespoons unsalted butter: For that rich, buttery flavor; it also helps the marshmallows melt smoothly.
- 1 cup semi-sweet chocolate chips: This will create the chocolate coating for our treats.
- Candy eyes: To give your spiders a cute (or creepy!) look.
- Black licorice or chocolate-covered pretzels: For the spider legs; you can use whatever you have on hand.
Instructions
Step 1: Prepare Your Pan
First things first, grab a large baking dish (about 9×13 inches) and line it with parchment paper. This will prevent the treats from sticking and make cleanup a breeze. If you don’t have parchment paper, just give the dish a light spray with cooking spray.
Step 2: Melt the Marshmallows and Butter
In a large saucepan, melt the butter over low heat. Once it’s melted, add the mini marshmallows and stir constantly until they’re completely melted and smooth. This usually takes about 5-7 minutes. Don’t rush this step; low and slow is key here to prevent burning!
Step 3: Mix in the Cereal
Once the marshmallows are nice and gooey, remove the saucepan from the heat. Gradually add the crispy rice cereal, stirring gently until all the cereal is well-coated. Don’t worry if it feels a little sticky at first; this is normal!
Step 4: Shape the Treats
Transfer the mixture into your prepared baking dish. Using a spatula or your greased hands, press the mixture evenly into the pan. Aim for a thickness of about an inch. Let it cool for about 15-20 minutes.
Step 5: Cut into Shapes
Once cooled, lift the entire block of treats out of the pan using the parchment paper. Place it on a cutting board and use a sharp knife to cut it into squares or any shape you like. I usually go for squares, but Halloween-themed cookie cutters can make them even more fun!
Step 6: Melt the Chocolate
In a microwave-safe bowl, melt the chocolate chips in 30-second intervals, stirring in between until smooth. Be careful not to overheat, as chocolate can burn easily.
Step 7: Coat the Treats
Dip the top of each treat into the melted chocolate, ensuring it’s well-coated. Allow the excess chocolate to drip off before placing them back on the cutting board. If you want, you can also drizzle some chocolate over the treats for an extra decorative touch!
Step 8: Decorate with Spiders
Now comes the fun part! While the chocolate is still melted, attach candy eyes and use the black licorice or chocolate-covered pretzels to create spider legs. Get creative—there’s no wrong way to do this!
Step 9: Let Them Set
Allow the chocolate to set for about 10-15 minutes at room temperature or pop the treats in the fridge for quicker results. Once the chocolate is firm, they’re ready to devour!
- Prep Time: 10 minutes
- Cook Time: 20 minutes
Nutrition
- Serving Size: Per treat
- Calories: 180 kcal

