Introduction
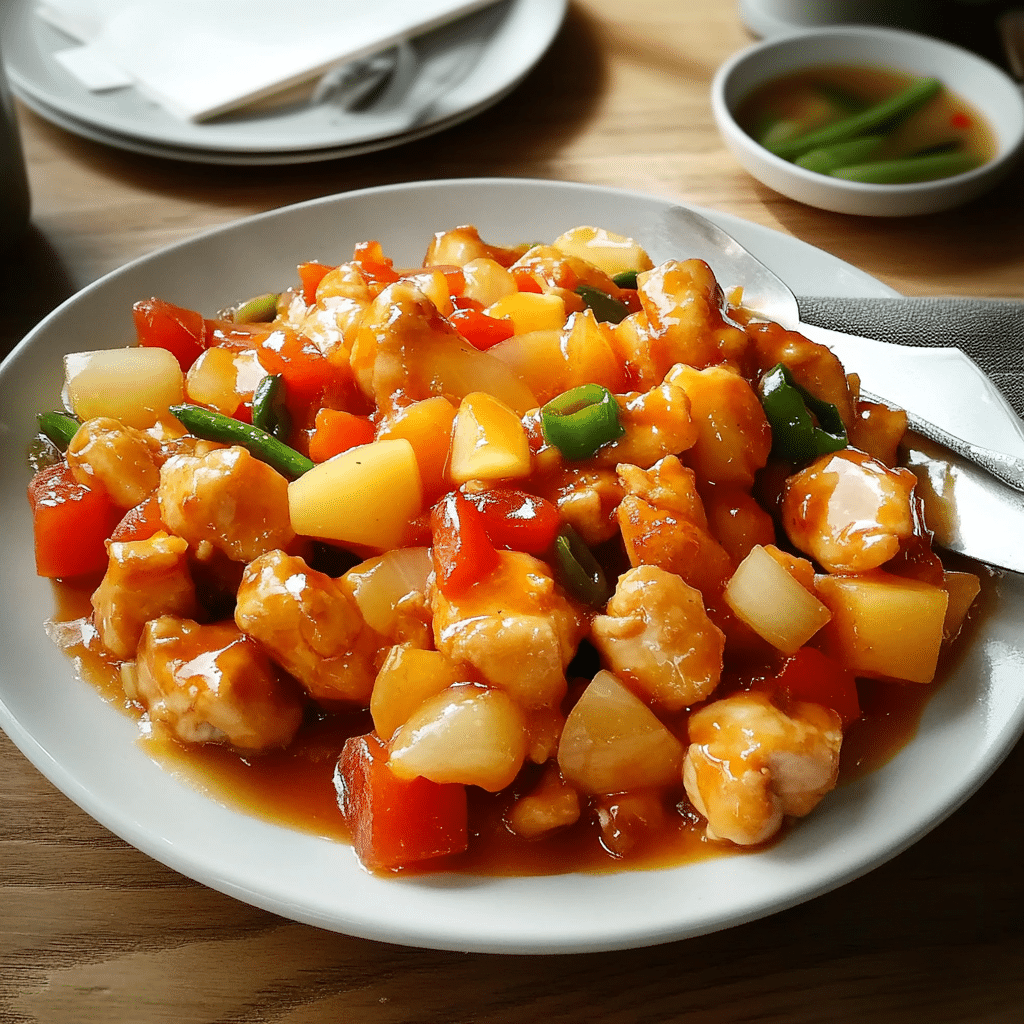
Sweet and Sour Chicken is a beloved dish that brings a perfect balance of tangy, sweet, and savory flavors to your plate. With its crispy chicken pieces, vibrant sauce, and a variety of vegetables, this dish offers a satisfying combination of textures and flavors that everyone will enjoy. Whether you’re craving a takeout-inspired dinner or want to impress your guests with an easy homemade recipe, Sweet and Sour Chicken is sure to become a favorite in your kitchen.
This recipe is incredibly versatile. You can customize it by adding your favorite vegetables, adjusting the level of sweetness or tanginess, and even choosing different protein options. It’s quick and simple to prepare, making it ideal for busy weeknights, family dinners, or when you’re hosting a casual gathering. With its bold flavors and colorful presentation, Sweet and Sour Chicken is not only delicious but also visually appealing, making it perfect for any occasion.
In this guide, we will walk you through the process of making Sweet and Sour Chicken, from preparing the chicken and vegetables to cooking and assembling the dish. You’ll also find helpful tips, variations, and suggestions for serving this crowd-pleasing dish.
Why You’ll Love Sweet and Sour Chicken
- Balanced Flavors: The perfect blend of tangy vinegar, sweet pineapple, and savory soy sauce makes the sauce irresistible. The crisp chicken perfectly complements the flavor-packed sauce.
- Quick and Easy: This recipe comes together in under an hour, with only a few simple ingredients required. It’s a great choice for busy nights or last-minute dinners.
- Customizable: You can adjust the sauce’s sweetness or tanginess, and swap in your preferred vegetables. You can even make it healthier by using air-fried chicken or baked chicken instead of frying.
- Healthy Options Available: By making the dish at home, you can control the ingredients, making it easier to make healthier substitutions if you prefer a lighter version.
- Great for Entertaining: Sweet and Sour Chicken is always a hit at parties and gatherings. The colorful presentation and irresistible taste will surely impress your guests.
Preparation and Cooking Time
- Total Time: 45 minutes
- Preparation Time: 15 minutes
- Cooking Time: 30 minutes
- Servings: 4 servings (about 1.5 cups per serving)
- Calories per Serving: Around 400-450 calories per serving, depending on ingredients and portion size.
Nutrition Facts (Per Serving)
- Calories: 400-450 kcal
- Fat: 20g
- Carbohydrates: 40g
- Protein: 20-25g
- Fiber: 3g
- Sugar: 25g
Ingredients
For the Chicken:
- 1 lb boneless, skinless chicken breasts or thighs, cut into bite-sized pieces
- ½ cup all-purpose flour (for dredging)
- 2 large eggs, beaten
- 1 cup cornstarch (for coating)
- ½ teaspoon salt
- ¼ teaspoon black pepper
- ½ cup vegetable oil (for frying)
For the Sweet and Sour Sauce:
- ¾ cup pineapple juice (from canned pineapple or fresh)
- ¼ cup apple cider vinegar
- ¼ cup sugar (or honey for a natural sweetener)
- ¼ cup ketchup
- 2 tablespoons soy sauce (low sodium recommended)
- 1 tablespoon cornstarch (for thickening)
- 1 teaspoon grated fresh ginger (optional, for extra flavor)
- 1 clove garlic, minced
- 1 teaspoon sesame oil (optional, for added depth)
Vegetables (Optional):
- 1 red bell pepper, sliced
- 1 yellow bell pepper, sliced
- 1 medium onion, sliced
- 1 cup pineapple chunks (fresh or canned)
- 1 carrot, sliced thinly (optional)
- ½ cup green onions, chopped (for garnish)
Step-by-Step Instructions
1. Prepare the Chicken
Start by preparing the chicken pieces. Cut the boneless, skinless chicken breasts or thighs into bite-sized cubes. Season the chicken lightly with salt and pepper. This will add some base flavor to the chicken before coating it in flour and cornstarch.
In a shallow bowl, place the flour, and in another bowl, beat the eggs. In a third bowl, place the cornstarch. Begin by dipping each piece of chicken into the flour, followed by the beaten eggs, and then into the cornstarch, ensuring each piece is well-coated. The cornstarch will create a light and crispy coating when fried.
2. Fry the Chicken
Heat the vegetable oil in a large skillet or wok over medium-high heat. You’ll need enough oil to coat the bottom of the pan. Once the oil is hot, carefully place the coated chicken pieces into the oil, making sure not to overcrowd the pan. Fry the chicken in batches if necessary.
Cook the chicken for 3-4 minutes per side, or until golden brown and crispy. The chicken should be fully cooked through and no longer pink inside. Use a slotted spoon or tongs to remove the fried chicken from the oil and set it on a paper towel-lined plate to drain excess oil.
3. Prepare the Sweet and Sour Sauce
While the chicken is frying, prepare the sweet and sour sauce. In a medium saucepan, combine the pineapple juice, apple cider vinegar, sugar, ketchup, soy sauce, and cornstarch. Stir the mixture until the cornstarch is fully dissolved.
Place the saucepan over medium heat and bring the sauce to a simmer, stirring constantly. As it heats up, the sauce will begin to thicken. Once the sauce has reached your desired thickness, remove it from the heat and set it aside.
For an extra layer of flavor, you can add freshly grated ginger and minced garlic to the sauce while it simmers. These ingredients will infuse the sauce with a pleasant aromatic flavor that complements the sweetness and tanginess.
4. Sauté the Vegetables (Optional)
If you’re using vegetables, now is the time to sauté them. In the same skillet or wok you used to fry the chicken, add a little more vegetable oil and heat it over medium heat. Add the sliced bell peppers, onion, and carrot (if using) to the pan and sauté for 3-4 minutes, or until the vegetables are tender-crisp. You want the vegetables to retain some crunch for texture in the final dish.
Once the vegetables are cooked, add the pineapple chunks and sauté for another 2-3 minutes, allowing the pineapple to warm up and caramelize slightly.
5. Combine the Chicken and Sauce
Now it’s time to bring everything together. Add the fried chicken pieces to the pan with the vegetables. Pour the sweet and sour sauce over the chicken and vegetables, making sure everything is well-coated in the sauce. Stir gently to combine, and cook for an additional 2-3 minutes to allow the flavors to meld together.
If you prefer a saucier dish, you can add a bit more pineapple juice or water to thin out the sauce. If you like your sauce thicker, simply let it cook for another minute or two until it reaches the desired consistency.
6. Serve the Sweet and Sour Chicken
Once the chicken is coated in the sweet and sour sauce and the vegetables are tender, it’s time to serve. Spoon the Sweet and Sour Chicken onto a serving platter or individual plates. Garnish with chopped green onions for a pop of color and freshness. You can also serve the dish with a sprinkle of sesame seeds for extra crunch and flavor.
Tips for Perfect Sweet and Sour Chicken
- Coating the Chicken: Make sure to coat the chicken thoroughly in the cornstarch to get that crispy texture. You can also double-coat the chicken by dipping it back in the egg and cornstarch for an even crispier result.
- Frying the Chicken: Avoid overcrowding the pan when frying the chicken. Fry the chicken in batches if necessary to ensure even cooking and a crispy coating.
- Adjusting the Sauce: If you prefer a sweeter sauce, add a bit more sugar or honey. For a tangier sauce, increase the vinegar or add a splash of lime juice. Experiment with the sauce to match your taste preferences.
- Make Ahead: You can prepare the chicken and sauce separately ahead of time. Fry the chicken and store it in an airtight container in the fridge for up to 1 day. The sauce can be stored in the fridge for up to 3 days. When ready to serve, simply reheat the chicken and sauce, and combine them with the sautéed vegetables.
- Gluten-Free Option: If you’re following a gluten-free diet, you can substitute the all-purpose flour with a gluten-free flour blend, and use tamari or coconut aminos instead of soy sauce for a gluten-free version of Sweet and Sour Chicken.
Variations of Sweet and Sour Chicken
- Sweet and Sour Shrimp: Swap out the chicken for shrimp to create a lighter version of the dish. Shrimp cooks quickly and works wonderfully with the sweet and sour sauce.
- Baked Sweet and Sour Chicken: For a healthier version, bake the chicken instead of frying it. Coat the chicken pieces in cornstarch and bake them on a parchment-lined baking sheet at 400°F for 15-20 minutes, or until golden and crispy.
- Vegetarian Sweet and Sour: Replace the chicken with tofu, tempeh, or a variety of vegetables like mushrooms, zucchini, or broccoli for a vegetarian version of Sweet and Sour Chicken.
- Crispy Sweet and Sour Cauliflower: For a plant-based option, try using battered cauliflower florets in place of chicken. Coat the cauliflower in cornstarch and fry or bake it, then toss with the sweet and sour sauce for a crispy, vegetarian twist.
Storage and Shelf Life
Sweet and Sour Chicken can be stored in an airtight container in the fridge for up to 3 days. To reheat, simply microwave the dish or warm it on the stovetop. If you have leftover chicken but no sauce, you can easily make more sauce and combine it with the chicken for a quick meal.
Suggested Sides for Sweet and Sour Chicken
Sweet and Sour Chicken pairs wonderfully with a variety of sides. Here are some great options to complete your meal:
- Steamed Jasmine Rice: A fragrant, soft rice that perfectly complements the flavors of the Sweet and Sour Chicken.
- Fried Rice: For extra flavor and texture, make a simple fried rice with peas, carrots, and scrambled eggs.
- Asian-Inspired Noodles: Serve with lo mein or soba noodles for a satisfying carb addition.
- Egg Rolls or Spring Rolls: Crispy appetizers that pair perfectly with the sweet and savory flavors of Sweet and Sour Chicken.

Sweet and Sour Chicken Recipe
- Total Time: 45 minutes
Description
A deliciously tangy and sweet dish with crispy chicken pieces coated in a vibrant sweet and sour sauce. This recipe balances savory and sweet flavors, offering a perfect homemade version of a Chinese takeout classic.
Ingredients
For the Chicken:
- 1 lb boneless, skinless chicken breasts or thighs, cut into bite-sized pieces
- ½ cup all-purpose flour (for dredging)
- 2 large eggs, beaten
- 1 cup cornstarch (for coating)
- ½ teaspoon salt
- ¼ teaspoon black pepper
- ½ cup vegetable oil (for frying)
For the Sweet and Sour Sauce:
- ¾ cup pineapple juice (from canned pineapple or fresh)
- ¼ cup apple cider vinegar
- ¼ cup sugar (or honey for a natural sweetener)
- ¼ cup ketchup
- 2 tablespoons soy sauce (low sodium recommended)
- 1 tablespoon cornstarch (for thickening)
- 1 teaspoon grated fresh ginger (optional, for extra flavor)
- 1 clove garlic, minced
- 1 teaspoon sesame oil (optional, for added depth)
For the Vegetables (Optional):
- 1 red bell pepper, sliced
- 1 yellow bell pepper, sliced
- 1 medium onion, sliced
- 1 cup pineapple chunks (fresh or canned)
- 1 carrot, sliced thinly (optional)
- ½ cup green onions, chopped (for garnish)
Instructions
1. Prepare the Chicken
Start by preparing the chicken pieces. Cut the boneless, skinless chicken breasts or thighs into bite-sized cubes. Season the chicken lightly with salt and pepper. This will add some base flavor to the chicken before coating it in flour and cornstarch.
In a shallow bowl, place the flour, and in another bowl, beat the eggs. In a third bowl, place the cornstarch. Begin by dipping each piece of chicken into the flour, followed by the beaten eggs, and then into the cornstarch, ensuring each piece is well-coated. The cornstarch will create a light and crispy coating when fried.
2. Fry the Chicken
Heat the vegetable oil in a large skillet or wok over medium-high heat. You’ll need enough oil to coat the bottom of the pan. Once the oil is hot, carefully place the coated chicken pieces into the oil, making sure not to overcrowd the pan. Fry the chicken in batches if necessary.
Cook the chicken for 3-4 minutes per side, or until golden brown and crispy. The chicken should be fully cooked through and no longer pink inside. Use a slotted spoon or tongs to remove the fried chicken from the oil and set it on a paper towel-lined plate to drain excess oil.
3. Prepare the Sweet and Sour Sauce
While the chicken is frying, prepare the sweet and sour sauce. In a medium saucepan, combine the pineapple juice, apple cider vinegar, sugar, ketchup, soy sauce, and cornstarch. Stir the mixture until the cornstarch is fully dissolved.
Place the saucepan over medium heat and bring the sauce to a simmer, stirring constantly. As it heats up, the sauce will begin to thicken. Once the sauce has reached your desired thickness, remove it from the heat and set it aside.
For an extra layer of flavor, you can add freshly grated ginger and minced garlic to the sauce while it simmers. These ingredients will infuse the sauce with a pleasant aromatic flavor that complements the sweetness and tanginess.
4. Sauté the Vegetables (Optional)
If you’re using vegetables, now is the time to sauté them. In the same skillet or wok you used to fry the chicken, add a little more vegetable oil and heat it over medium heat. Add the sliced bell peppers, onion, and carrot (if using) to the pan and sauté for 3-4 minutes, or until the vegetables are tender-crisp. You want the vegetables to retain some crunch for texture in the final dish.
Once the vegetables are cooked, add the pineapple chunks and sauté for another 2-3 minutes, allowing the pineapple to warm up and caramelize slightly.
5. Combine the Chicken and Sauce
Now it’s time to bring everything together. Add the fried chicken pieces to the pan with the vegetables. Pour the sweet and sour sauce over the chicken and vegetables, making sure everything is well-coated in the sauce. Stir gently to combine, and cook for an additional 2-3 minutes to allow the flavors to meld together.
If you prefer a saucier dish, you can add a bit more pineapple juice or water to thin out the sauce. If you like your sauce thicker, simply let it cook for another minute or two until it reaches the desired consistency.
6. Serve the Sweet and Sour Chicken
Once the chicken is coated in the sweet and sour sauce and the vegetables are tender, it’s time to serve. Spoon the Sweet and Sour Chicken onto a serving platter or individual plates. Garnish with chopped green onions for a pop of color and freshness. You can also serve the dish with a sprinkle of sesame seeds for extra crunch and flavor.
- Prep Time: 15 minutes
- Cook Time: 30 minutes
Nutrition
- Calories: 400-500 kcal
- Fat: 20g
- Carbohydrates: 40g
- Protein: 20-25g
Conclusion
Sweet and Sour Chicken is a classic dish that combines crispy chicken, vibrant vegetables, and a tangy-sweet sauce that everyone will love. It’s quick to prepare, customizable to your preferences, and perfect for feeding a crowd or serving for a weeknight dinner. Whether you make it as a crispy fried dish or opt for a healthier baked version, this recipe is sure to impress.
With its balanced flavors, crisp texture, and colorful presentation, Sweet and Sour Chicken is a dish that brings comfort, excitement, and a burst of flavor to your table. Try this recipe today and enjoy a delicious homemade version of this popular dish that will leave everyone asking for seconds!


