Introduction
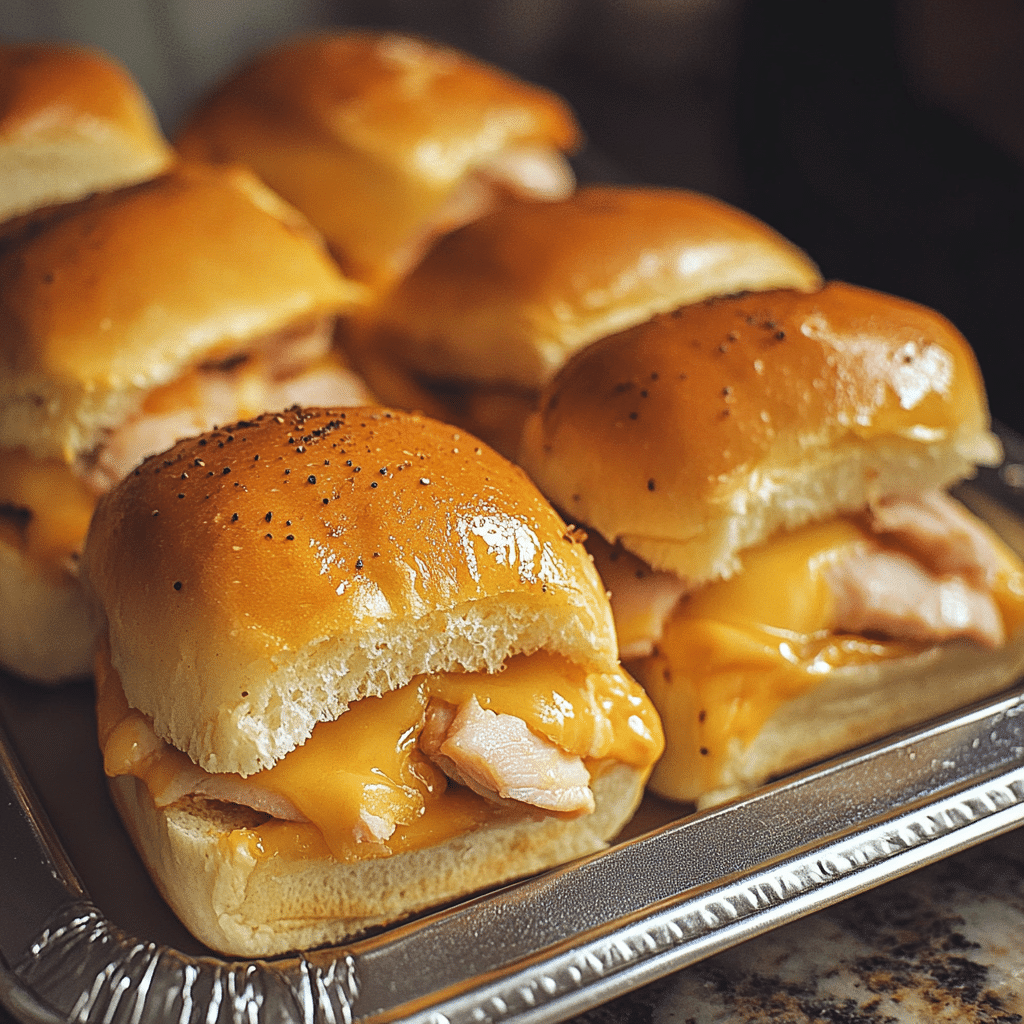
Turkey and Cheese Sliders are the perfect combination of savory turkey, melted cheese, and soft, buttery buns that are guaranteed to please a crowd. These bite-sized sandwiches are perfect for everything from casual gatherings to game days, family dinners, or even as a quick and easy meal. With their delicious flavor and simplicity, Turkey and Cheese Sliders offer the ultimate balance of comfort food with a touch of elegance. Whether served as an appetizer, a snack, or part of a main course, these sliders are a crowd-pleaser in every sense.
What makes Turkey and Cheese Sliders even more appealing is their versatility. You can add a variety of sauces, seasonings, or even veggies to customize them to suit your tastes. This recipe is straightforward to prepare, and the end result is a batch of warm, gooey sliders that everyone will love. Whether you’re hosting a party, preparing a simple family meal, or looking for a fun twist on the classic turkey sandwich, Turkey and Cheese Sliders are an ideal choice.
In this guide, you will find everything you need to know to make these irresistible sliders, including step-by-step instructions, helpful tips, and creative variations to make your sliders stand out. So, let’s dive into this flavorful and easy-to-make recipe that will quickly become a favorite at your table.
Why You’ll Love Turkey and Cheese Sliders
- Easy to Make: Turkey and Cheese Sliders are incredibly simple to prepare, requiring minimal ingredients and just a few easy steps. Whether you’re a beginner cook or a seasoned pro, this recipe is a breeze to follow.
- Perfect for Any Occasion: Whether it’s a casual weeknight dinner, a weekend get-together, or a party, these sliders are perfect for almost any occasion. Their bite-sized nature makes them ideal for finger food at social gatherings, while their comforting flavor makes them a hit at family meals.
- Deliciously Savory: The combination of savory turkey, melted cheese, and warm, soft buns creates a satisfying sandwich with just the right amount of flavor. The turkey is lean and delicious, the cheese is gooey and creamy, and the buns offer the perfect soft and fluffy base.
- Customizable: These sliders can easily be customized with different types of cheese, sauces, or vegetables to suit your preferences. Add pickles, lettuce, or tomatoes, or drizzle some mustard or mayonnaise for extra flavor. The possibilities are endless.
- Great for Feeding a Crowd: With their small size, Turkey and Cheese Sliders are perfect for serving a large group. You can easily scale the recipe up or down, depending on how many people you need to feed.
Preparation and Cooking Time
- Total Time: 45 minutes
- Preparation Time: 15 minutes
- Cooking Time: 25-30 minutes
- Servings: Approximately 12 sliders
- Calories per Serving: Around 150-200 calories per slider, depending on ingredients and portion sizes.
Nutrition Facts (Per Serving)
- Calories: 150-200 kcal
- Fat: 6-9g
- Carbohydrates: 15-20g
- Protein: 10-15g
- Fiber: 1g
- Sugar: 2-3g
Ingredients
For the Turkey and Cheese Sliders:
- 12 dinner rolls (such as Hawaiian rolls or soft slider buns)
- 1 lb deli sliced turkey breast
- 12 slices of cheese (Swiss, cheddar, or provolone are popular choices)
- 1/4 cup mayonnaise (optional)
- 1 tablespoon Dijon mustard (optional)
- 2 tablespoons butter, melted
- 1 teaspoon garlic powder
- 1 teaspoon onion powder
- 1/2 teaspoon dried thyme (optional)
- Salt and pepper, to taste
For Toppings (Optional):
- Pickles (sliced)
- Lettuce
- Tomatoes (sliced)
- Cranberry sauce (for a festive twist)
- Any additional condiments or seasonings as preferred
Step-by-Step Instructions
1. Prepare the Buns
Preheat your oven to 350°F (175°C). While the oven is warming up, you can begin preparing the buns. Start by slicing the dinner rolls in half, keeping the top and bottom halves connected to maintain the structure of the sliders. Depending on the type of rolls you use, you may be able to simply slice them as one large block and separate them after baking.
Arrange the bottom halves of the dinner rolls in a baking dish or on a baking sheet. If you’re using a 9×13-inch baking dish, this size is perfect for 12 sliders. Make sure the rolls are snug but not overcrowded.
2. Assemble the Turkey and Cheese Sliders
Spread a thin layer of mayonnaise on the cut sides of the bottom half of the buns. This is optional, but it helps add creaminess and a little extra flavor to each bite. You can also add Dijon mustard here for a tangy contrast, depending on your preference.
Next, layer the deli-sliced turkey evenly over the bottom half of the rolls. Be sure to cover the buns fully, so every slider has a good amount of turkey. Afterward, place a slice of cheese on top of the turkey. If you prefer more cheese, feel free to add an extra slice per slider.
Once your turkey and cheese layers are ready, place the top halves of the buns on top, pressing down gently to help them stick. This helps the ingredients stay in place while baking and gives the sliders that perfect sandwich shape.
3. Prepare the Butter Sauce
In a small bowl, combine the melted butter, garlic powder, onion powder, and dried thyme. Stir the ingredients together until well mixed. This butter sauce will be drizzled over the top of the sliders, adding flavor and a golden, crispy texture once baked.
You can also season the butter with a pinch of salt and pepper to taste. For those who like a little heat, a pinch of cayenne pepper or red pepper flakes can be added to give the sliders a slight kick.
4. Drizzle the Butter Sauce Over the Sliders
Pour the prepared butter sauce evenly over the top of the assembled sliders. Use a brush or the back of a spoon to ensure that the sauce covers the entire top of the rolls. The buttery coating will make the buns soft on the inside and crispy on the outside as they bake, adding extra flavor to every bite.
If you’re feeling a little adventurous, you can even sprinkle a bit of extra garlic powder or onion powder on top of the buns for additional seasoning.
5. Bake the Sliders
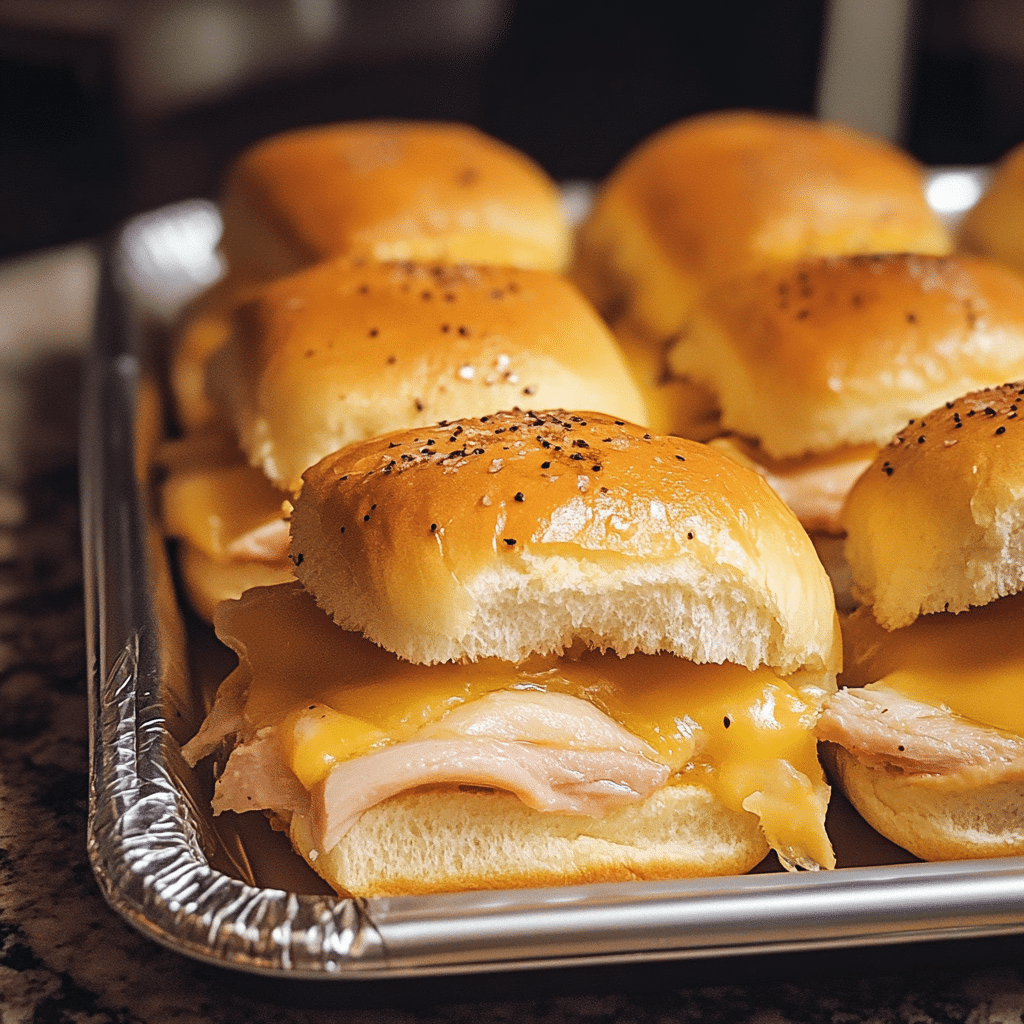
Place the baking dish with the sliders in the preheated oven. Bake for 25-30 minutes, or until the tops of the buns are golden brown and the cheese is melted and gooey. The sliders should be heated all the way through and slightly crispy on top.
If you prefer extra crispy sliders, you can broil them for the last 2-3 minutes, but keep an eye on them to prevent burning. You want the tops of the buns to be golden, not dark brown.
6. Serve and Enjoy
Once the sliders are done baking, remove them from the oven and let them sit for a few minutes. This helps the cheese firm up a bit, making the sliders easier to cut and serve.
Using a sharp knife, slice the sliders along the pre-cut lines, and serve immediately. You can serve the sliders on a platter, alongside your favorite dipping sauces or additional toppings like pickles or lettuce.
Tips for Perfect Turkey and Cheese Sliders
- Use Soft Rolls: For the best sliders, choose soft dinner rolls like Hawaiian rolls or other slider buns. These buns are perfect for holding the fillings and add a slight sweetness that pairs wonderfully with the savory turkey and cheese.
- Customize the Cheese: While Swiss, cheddar, and provolone are popular choices, feel free to use any cheese you like. Gouda, mozzarella, or even pepper jack can add a fun twist and different flavor profiles to the sliders.
- Add Crunchy Toppings: To add some texture to the sliders, consider adding crunchy toppings like pickle slices or fresh lettuce. A thin layer of cranberry sauce can also give the sliders a festive touch, especially around the holidays.
- Make Ahead: If you’re preparing these sliders for a party or meal, you can assemble them the night before and store them in the fridge. When you’re ready to bake, simply drizzle the butter sauce on top and bake them as directed.
- Use Leftover Turkey: These sliders are a great way to use up leftover turkey from Thanksgiving or any other meal. Just replace the deli turkey with shredded leftover turkey, and you’ll have an easy and delicious meal.
- Add a Little Heat: If you like a bit of spice, you can add jalapeño slices to the sliders or use a spicy mustard or hot sauce in place of the mayonnaise or Dijon mustard.
Variations of Turkey and Cheese Sliders
- Cranberry Turkey and Cheese Sliders: For a festive version of this recipe, spread a layer of cranberry sauce on the buns before adding the turkey and cheese. The tartness of the cranberry adds a sweet and savory contrast that pairs wonderfully with the turkey and cheese.
- Bacon Turkey and Cheese Sliders: Add some crispy bacon to the sliders for an extra layer of flavor and texture. Bacon complements turkey perfectly and adds a savory crunch to each bite.
- BBQ Turkey and Cheese Sliders: If you prefer a smoky flavor, brush some barbecue sauce on the turkey before assembling the sliders. The sauce adds a tangy kick that pairs perfectly with the turkey and cheese.
- Veggie Turkey and Cheese Sliders: Add some sautéed onions, mushrooms, or spinach to the sliders for an extra burst of flavor and nutrition. These vegetables add both color and texture to the sliders, making them more filling and vibrant.
Storage and Shelf Life
Turkey and Cheese Sliders are best enjoyed fresh, but they can be stored for later if necessary. To store, allow the sliders to cool completely, then wrap them tightly in plastic wrap or foil. They can be kept in the refrigerator for up to 3-4 days.
To reheat the sliders, wrap them in foil and place them in a preheated oven at 350°F (175°C) for 10-15 minutes, or until heated through. If you prefer, you can reheat individual sliders in the microwave for 30-45 seconds.
For longer storage, you can freeze the sliders. Place them in a freezer-safe container or bag and store for up to 2-3 months. To reheat frozen sliders, thaw them in the fridge overnight and bake or microwave as usual.
Side Dishes and Pairings for Turkey and Cheese Sliders
Turkey and Cheese Sliders pair wonderfully with a variety of sides and accompaniments:
- Chips: Serve the sliders with a side of crispy potato chips, tortilla chips, or even veggie chips for an easy and crunchy accompaniment.
- Salad: A light side salad with mixed greens, cherry tomatoes, and a tangy vinaigrette is a refreshing complement to the richness of the sliders.
- Pickles: Tangy pickle spears or slices are a perfect match for the savory turkey and cheese, providing a refreshing contrast to the rich flavors of the sliders.
- Coleslaw: A creamy coleslaw adds a cool and crunchy element to the meal, balancing the warmth and richness of the turkey sliders.

Turkey and Cheese Sliders Recipe
- Total Time: 45 minutes
Description
Mini sandwiches filled with tender turkey and melted cheese, served on soft rolls. These bite-sized sliders are perfect for game day, parties, or a quick and satisfying snack.
Ingredients
For the Turkey and Cheese Sliders:
- 12 dinner rolls (such as Hawaiian rolls or soft slider buns)
- 1 lb deli sliced turkey breast
- 12 slices of cheese (Swiss, cheddar, or provolone are popular choices)
- 1/4 cup mayonnaise (optional)
- 1 tablespoon Dijon mustard (optional)
- 2 tablespoons butter, melted
- 1 teaspoon garlic powder
- 1 teaspoon onion powder
- 1/2 teaspoon dried thyme (optional)
- Salt and pepper, to taste
For Toppings (Optional):
- Pickles (sliced)
- Lettuce
- Tomatoes (sliced)
- Cranberry sauce (for a festive twist)
- Any additional condiments or seasonings as preferred
Instructions
1. Prepare the Buns
Preheat your oven to 350°F (175°C). While the oven is warming up, you can begin preparing the buns. Start by slicing the dinner rolls in half, keeping the top and bottom halves connected to maintain the structure of the sliders. Depending on the type of rolls you use, you may be able to simply slice them as one large block and separate them after baking.
Arrange the bottom halves of the dinner rolls in a baking dish or on a baking sheet. If you’re using a 9×13-inch baking dish, this size is perfect for 12 sliders. Make sure the rolls are snug but not overcrowded.
2. Assemble the Turkey and Cheese Sliders
Spread a thin layer of mayonnaise on the cut sides of the bottom half of the buns. This is optional, but it helps add creaminess and a little extra flavor to each bite. You can also add Dijon mustard here for a tangy contrast, depending on your preference.
Next, layer the deli-sliced turkey evenly over the bottom half of the rolls. Be sure to cover the buns fully, so every slider has a good amount of turkey. Afterward, place a slice of cheese on top of the turkey. If you prefer more cheese, feel free to add an extra slice per slider.
Once your turkey and cheese layers are ready, place the top halves of the buns on top, pressing down gently to help them stick. This helps the ingredients stay in place while baking and gives the sliders that perfect sandwich shape.
3. Prepare the Butter Sauce
In a small bowl, combine the melted butter, garlic powder, onion powder, and dried thyme. Stir the ingredients together until well mixed. This butter sauce will be drizzled over the top of the sliders, adding flavor and a golden, crispy texture once baked.
You can also season the butter with a pinch of salt and pepper to taste. For those who like a little heat, a pinch of cayenne pepper or red pepper flakes can be added to give the sliders a slight kick.
4. Drizzle the Butter Sauce Over the Sliders
Pour the prepared butter sauce evenly over the top of the assembled sliders. Use a brush or the back of a spoon to ensure that the sauce covers the entire top of the rolls. The buttery coating will make the buns soft on the inside and crispy on the outside as they bake, adding extra flavor to every bite.
If you’re feeling a little adventurous, you can even sprinkle a bit of extra garlic powder or onion powder on top of the buns for additional seasoning.
5. Bake the Sliders
Place the baking dish with the sliders in the preheated oven. Bake for 25-30 minutes, or until the tops of the buns are golden brown and the cheese is melted and gooey. The sliders should be heated all the way through and slightly crispy on top.
If you prefer extra crispy sliders, you can broil them for the last 2-3 minutes, but keep an eye on them to prevent burning. You want the tops of the buns to be golden, not dark brown.
6. Serve and Enjoy
Once the sliders are done baking, remove them from the oven and let them sit for a few minutes. This helps the cheese firm up a bit, making the sliders easier to cut and serve.
Using a sharp knife, slice the sliders along the pre-cut lines, and serve immediately. You can serve the sliders on a platter, alongside your favorite dipping sauces or additional toppings like pickles or lettuce.
- Prep Time: 15 minutes
- Cook Time: 25-30 minutes
Nutrition
- Calories: 150-200 kcal
- Fat: 6-9g
- Carbohydrates: 15-20g
- Protein: 10-15g
Conclusion
Turkey and Cheese Sliders are an easy, delicious, and versatile dish that can be enjoyed for almost any occasion. Whether you’re hosting a party, preparing a family meal, or simply craving something comforting, these sliders offer the perfect combination of savory turkey, melted cheese, and soft, buttery buns. With just a few ingredients and simple steps, you can make sliders that are sure to impress.
From customizing the flavors to adding fun toppings, these sliders are as versatile as they are delicious. Make them ahead of time for a hassle-free meal or serve them fresh from the oven for a satisfying and crowd-pleasing treat. Whatever your preferences, Turkey and Cheese Sliders are sure to become a staple in your recipe collection.

