Introduction
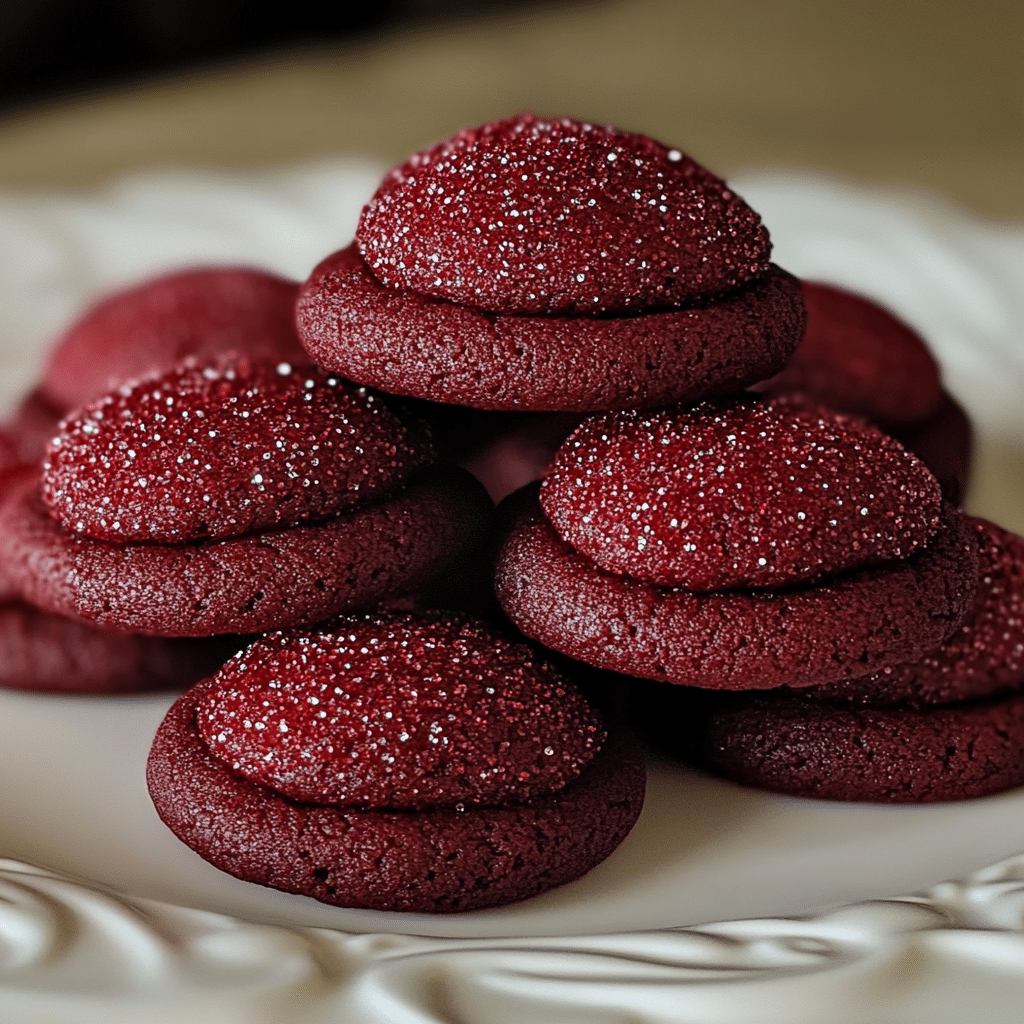
Hershey’s Red Velvet Blossoms Cookies are a delightful twist on the classic chocolate chip cookie, combining the rich, velvety taste of red velvet cake with the irresistible charm of a cookie topped with a Hershey’s chocolate kiss. These festive and indulgent cookies are perfect for holiday celebrations, birthdays, or any special occasion where you want to impress your friends and family with something both beautiful and delicious.
The red velvet flavor is both unique and inviting, with a perfect balance of tanginess and sweetness. Paired with the classic Hershey’s kiss, each bite is a decadent combination of soft, chewy cookie and smooth, melty chocolate. The deep red hue of the cookies makes them a standout addition to any cookie platter, and their rich flavor makes them impossible to resist.
Hershey’s Red Velvet Blossoms are easy to make and are guaranteed to become a favorite. Whether you’re an experienced baker or just starting out, this recipe is simple to follow and results in a batch of cookies that are both beautiful and scrumptious.
Why You’ll Love Hershey’s Red Velvet Blossoms Cookies
- Rich Flavor: The red velvet flavor is a perfect combination of cocoa and buttermilk, giving the cookies a rich and smooth taste that is both sweet and slightly tangy.
- Perfect Texture: These cookies are soft and chewy with a slightly crisp edge, and they hold their shape perfectly. The Hershey’s kiss adds a burst of smooth chocolate that melts in your mouth.
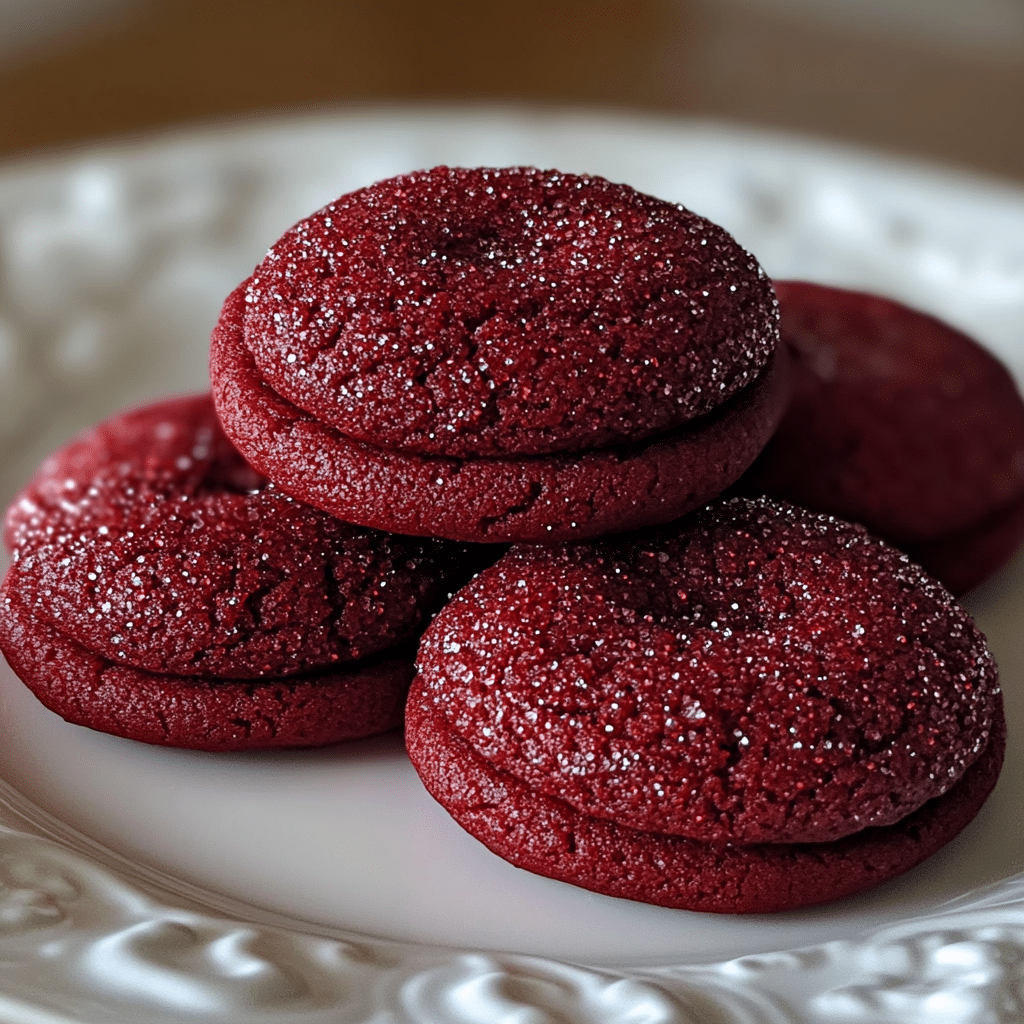
- Festive Appearance: The striking red color of the cookies makes them a festive treat, ideal for holiday gatherings, Valentine’s Day, or any occasion where you want to impress guests with something special.
- Easy to Make: The recipe is straightforward and doesn’t require any advanced baking techniques. With just a few ingredients and a little time, you’ll have a batch of delicious cookies.
- Kid-Friendly: This recipe is a great one to make with kids. The process of unwrapping and placing the Hershey’s kisses on top of the cookies is fun and simple, making it a perfect activity for young bakers.
Preparation and Cooking Time
- Total Time: 2 hours
- Preparation Time: 20 minutes
- Cooking Time: 10-12 minutes
- Cooling Time: 30 minutes
- Servings: 24 cookies
- Calories per Serving: Approximately 180 calories per cookie (varies based on ingredient choices).
Nutrition Facts (Per Serving)
- Calories: 180 kcal
- Fat: 9g
- Carbohydrates: 26g
- Protein: 1g
- Fiber: 1g
- Sugar: 18g
- Sodium: 60mg
Ingredients
For the Cookie Dough:
- 2 ¼ cups all-purpose flour
- 2 tablespoons cocoa powder (unsweetened)
- 1 teaspoon baking soda
- ½ teaspoon salt
- ½ cup unsalted butter, softened
- 1 cup granulated sugar
- 1 large egg
- 2 tablespoons milk
- 1 tablespoon red food coloring
- 1 teaspoon vanilla extract
- 1 tablespoon white vinegar (or apple cider vinegar)
For the Topping:
- 24 Hershey’s Kisses (unwrapped, or your favorite flavor of Hershey’s chocolate)
Step-by-Step Instructions
1. Preheat the Oven and Prepare the Baking Sheets
Start by preheating your oven to 350°F (175°C). Line two baking sheets with parchment paper or silicone baking mats to prevent the cookies from sticking.
This will allow the cookies to bake evenly and give them the perfect texture as they come out of the oven. Preparing your baking sheets ahead of time will save you time once the cookie dough is ready.
2. Mix the Dry Ingredients
In a medium-sized bowl, whisk together the all-purpose flour, cocoa powder, baking soda, and salt. Set this bowl aside, as you’ll be adding the dry ingredients to the wet ingredients later.
The cocoa powder is essential for giving the cookies their signature red velvet flavor, and the baking soda will help the dough rise and spread as it bakes. Make sure to sift the cocoa powder to avoid any clumps in the dough.
3. Cream the Butter and Sugar
In a large mixing bowl, beat the softened butter and granulated sugar together using a hand mixer or stand mixer. Beat on medium speed for about 2-3 minutes, or until the mixture is light and fluffy.
This step is crucial for creating the right texture in your cookies. The butter and sugar mixture should be smooth and pale, which means the sugar is well incorporated and the cookies will have a soft, chewy texture once baked.
4. Add the Wet Ingredients
Once the butter and sugar are fully creamed together, add the egg, milk, red food coloring, vanilla extract, and white vinegar to the mixture. Beat on low speed until all ingredients are fully incorporated.
The red food coloring will give the cookies their signature deep red hue, while the vinegar reacts with the baking soda to give the cookies a slight rise and ensure they have the perfect texture. The milk will add moisture, making the dough easy to work with.
5. Combine the Wet and Dry Ingredients
Gradually add the dry ingredients to the wet ingredients. Mix until the dough comes together and forms a soft, slightly sticky texture. If the dough seems too sticky to handle, add a tablespoon of flour at a time until it reaches a manageable consistency.
The dough should be soft and pliable but not too sticky. If necessary, use your hands to finish incorporating the flour and cocoa powder into the dough.
6. Form the Cookie Dough Balls
Using a tablespoon or cookie scoop, portion out the dough into small balls, about 1 inch in diameter. Roll each ball of dough between your hands to create a smooth, even ball.
Arrange the dough balls on the prepared baking sheets, leaving about 2 inches of space between each one to allow for spreading during baking.
7. Bake the Cookies
Place the baking sheets in the preheated oven and bake the cookies for 10-12 minutes. The cookies should look slightly puffed and set around the edges but still soft in the center.
It’s important not to over-bake these cookies, as you want them to remain soft and chewy. They will continue to set as they cool on the baking sheet, so take them out of the oven while they are still slightly underdone in the center.
8. Top the Cookies with Hershey’s Kisses
Once the cookies are out of the oven, immediately place a Hershey’s Kiss in the center of each cookie. Gently press down on the kiss so that it sticks to the cookie, but be careful not to press too hard or the cookie might break apart.
The warm cookies will soften the chocolate kiss, allowing it to meld beautifully with the red velvet cookie base. If you prefer, you can use other types of Hershey’s chocolate kisses, such as caramel-filled, peanut butter, or even special holiday flavors.
9. Cool the Cookies
Allow the cookies to cool on the baking sheets for about 5 minutes before transferring them to a wire rack to cool completely. This gives the Hershey’s Kisses time to firm up and makes it easier to remove the cookies from the baking sheets.
While the cookies are cooling, the chocolate kiss will solidify a bit, but the inside will remain soft and melty. This combination of warm, gooey chocolate and soft, chewy cookie is what makes these Hershey’s Red Velvet Blossoms so irresistible.
10. Serve and Enjoy
Once the cookies have cooled completely, they are ready to be enjoyed! The bright red color and shiny Hershey’s Kiss on top make them a visually stunning treat, while the combination of cocoa, butter, and chocolate is sure to satisfy anyone with a sweet tooth.
These cookies are perfect for holiday parties, gift-giving, or as a special treat to enjoy with a glass of milk or hot cocoa.
Tips for Perfect Hershey’s Red Velvet Blossoms Cookies
- Use Room Temperature Ingredients: For the best results, make sure your butter and egg are at room temperature before you start mixing. This helps them combine more evenly with the other ingredients and ensures a smooth dough.
- Don’t Overmix the Dough: Overmixing the dough can lead to tough cookies. Mix just until the dough comes together, and avoid overworking it.
- Chill the Dough: If the dough feels too soft or sticky, you can refrigerate it for about 30 minutes before baking. Chilled dough will help the cookies maintain their shape during baking.
- Use the Right Food Coloring: For the most vibrant red color, use a gel food coloring rather than liquid food coloring. Gel food coloring is more concentrated and gives the cookies a deeper, richer color.
- Press the Hershey’s Kiss Gently: Be careful not to press too hard on the Hershey’s Kiss, as this can cause the cookie to break. Gently place the kiss on top of the warm cookie and let it set.
- Experiment with Different Kisses: If you want to get creative, try using different Hershey’s Kisses, such as those filled with caramel, peanut butter, or even mint. This will give your cookies a unique twist and can add additional flavor variations.
Storage and Shelf Life
Hershey’s Red Velvet Blossoms Cookies can be stored in an airtight container at room temperature for up to 1 week. If you want to store them for longer, you can freeze the cookies. Place them in a freezer-safe container with layers of parchment paper between each layer of cookies, and they will stay fresh for up to 3 months.
To thaw frozen cookies, simply leave them at room temperature for about 30 minutes, or microwave them for 10-15 seconds for a warm, melty treat.
Variations of Hershey’s Red Velvet Blossoms Cookies
- Red Velvet White Chocolate Blossoms: Swap out the Hershey’s Kisses for white chocolate chips or white chocolate melts to create a creamier, lighter flavor.
- Red Velvet Cheesecake Blossoms: Add a cream cheese filling to the cookie dough for a cheesecake-flavored twist. This variation pairs beautifully with the red velvet base.
- Mini Red Velvet Blossoms: Make mini versions of these cookies by reducing the size of the dough balls and using mini Hershey’s Kisses. These bite-sized treats are perfect for parties or cookie exchanges.
Pairing Suggestions
- Milk: A classic pairing with cookies, a tall glass of cold milk is perfect for dipping these soft, gooey cookies.
- Hot Cocoa: These cookies go wonderfully with a cup of rich hot cocoa, especially during the colder months or around the holidays.
- Coffee or Tea: For a more sophisticated pairing, enjoy these cookies with a cup of coffee or tea. The bold flavors of the cookies complement the bitterness of the coffee or the smoothness of tea.

Hershey’s Red Velvet Blossoms Cookies Recipe
Description
Rich, red velvet-flavored cookies topped with a Hershey’s Kisses chocolate. Soft and sweet with a perfect balance of flavors, these cookies are perfect for gifting or sharing.
Ingredients
For the Cookie Dough:
- 2 ¼ cups all-purpose flour
- 2 tablespoons cocoa powder (unsweetened)
- 1 teaspoon baking soda
- ½ teaspoon salt
- ½ cup unsalted butter, softened
- 1 cup granulated sugar
- 1 large egg
- 2 tablespoons milk
- 1 tablespoon red food coloring
- 1 teaspoon vanilla extract
- 1 tablespoon white vinegar (or apple cider vinegar)
For the Topping:
- 24 Hershey’s Kisses (unwrapped, or your favorite flavor of Hershey’s chocolate)
Instructions
1. Preheat the Oven and Prepare the Baking Sheets
Start by preheating your oven to 350°F (175°C). Line two baking sheets with parchment paper or silicone baking mats to prevent the cookies from sticking.
This will allow the cookies to bake evenly and give them the perfect texture as they come out of the oven. Preparing your baking sheets ahead of time will save you time once the cookie dough is ready.
2. Mix the Dry Ingredients
In a medium-sized bowl, whisk together the all-purpose flour, cocoa powder, baking soda, and salt. Set this bowl aside, as you’ll be adding the dry ingredients to the wet ingredients later.
The cocoa powder is essential for giving the cookies their signature red velvet flavor, and the baking soda will help the dough rise and spread as it bakes. Make sure to sift the cocoa powder to avoid any clumps in the dough.
3. Cream the Butter and Sugar
In a large mixing bowl, beat the softened butter and granulated sugar together using a hand mixer or stand mixer. Beat on medium speed for about 2-3 minutes, or until the mixture is light and fluffy.
This step is crucial for creating the right texture in your cookies. The butter and sugar mixture should be smooth and pale, which means the sugar is well incorporated and the cookies will have a soft, chewy texture once baked.
4. Add the Wet Ingredients
Once the butter and sugar are fully creamed together, add the egg, milk, red food coloring, vanilla extract, and white vinegar to the mixture. Beat on low speed until all ingredients are fully incorporated.
The red food coloring will give the cookies their signature deep red hue, while the vinegar reacts with the baking soda to give the cookies a slight rise and ensure they have the perfect texture. The milk will add moisture, making the dough easy to work with.
5. Combine the Wet and Dry Ingredients
Gradually add the dry ingredients to the wet ingredients. Mix until the dough comes together and forms a soft, slightly sticky texture. If the dough seems too sticky to handle, add a tablespoon of flour at a time until it reaches a manageable consistency.
The dough should be soft and pliable but not too sticky. If necessary, use your hands to finish incorporating the flour and cocoa powder into the dough.
6. Form the Cookie Dough Balls
Using a tablespoon or cookie scoop, portion out the dough into small balls, about 1 inch in diameter. Roll each ball of dough between your hands to create a smooth, even ball.
Arrange the dough balls on the prepared baking sheets, leaving about 2 inches of space between each one to allow for spreading during baking.
7. Bake the Cookies
Place the baking sheets in the preheated oven and bake the cookies for 10-12 minutes. The cookies should look slightly puffed and set around the edges but still soft in the center.
It’s important not to over-bake these cookies, as you want them to remain soft and chewy. They will continue to set as they cool on the baking sheet, so take them out of the oven while they are still slightly underdone in the center.
8. Top the Cookies with Hershey’s Kisses
Once the cookies are out of the oven, immediately place a Hershey’s Kiss in the center of each cookie. Gently press down on the kiss so that it sticks to the cookie, but be careful not to press too hard or the cookie might break apart.
The warm cookies will soften the chocolate kiss, allowing it to meld beautifully with the red velvet cookie base. If you prefer, you can use other types of Hershey’s chocolate kisses, such as caramel-filled, peanut butter, or even special holiday flavors.
9. Cool the Cookies
Allow the cookies to cool on the baking sheets for about 5 minutes before transferring them to a wire rack to cool completely. This gives the Hershey’s Kisses time to firm up and makes it easier to remove the cookies from the baking sheets.
While the cookies are cooling, the chocolate kiss will solidify a bit, but the inside will remain soft and melty. This combination of warm, gooey chocolate and soft, chewy cookie is what makes these Hershey’s Red Velvet Blossoms so irresistible.
10. Serve and Enjoy
Once the cookies have cooled completely, they are ready to be enjoyed! The bright red color and shiny Hershey’s Kiss on top make them a visually stunning treat, while the combination of cocoa, butter, and chocolate is sure to satisfy anyone with a sweet tooth.
These cookies are perfect for holiday parties, gift-giving, or as a special treat to enjoy with a glass of milk or hot cocoa.
Nutrition
- Calories: 180 kcal
- Fat: 9g
- Carbohydrates: 26g
- Protein: 1g
Conclusion
Hershey’s Red Velvet Blossoms Cookies are a fun and festive treat that brings together the rich flavor of red velvet with the iconic Hershey’s Kiss. These cookies are soft, chewy, and indulgent, making them perfect for any occasion, from holiday celebrations to everyday snacking. With a straightforward recipe and a few simple ingredients, you can easily bake up a batch of these delicious cookies that everyone will love.
Whether you’re a baking novice or an experienced chef, Hershey’s Red Velvet Blossoms are a great way to add a touch of sweetness and elegance to your cookie jar. So grab your ingredients, preheat your oven, and enjoy these irresistible cookies that are sure to be a hit with friends and family alike!

